|
The more you work with Google Apps for Education, the more quick hacks and tricks you find to make them work best for you. As much as we all love GAFE, no tool can do it all, and you need to be adaptable in order get things done that help you and your students succeed. If you're like me, you been shown, and discovered, some quick tips and tricks for many of the GAFE components. I thought I'd start a list (that will inevitably grow) of some of the ones I've found most useful: 1. Force copy - Unless you are handing something out through Google Classroom you've probably run into the trouble of making sure other people are making a copy of your work and not editing your original or have trouble with the process of copying. Use force copy to shorten the process and ensure the recipient has a editable copy of your document all to themselves. All you need to do is replace the end of the link from your edit screen with the word 'copy' and copy that link to anywhere easily accessible to your desired audience.
I have used the force copy link to share out templates with students and to allow professional development participants easy access to documents they can customize or take notes on. You can use the force copy trick for just about every GAFE tool (Docs, Sheets, Forms, and Drawings) So stop worrying about outsiders ruining your documents and start spreading the love! 2. Tables in Google Docs - You are probably familiar with the ability to insert tables in a Google Doc, but have you redesigned the purpose of this ability? When first implementing Google Docs many teachers jumped at the chance to create digital worksheets, but quickly had issues with where the content created by students should go to make the activities easy to view and provide feedback for. By creating a simple 1x1 table underneath a question you require a written response for, you now have a text box that will grow with any amount of content and keep answers organized on the page.  No need to stop at a 1x1 table. Inserting a mute-cell table enables you have students respond to more complex questions and help continue developing critical thinking questions and answers. 3. Page size in Google Slides - Adjusting the page size in Google Slides is a quick and easy way to adapt the standard presentation format into something different and engaging for the students. A simple change to 8.5in x 11in will create a great magazine template that can be easily shared and worked on by an entire class.  One of our AHS English teachers used this formatting trick to create a wonderful literary magazine (Nepsamerg 2016) that her students were able to quickly and easily edit and publish. The formatting made basic graphic design easy for all students and enabled each one to put a personal touch on the final product. 4. Google Slides backgrounds in Google Drawings - If you have really taken on the use of Google Slides as a presentation and student-work tool in your classroom then you need to take advantage of your ability to customize the backgrounds using Google Drawings. Change the page size to match your slide and create a slide background that cannot be manipulated or erased by another user (unless they change the background as a whole...). This is a great way to make assignments using Google Slides that can be shared out via Google Classroom.
Make sure once you have created an image you want to use as a Slides background that you download it as an image file type (preferably a .jpg or .png) or Slides won't recognize it as a viable option. 5. Pre-filled Google Forms - Are you using Google Forms to collect all types of information from staff and students? In the case when you want to collect some individual information, but also have pieces that will be the same for anyone submitting you can utilize pre-filled forms to get what you need and keep a consistency for certain questions. Our district has found this extremely useful when creating registrations for in-district courses for staff. The pre-filled Google form creates a great roster that can then be shared with HR.  This is used in my district to have staff create registrations for in-district course offerings that require rosters for HR. Course Instructors can then easily collect information from interested staff members while keeping some of the important information for HR consistent. 6. Photo editing in Google Drawing - Photo editing can be complicated, but if you're in need of basic and simple changes insert you picture into Google Drawings for a quick way to resize, crop, fade, brighten, contrast, or recolor.  This skill set is very similar to creation of Google Slides backgrounds mentioned in trick #4. One thing to remember is to make sure to download the file as a photo (.jpg, .png, or .svg) in order to have it be recognized by other programs as an image. 7. Limiting Sharing Options - When you want to share a document with your colleagues or the world you may be hesitant to put it out there for anyone to take share with others or create their own copies and use your work without giving you credit. Recently added are two options to limit others abilities to share you documents. When you go to 'advanced options' options you can now select to "Prevent editors from changing access and adding new people" and "Disable options to download, print, and copy for commenters and viewers".  These options are great for sharing sensitive information that you would only like a specific group to see or safely sharing others work with a larger audience without the worry of work being taken without permission. There you have a few ways to get the most out of your GAFE tools. The more we use GAFE the more ways we find to make sure they work best for our needs. I have no doubt that I'll be updating this post with more tips and tricks as time goes on, but if you have any that work for you, feel free to leave them in the comments below.
0 Comments
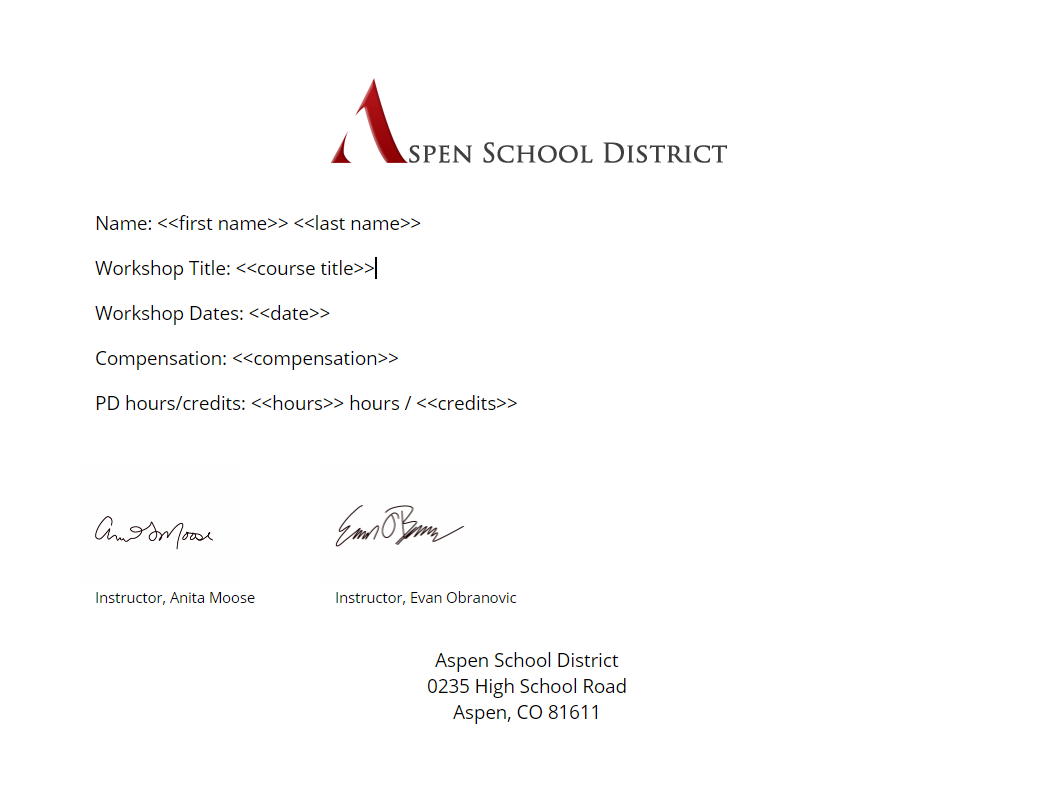
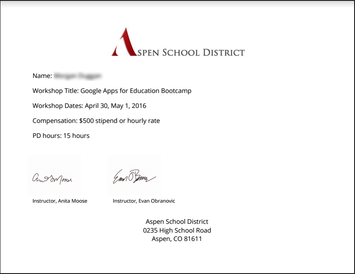
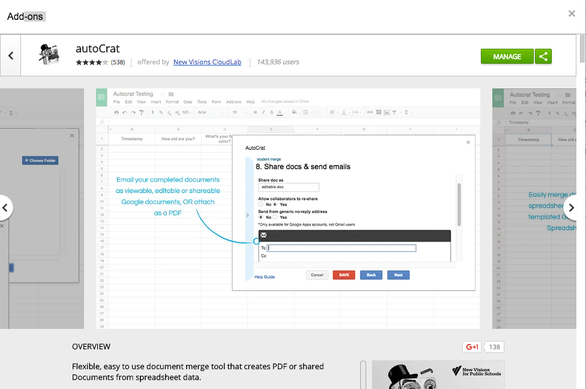 Find the autoCrat add-on in the Chrome web store or the add-on market directly in a Google Sheet. I have written about the autoCrat add-on before in my "What Google Sheets and add-ons can do for you..." post, but I really wanted to spend some time diving into the great ways myself and my district are using this versatile add-on to help automate, streamline, and uniform how we format and share information from our Google Apps for Education (GAFE) with our staff. The process of autoCrat is really just a version of a mail-merge tool, but with the added power of GAFE, (specifically Forms, Sheets, and Classroom) you are really able to create and maintain a workflow that better helps the transfer of information between everyone. I have used it many times with my co-integrator, Anita Moose (@amooseIT), in order to create and share certificates of completion for our technology-based professional development with our staff. This process has allowed us to use an existing roster of participants collected from a Google Form registration and create custom certificates that serve as record of participation, completion, and in-district credit. We also then have a spreadsheet containing all the relevant data and links to the certificates to share with HR in order to qualify staff for salary advancement and keep their records digital and searchable. 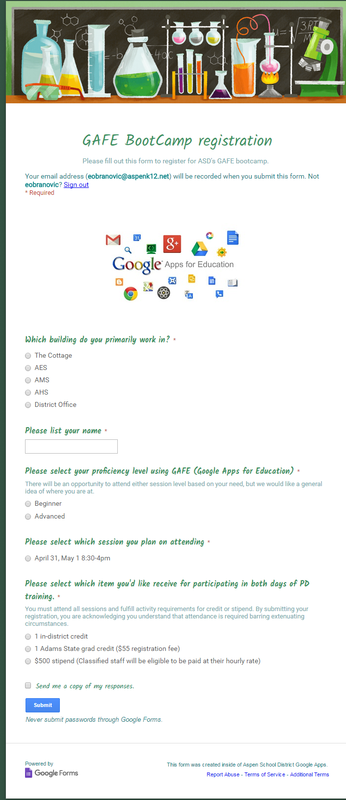 Collecting information via a Google Form is a great way to get all the important details in a spreadsheet that you can run autoCrat on to send form letters or certificates. 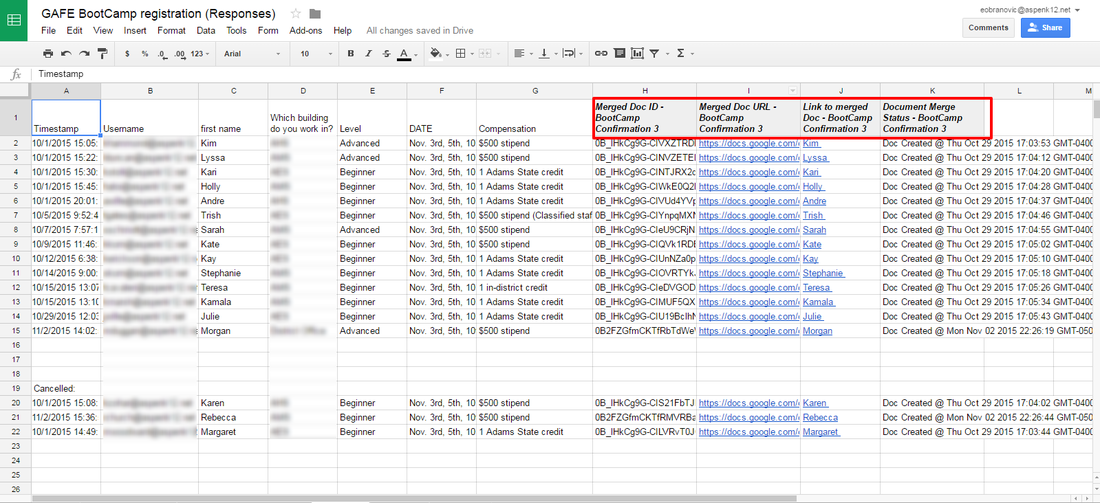 Using the response sheet from a Google Form, you can run autoCrat to pull the specific information you want and insert it on a Google doc template.
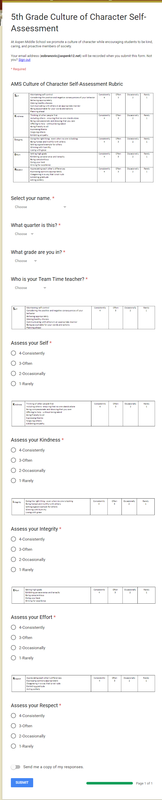
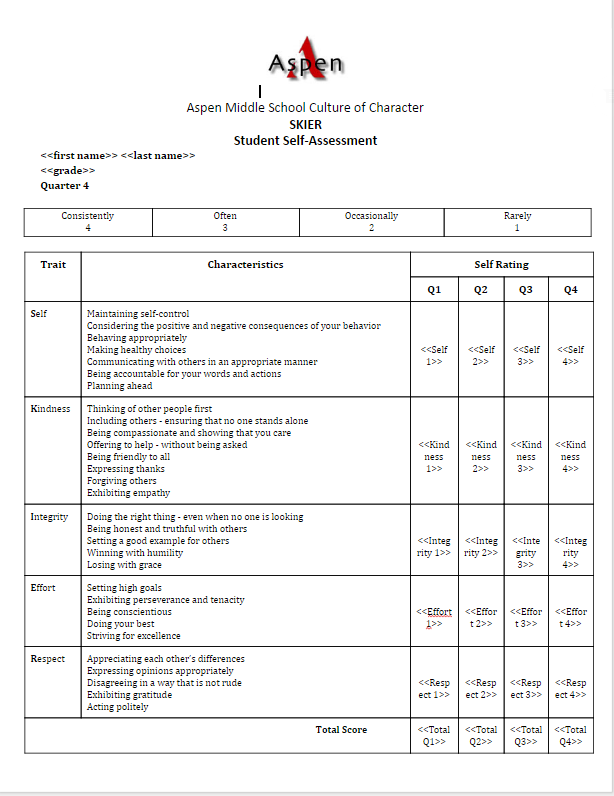
Anita has used autoCrat to create progress reports for middle school students as they self-evaluate on a rubric designed to evaluate character using Google forms. Grades 5th-8th are enrolled in a Google Classroom per grade-level and expected to complete the self-evaluation each quarter The results are then pushed to a running progress report that is printed and included in report card envelopes sent home at the end of each quarter to help students see their progression throughout the year.
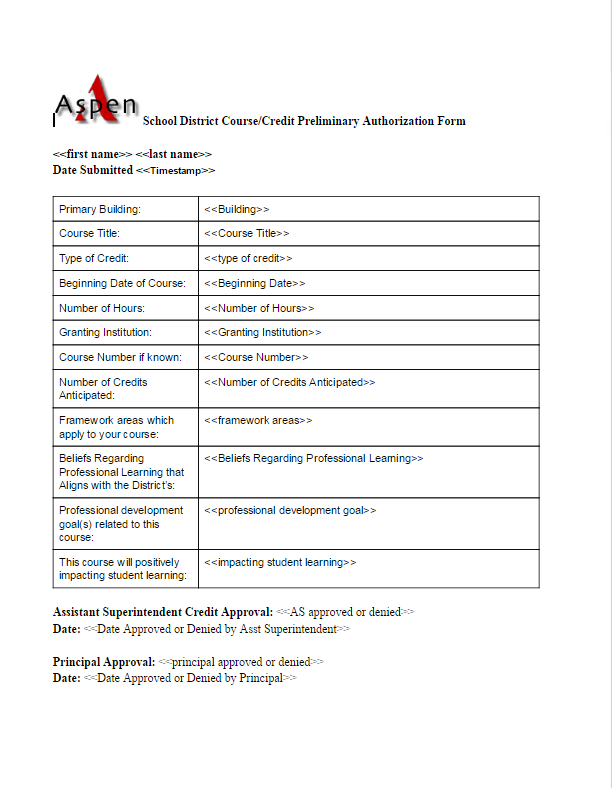
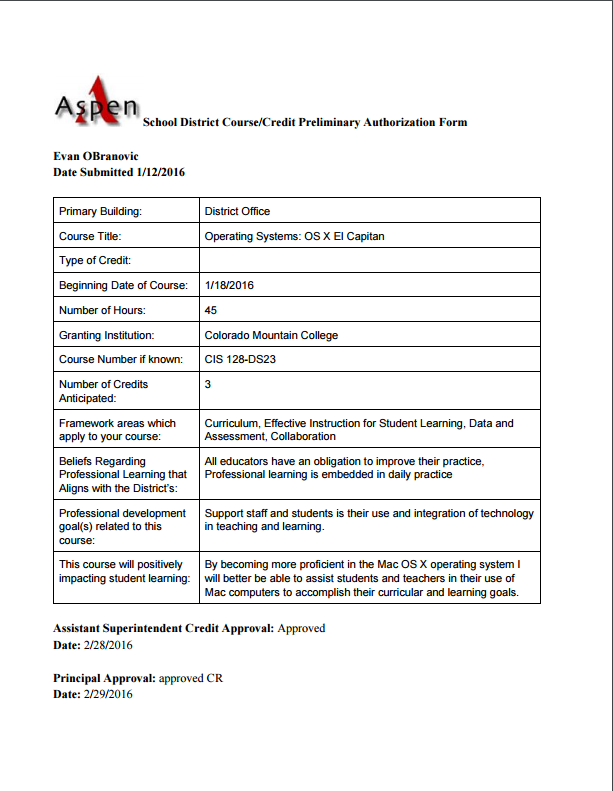
Our district has started to move several of their processes to a digital/GAFE format and we again found great use for autoCrat. With the large amount of professional development opportunities our staff take advantage of during the school year and summer, we wanted to streamline the process of approving relevant PD and keeping track of completion. All approvals are now done through Google forms as well as completion certificate submissions. This makes record keeping for our District office much easier and a quicker turn-around for teachers and staff to have the information they need.
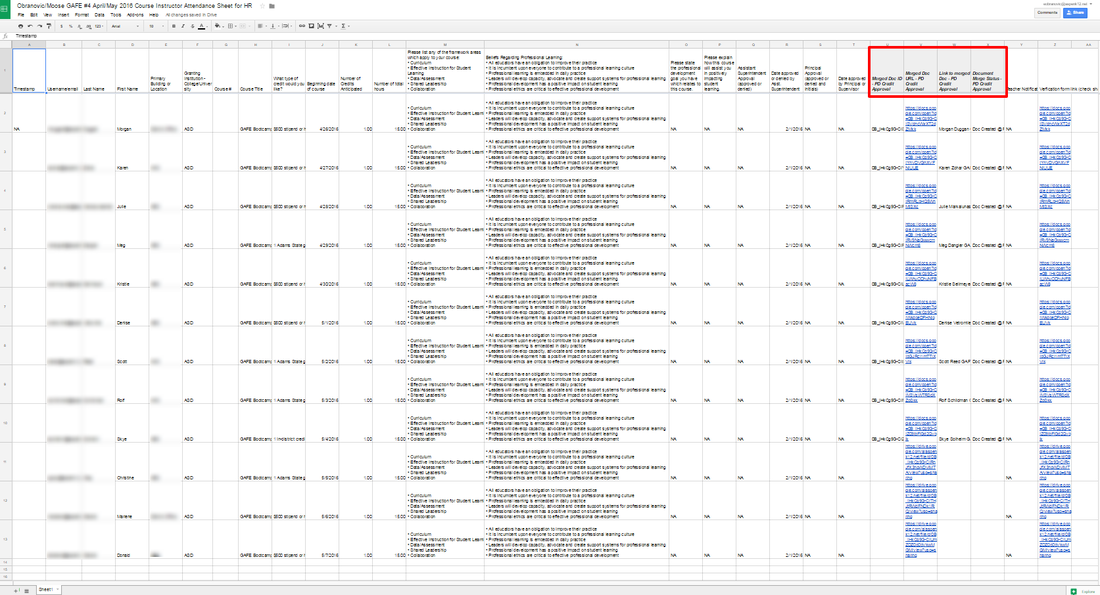 When a staff member runs an in-district PD, they are given a copy of this sheet to customize for their own attendance and record keeping. They can then run autoCrat to personalize completion certificates and turn in a copy of the Sheet to HR for district records. So now you can see how much autoCrat can improve your workflow. If you are a Google school you need to start taking advantage of this FREE add-on and become far more efficient with how you can collect, format, and share information. There are lots of great tutorials out there, but below you will find one that walks through the latest version of autoCrat by Brent Coley that is well done. Please don't hesitate to contact me for help getting started with autoCrat and feel free to comment below on great ways you have found to use this amazing tool! Dear Voxer, I just wanted to thank you for taking my smart phone back in time to the days of Nextel (chirp, chirp!). A simpler time, when with the quick push of a button I could send a walkie-talkie type voice message to my friends to find out what was happening on campus. The push-to-talk phase was great, and oh how it's back with a vengeance! Now with the Voxer app I can take all the best features of push-to-talk with the added functionality of having a computer in my pocket. You enable me to send quick voice messages that can either be played in real-time when the app is open or the messages will be queued up and ready to play over and over again if needed. The saved message feature is great for multi-tasker like myself. When I am trying to listen to which Chromebooks my colleague took from my office and simultaneously help a teacher set-up their Google Classroom ("Wait, where did those Chromebooks go?"). I love that messages can be between individuals or set up in group conversations to enable your whole team an easy avenue to communicate with each other and refer back to information relevant to the whole group. Working in a tech department that is always on the go and handling multiple issues I need that ability to juggle multiple conversations at once and you do not disappoint. And if doing push to talk wasn't enough, you include all the great features of normal texting apps including pictures, text, and even GIFs! So in closing, thank you Voxer. I never knew how much I missed the ability to turn my phone into a walkie-talkie until you came along, and the best part is how much more productive you have made me and my team! I think we have a long and prosperous future ahead! Love, Evan P.S. You are just as useful and even more fun with my friends. What better way to amp up a group text then by creating a group vox to talk trash about fantasy sports or our favorite TV show! What were those directions again, just replay the message. How did I communicate before you were around?!? 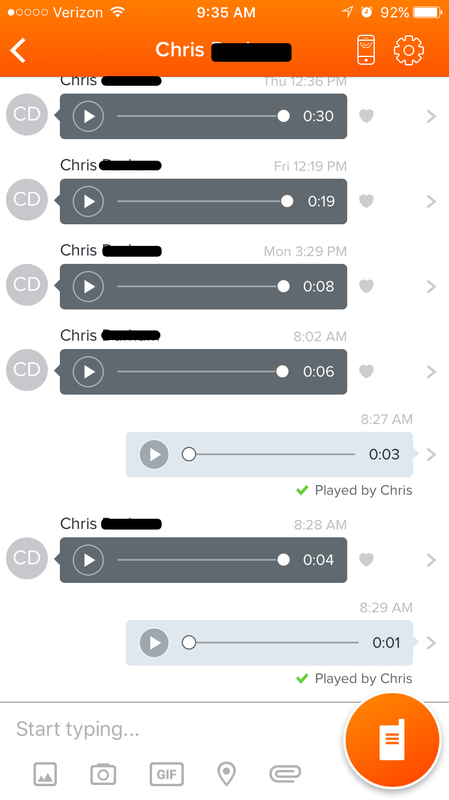 Voxer keeps a queue of the messages you have sent and received for easy replaying. 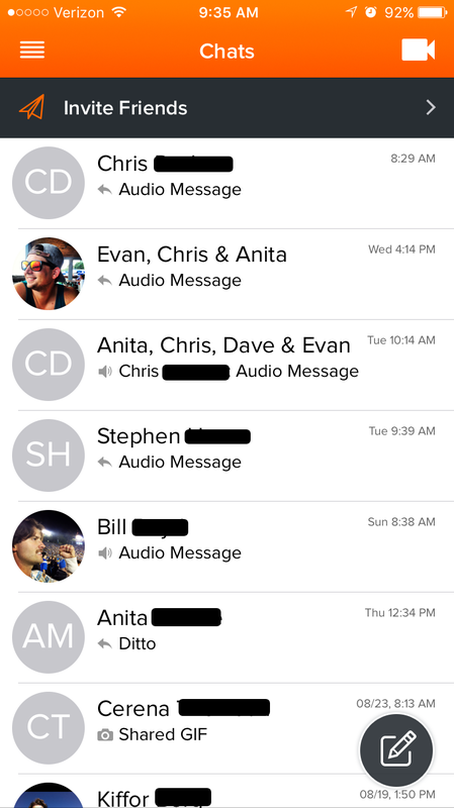 Your messaging is organized by individuals and/or groups and in chronological order. 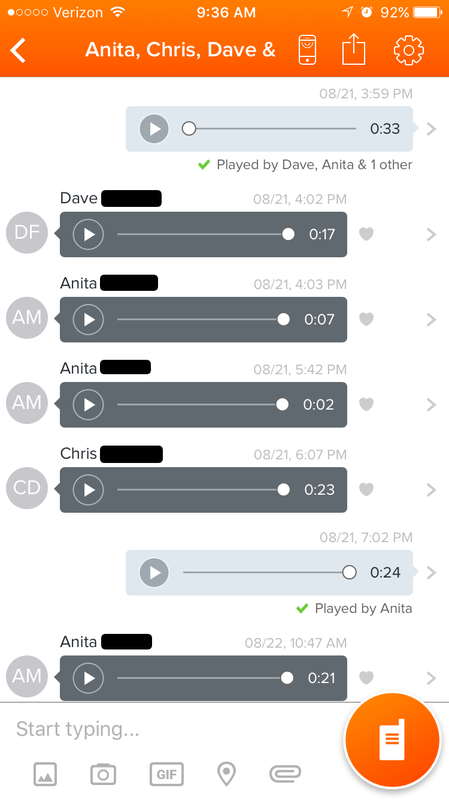 Group messaging is a great way to get a whole department involved in on the conversation.
12 educators from all three of our buildings at Aspen School District (ASD) travelled to Denver at the end of June to attend the annual ISTE conference (International Society for Technology in Education). What is the ISTE conference? It's a massive gathering of educators, administrators, and edtech companies coming together for the purpose of learning from one another how educational technology can be used to help teachers, students, administrators and schools be successful in accomplishing meaningful student learning. Held at the Colorado Convention Center, it is truly a sight to behold. This year’s conference had over 14,000 attendees! Walking through the convention center halls with so many inspired and motivated professionals was truly amazing!
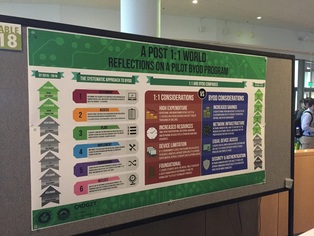
So what does does an ISTE conference look like? It fills the halls of the CCC with teachers, specialists, administrators, etc… buzzing from room to room and booth to booth, trying to find the right presentation for their needs and interests in educational technology. Presentations are held in many different formats: traditional lectures, interactive playgrounds, quick poster presentations, research paper presentations, interactive discussions, panel discussions, workshops, and a massive expo hall space in which companies from around the country and world showcase their latest and best in education. The vast variety of content makes finding what’s interesting and right for you and your school only a few steps away. Topics this year included coding, robotics, blended and distance learning, virtual reality, effective assessment, BYOD (Bring your Own Device), Personalized Professional Development, ISTE standards for teachers, admins, and students, and much much more! Being my second time attending an ISTE conference I could really appreciate everything that was going on and how beneficial bringing educators to a conference like this can be. You are instantly put in a place to network with like-minded educators and grow your PLN (Professional Learning Network) so that long after the conference you are still developing great ideas and new concepts. Being in a new role as a Technology Integration Specialist I was amazed to see how prevalent my new position has become across the country and excited to connect and learn from other’s in my field doing so many great things for their staff and students. Having the ASD teachers who attended come up and express their excitement and motivation during and after the conference was also inspiring. They were able to see how many in their same position could leverage all the tools available to create successful and exciting learning environments. We all left the conference with a renewed, positive outlook on our involvement in education and how we can take our profession and students to the next level. Events like this are so important for teachers, administrators, specialists, and all educators to attend to recharge their outlook on the profession and continue to develop their skills to match an evolving field. It feels good to be part of a school district that values educational technology and encourages teachers to learn and grow in this incredible field. 
Click on the image above to check out my full list of resources from ISTE 2016 in my Digital Tote.
My biggest take-aways:
1. Student devices are here to stay! - With so many newly evolving technology practices within education, students having an easily accessible device is crucial to taking advantage of the new methods capable in a digital world. So many teachers are utilizing the various cloud-based platforms and LMS (Google Classroom, Microsoft Classroom, ClassFlow, Canvas, Blackboard, etc...) systems to make classrooms paperless and more accessible. Many factors play into what device is ideal for your student population and though my district has moved forward with Chromebooks, I can see the advantages of tablet devices and feel like a mix of the two helps address all the needs. BYOD (Bring your own device) policies and programs still haven't found the sweet spot. But just like different learning styles, cause us to change our teaching methods, if a student can succeed with one device over another and has the ability to bring it and take ownership of it, why not let them choose? It seems the most important item is access to some type of device to enable the teacher and student to work together in this new medium of education.
2. Edtech Coaches/Tech Coaches/Tech Integrators/etc... are a growing part of most schools and districts. - It was so refreshing to see such a large group of educators in my same field, working towards the same goals. We have many different names, but it became clear to me that the position of Edtech Coach/Integrator is here to stay. Now that we are here to stay, we can start to connect and share our hurdles and successes. Having the ISTE standards for Coaches is a great reference that can help put us all on the same page working to help our teachers, students, and administrators achieve the same goals. I can't wait to continue to grow in this field and work with other amazing educators passionate about how technology can change education for the better!
4. Technology does not replace great teachers and good teaching! - With everything that continues to help make teaching better, one very simple fact seems to stand the test of time: great teachers are what make students successful! The various tools and strategies can only amplify what is already there. The potential for great teachers to become even better and reach more students with the developments in edtech is staggering. The technology available is finally starting to reach a point that allows educators to think well beyond what was once possible and prepare students for a world and job market that is always on the cutting edge. So all the bells and whistles are great, but it's still the teacher behind the technology that makes it go!
Comment below any of your highlights or insights from ISTE 2016!
We are living in a digital world where just about any information is available at our fingertips. This has increasingly made a boxed curriculum more irrelevant as finding information that is current and valuable to students online can be as simple as a Google search.
DocentEDU is an amazing tool that enables any teacher to easily create a lesson using the most updated content they find on the web and share it with their students. This extension or add-on makes the development of your content accessible from anywhere and available on most web browsers. The DocentEDU layer works with most webpages, online pdfs, and published Google docs. The process is pretty simple: Sign up for an account, add the extension or add-on to your web browser, and find relevant web content you would like to incorporate into a digital lesson for your students. I personally prefer to utilize this tool with Google Chrome as an extension which works really well as one more tool in my favorite extensions list. 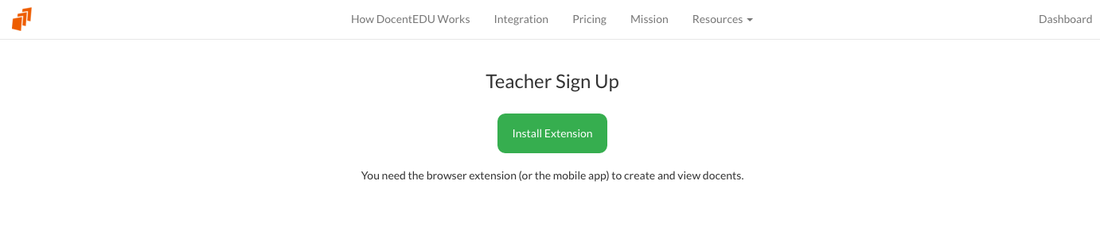
With a free account you can create up to 5 "Docents" to share with a class. For the low price of $40/year or $8/month you can have unlimited Docents and be able to refer back to any of your created content to reuse again with future students. I recommend getting set-up with the free account and playing around before making the decision to purchase. If you and your colleagues find this tool useful, you can work with your school's tech and/or curriculum department to look at a volume purchase for a large group of teachers who can then share content with one another.
DocentEDU is fully integrated with Google to make all you GAFEers out there one step closer to implementation. Google Classroom can be used to create your classes with existing rosters and assign Docents to your students through the Stream. 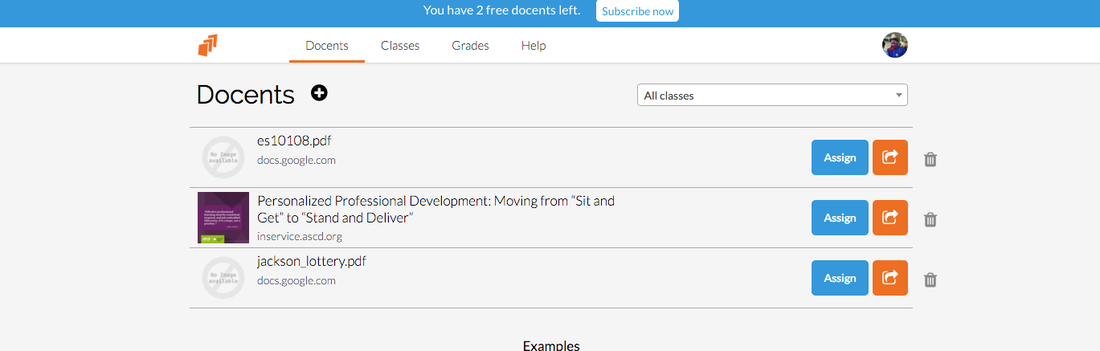

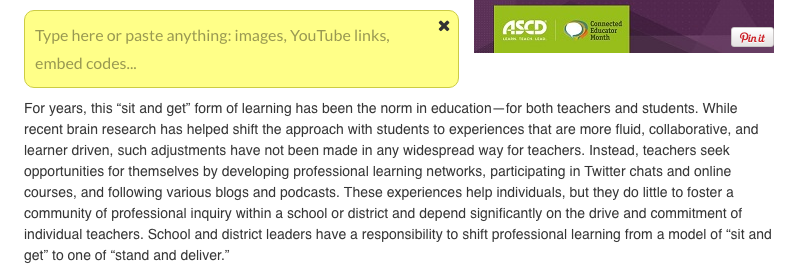
Sticky Note: This is DocentEDU's do all tool. It works as a simple sticky note within a document or accepts embed code for YouTube videos, Google Slides, images etc... in order to allow you to add more information to an existing webpage for your students to review.
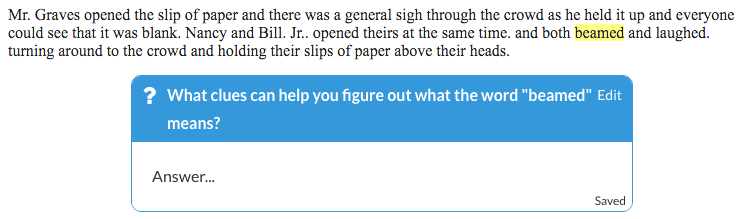
Question: Just like it sounds add a short answer or multiple choice question that your students can answer and the results will get stored in the DocentEDU database for you to go back to your teacher dashboard and review and grade/provide feedback.
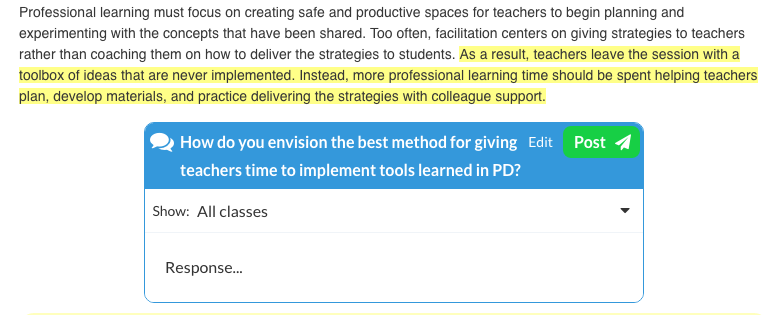
Discussion: Create a thread where you and your students can discuss topics based on content in your lesson. Provides a safe place to host an online discussion within the realm of your classroom.
I got a chance to speak with Karin Hogen, the co-founder of DocentEDU, in my early stages of discovery and DocentEDU's early stages of release. She walked my fellow integrator and I through her creation and development of DocentEDU, how it can be used, and what her hopes were for the tool in the future. It's great to see a teacher look to create such an innovative solution to an up and coming problem of trying to give students the most updated information when teaching them concepts across subject matter.
If you try and teach using new web content and current events then you need to check out DocentEDU as a easy and innovative way to deliver lessons to your students.
Check out this video from DocentEDU on how easy it is to create questions.
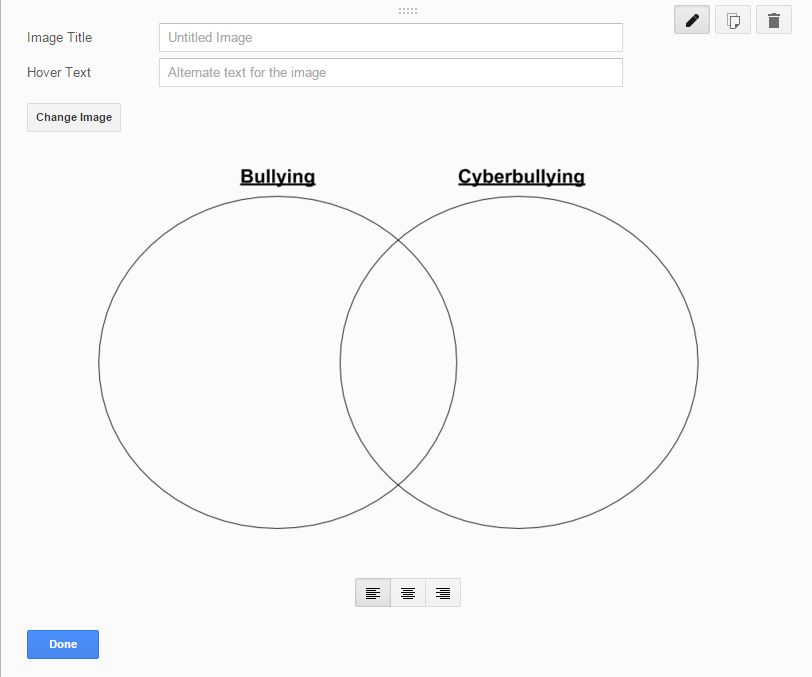
One great adaption of using Google Docs in the classroom is the ability to transform the way you deliver content. Creating Hyperdocs and Multi-media text sets is a great way to deliver curriculum material, supplemented with the wealth of resources you can find online, especially if you have begun working in a GAFE environment and taking full advantage of Google Classroom. Don't let the names fool you! They are incredibly easy to create and as long as you put some thought into what your desired outcomes are and what students can achieve they prove to be incredibly effective! I'm a big proponent of working out from the academic standards you are trying to achieve with your students and building a lesson from there. This always helps me keep my goals in perspective and really utilize technology to enhance student learning as opposed to simply shock and awe engagement for using some fancy new tool. I was first introduced to the concept of Hyperdocs and Multi-Media text sets from working through the new and improved Google for Education training program. They give you great examples of each which you can access here (Hyperdoc and Multi-Media text set) and use as a base to begin to create your own based on your specific needs. Though I feel these two tools are somewhat interchangeable in their name and purpose I think the main difference to keep in mind is that a Hyperdoc is a digital document used to replace a more traditional worksheet that enables you to add a slew of elements and resources to your instruction to engage and enrich your students' learning. A Multi-media text is more of a focus on gathering digital resources and materials students can use to learn about a particular subject all in one location. Interactive elements or critical thinking questions can be added for students to process or respond to after consuming the content you have curated for them. Below you will find two images of Hyperdocs/Multi-media texts I've created for teachers in my district to help them teach science and social studies standards. Click on the image to access a fully functional doc that you can copy and use as a template to begin to create your own library of curriculum resources. 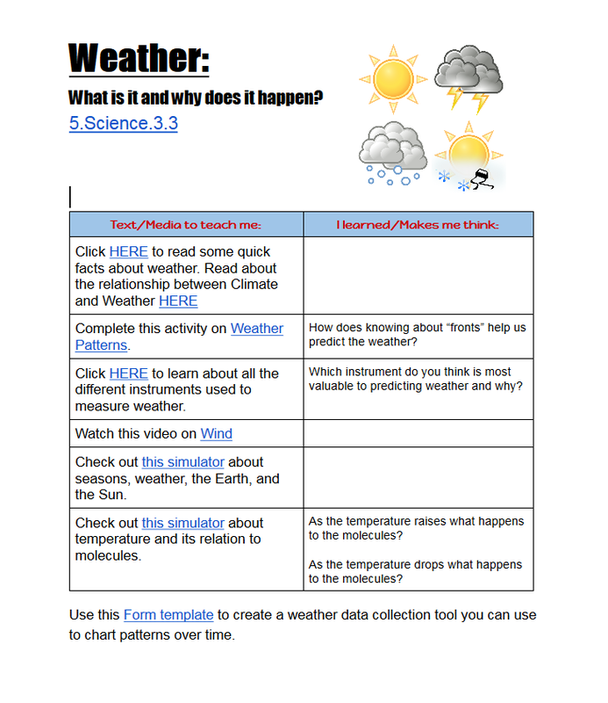 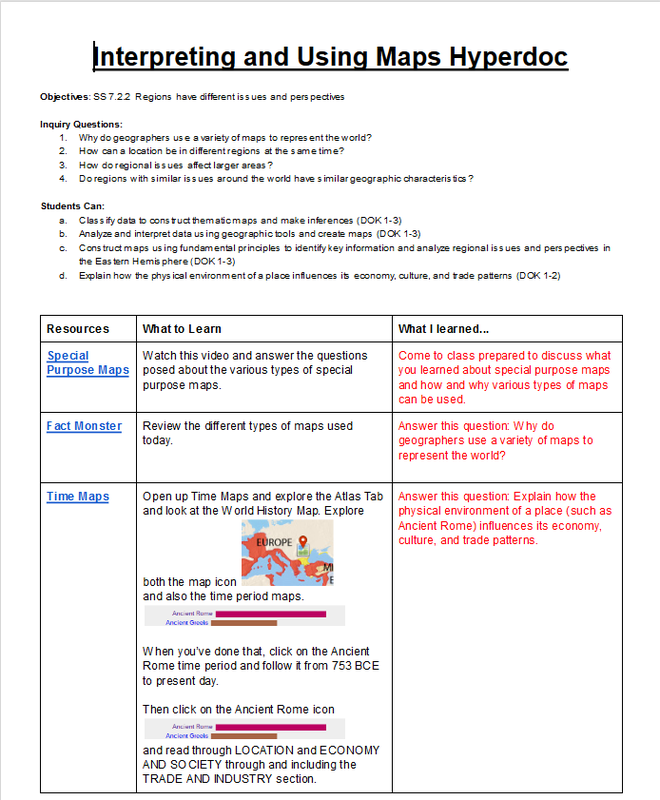 Now get out there and start to redefine your teaching and students' learning by taking some time to redesign how you deliver curriculum and accomplish your academic standards. Please comment below with any questions or additional information you may have experienced with using these tools.
One of the biggest buzzwords flying around the education world is "Flipping" the classroom. When you Flip the Classroom you attempt to enable students to learn concepts at home (or anywhere) and come to class prepared to take the next steps in the learning process. This strategy is a great way to cover a lot a content in a limited amount of classtime or re-enforce concepts to individuals or the whole group. You can also differentiate for small groups or individuals. Edpuzzle is a free service you can sign up for (In addition to email you can use a Google or Edmodo account to register) and create classes/groups that can then be assigned videos from a large list of video databases. (Youtube, National Geographic, Kahn Academy, Vimeo, etc...)  Once you have picked a video with content that meets your students needs you can trim the video in order to focus on specific ideas or content. You can only trim from both ends of a video so be careful of what you are removing.  If you prefer to customize your video's audio you can record your own narration over the video content. If you start your own narration you do have to record over the entire clip so make sure you aren't removing any original sounds or narration you want to include. 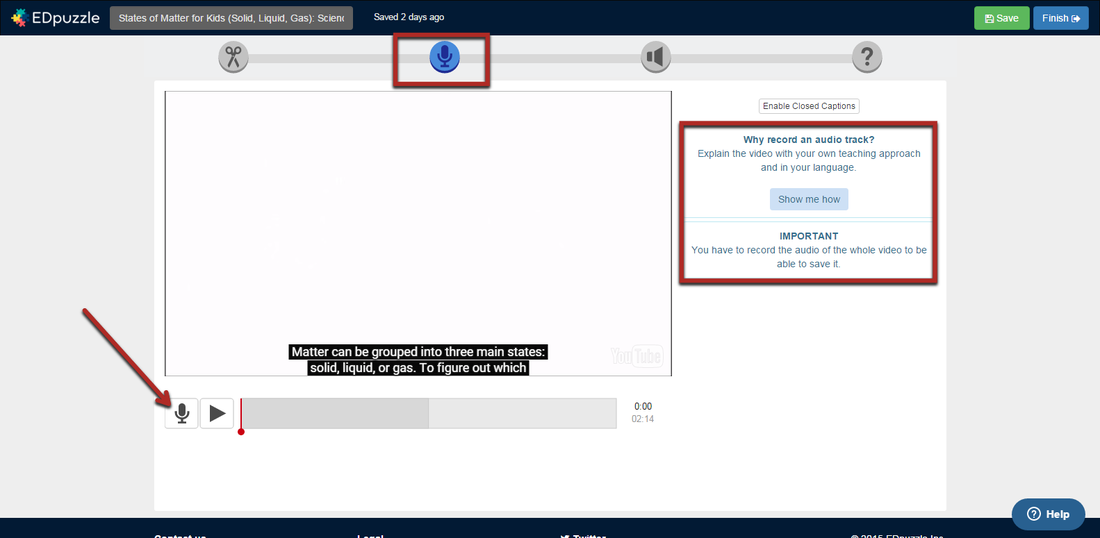 Throughout the video you can add audio notes for your students to listen to as they watch the video. They can be added at specific points in the video to allow you to highlight ideas or concepts in the video. 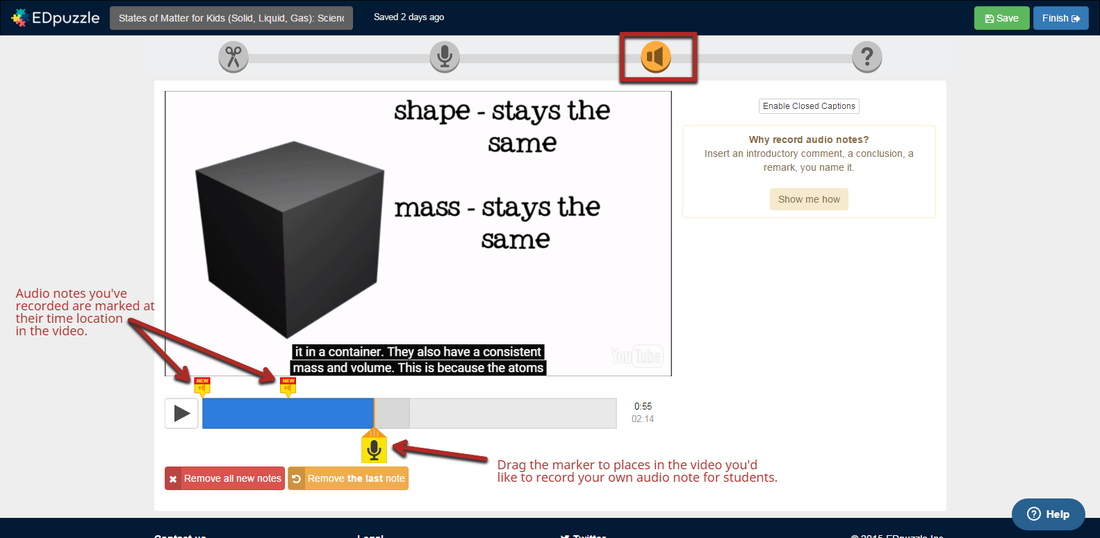 One of the coolest features is the ability to add questions throughout the video at specific points to assess if students are understanding the content they are watching. You have three options: Open-ended, Multiple Choice, and comment. Answers are collected and can be graded and sent back to students. 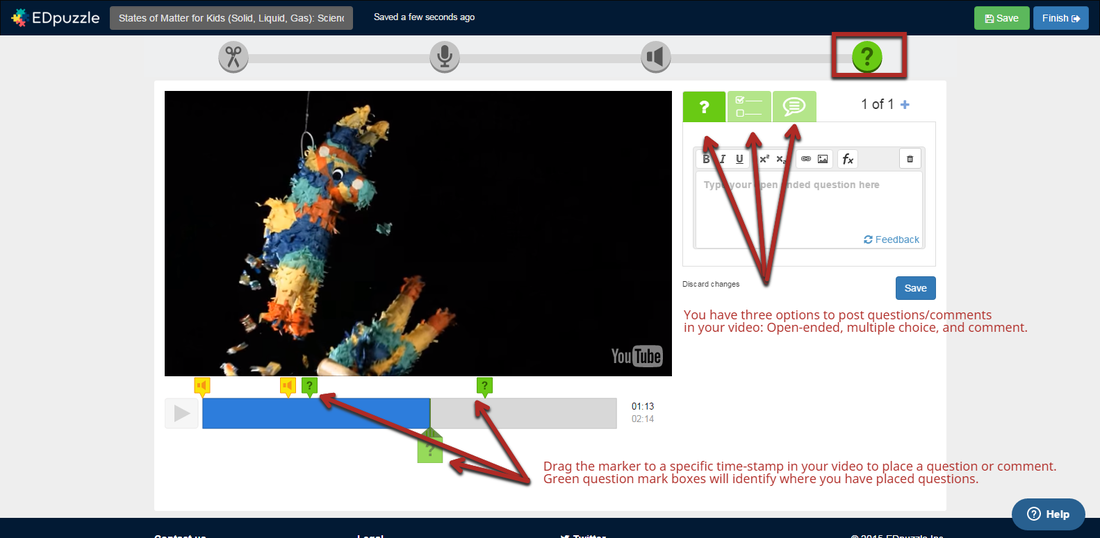 Finally, you can assign your video to one or more classes/groups and enable or disable your two 'Superpowers' which can prevent students from skipping around in your assigned video and set a due date. 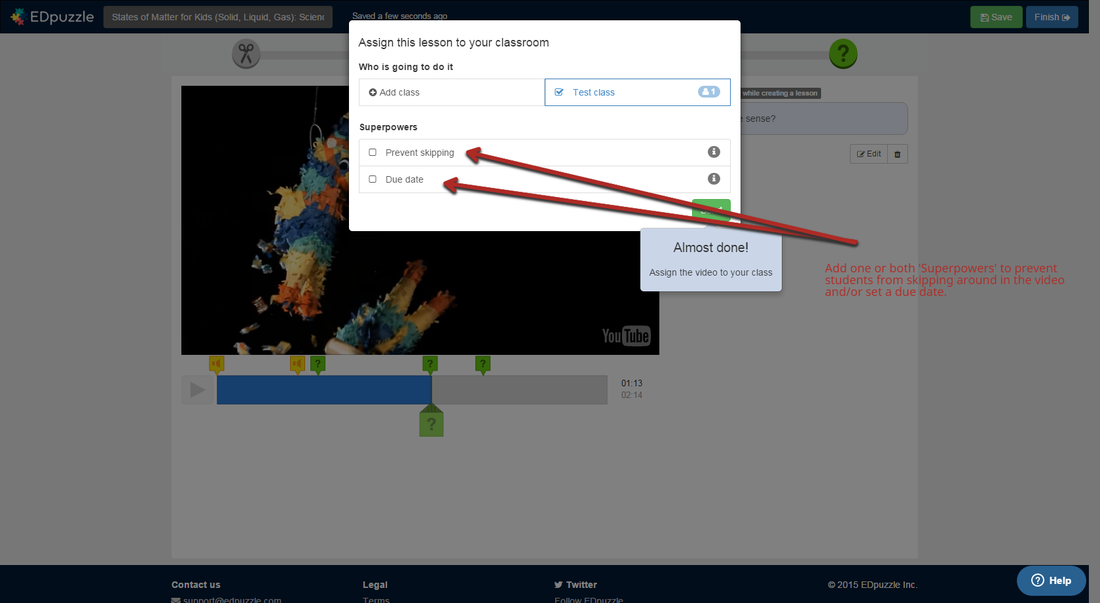
No teacher has enough time in the school day to teach everything, so make sure you're taking advantage of great free tools out there like Edpuzzle to easily flip the classroom and customize learning for students in a variety of ways that can best meet their needs. Comment below any great ways you've used Edpuzzle or any other useful flipping tool.
Last month I wrote a post about the massive potential for Google Forms in education and you can't really talk about Forms without mentioning Google Sheets. Though Sheets is its own application within the Google Apps for Education (GAFE) it is the default collection spot for Form responses and is still the best choice when looking to sort and analyze data you've collected. When Form data comes into a Sheet it is organized by TimeStamp, Username (if you create it under a organization account and opt to require and collect it), and then each question's response. The order of the responses going left to right across the sheet matches the order in which you created questions on the Form. A great new update is the ability to move the columns (aka the question/responses) to any location on the x-axis. This used to be prevented because of the connections between the Form responses and the Sheet, but now you can arrange the responses how you see fit without out affecting the Form. 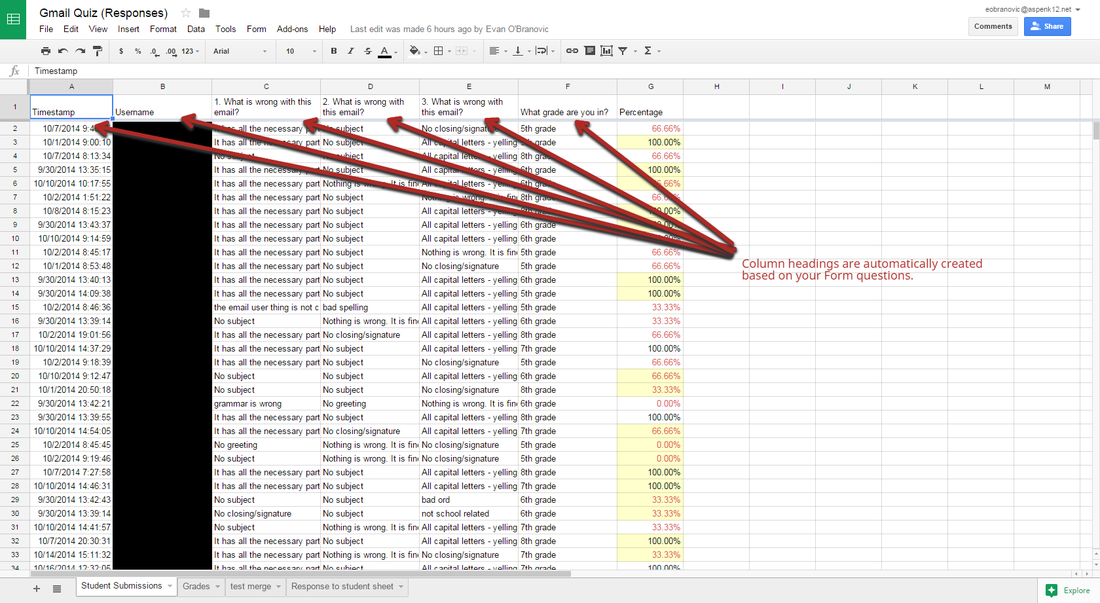 By freezing the first row with the Form questions you can scroll through a large amount of data and keep track of what question you're reading a response to. Quick tips:
Here are some great add-ons and tools you can use in Sheets to work with Form data: Flubaroo: Great add-on that lets you create an answer key and grade submitted forms. The grade report is created on a separate tab for easy viewing. An answer report can be emailed to the Form respondents identifying their correct and incorrect responses. After you run Flubaroo once you can set it to auto-grade any new incoming responses. SuperQuiz: A more in-depth tool to work with Forms and Sheets to create quizzes and assessments. Check out this video to get a full explanation of how to set it up and make it work for you and your students. WorkFlow: A new add-on that helps increase the productivity and collaboration of working with information on a Sheet. The WorkFlow add on lets you send an approval request to someone to let them know they need to look at something contained within your Sheet and respond which in turn lets you know they've seen it. If you start to explore the use of forms as a way for staff to register for events and PD using WorkFlow is helpful to keep all interested parties informed of changes and stay updated on incoming information. Autocrat- This is an amazing mail merge add-on that lets you create form letters and customize them with information collected in a Sheet. It works really well to send confirmations of Form data when you want your respondents to be aware or remember the responses they gave you. (i.e. reminding respondents who have used a form to register for an event) It allows for a PDF or Google Doc letter created and the ability to automatically email your merged document. SaveAsDoc: If you've ever tried collecting paragraph style answers in Forms you know how difficult it can be to try and efficiently review the responses without giving yourself a headache. Using the SaveAsDoc add-on can save your eyes and sanity by taking each set of responses and created a running Doc that is much easier to read and can even be easily printed out if you want respondents to review their answers. Each question becomes a bold heading with the responses below. Notifications: By going to the 'Tools' menu and selection 'notification rules...' you have a few simple options to have emails sent you when any changes are made or when a user submits a form. You can receive these notifications in an immediate email or in a daily digest. This is a great way to keep track of Form submissions without having to leave the response sheet open and keep refreshing.  Using Flubaroo is a great time saver when grading Form data. Conditional Formatting: Conditional Formatting is a built-in tool that allows you to color code Sheet cells based on a value, or range of values you identify. This is great to identify specific or correct answers quickly as responses come in or to go more in-depth with your analysis of any amount of data by creating flags for certain benchmarks. Sorting and Filtering - Every column allows you to do a simple ascending or descending sort A-Z, but you can also enable the 'Filter' feature for a more in-depth sorting to help organize the data you want to see. 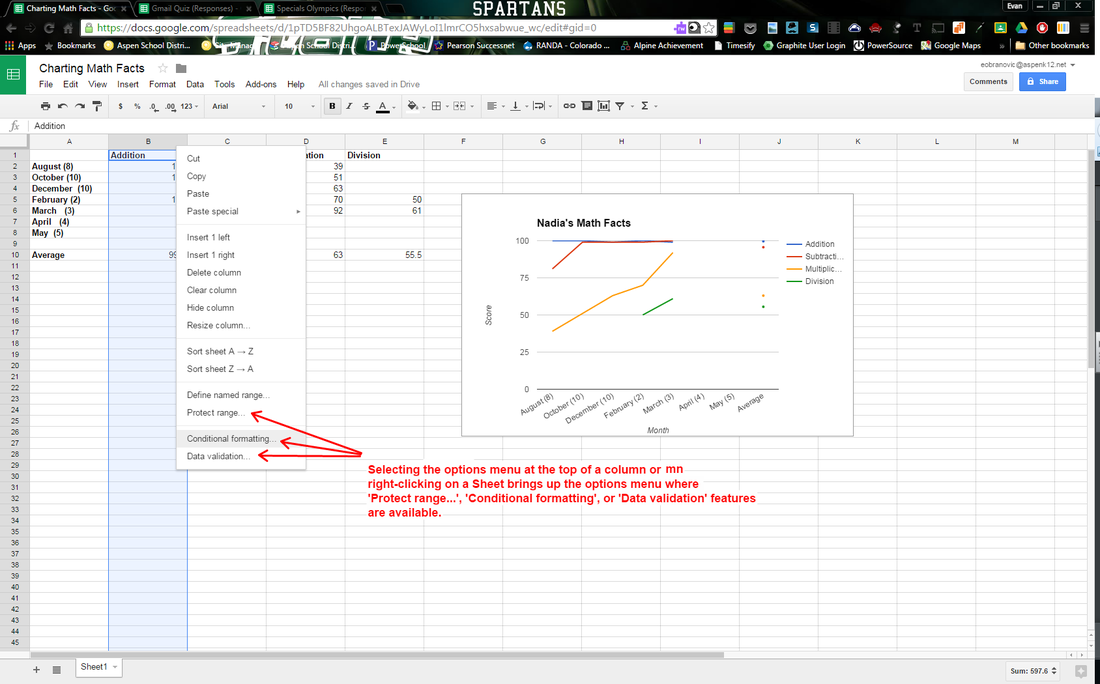 In addition to collecting Form data, Sheets works as a cloud spreadsheet that can be used to collect, organize, and analyze data. Graphs and charts can be created to make visual representations of data collected. You can even make the visuals living documents so they grow when new data has been added. In the past I've had students record their monthly math fact scores and track their progress. The Specials teachers in my district use a form to collect behavior data from each class and chart their progress to reward positive behavior. If you're not sure of how to best chart or graph the data you have collected in a Sheet, Google has added the 'Explore' feature that suggests various ways to chart and analyze the data you've collected. Pivot tables- This is a whole other beast when it comes to sorting and organizing data within a Sheet. The Pivot table allows you to reorganize massive amounts of data and add various values and fields to shape the data in a way that works for you. In order to achieve the growing/living chart for Specials behavior as I mentioned earlier a Pivot table was needed in order to separate the grade-levels and teams so the data was useful and specified enough to allow teachers and students to quickly look at their progress. 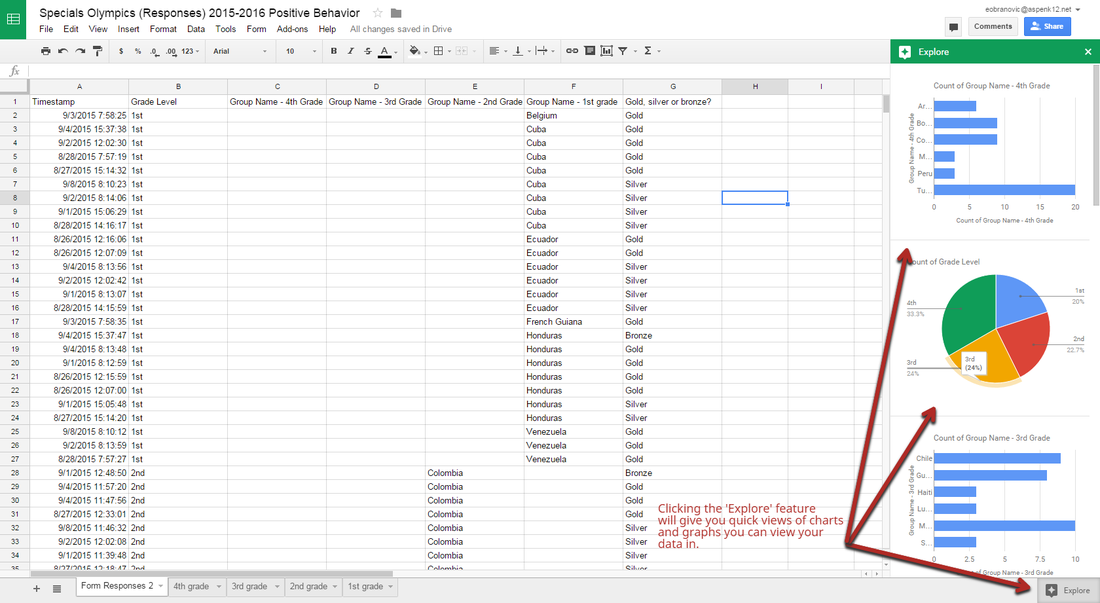 Explore is a new feature that helps get you started with using charts to view and analyze your Sheet data. 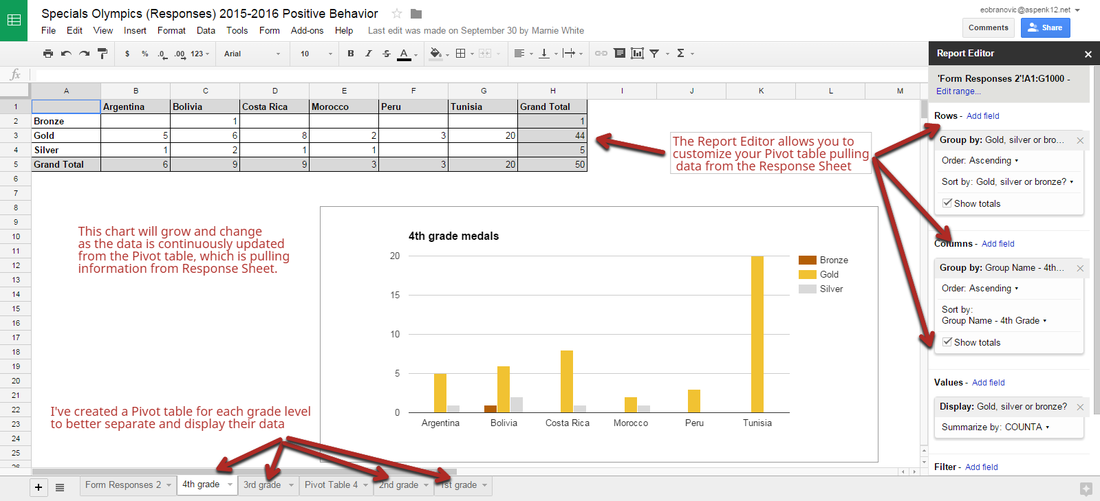 Here I've combined using a Pivot table and graph to create a custom visual for each grade level group. Now that you have several tools and places to start, don't be shy about getting into Sheets and using it to really dive into your data analysis and make some good decisions about your next steps. Feel free to comment below any additional tools or strategies you've found to be helpful.
The information and data you can collect with Google Forms is astounding! They have become so versatile that the uses in education seem to keep growing. Now with Google Forms one thing that needs to be remembered is that your responses are often collected in a Google Sheet (look for a post about the great add-ons and uses for Sheets coming soon!). You can now opt to see the results directly in "Summary of Responses" from the "Responses" tab. 
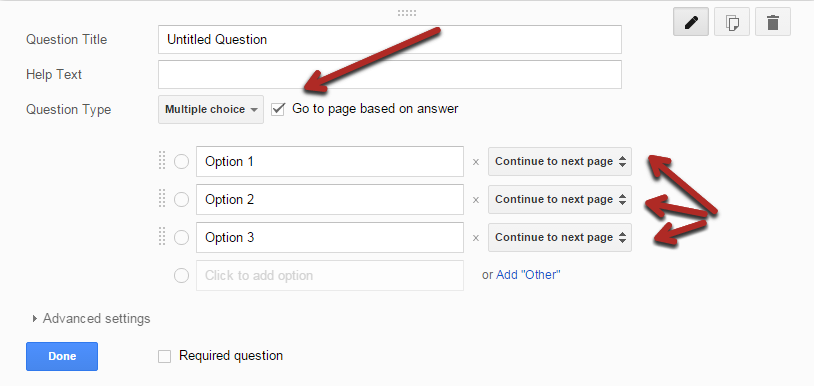
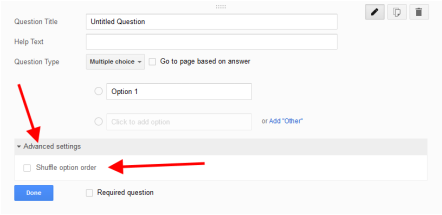
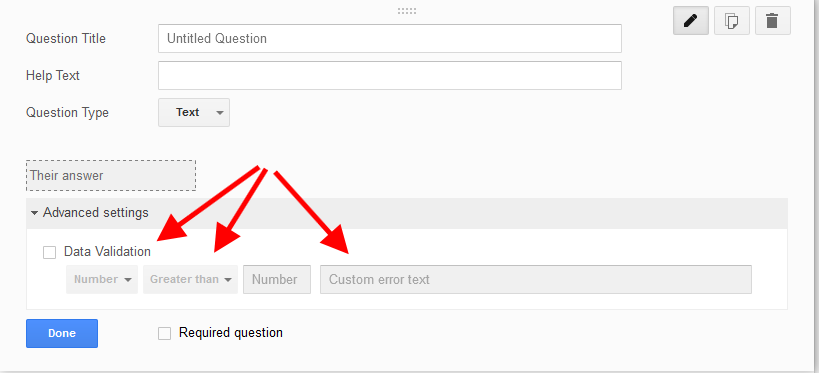
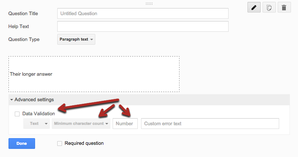
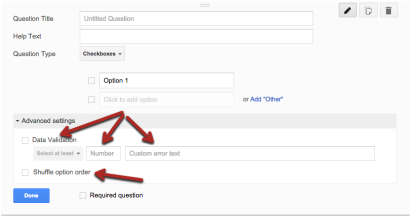
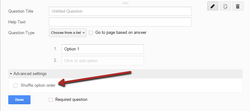
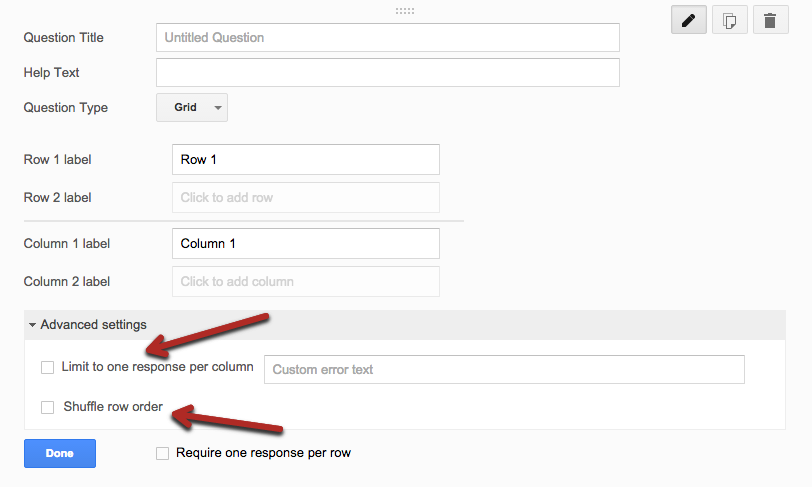
You hopefully are familiar with the various types of questions you can ask in a Form (Text, Paragraph Text, Multiple Choice, Checkboxes, Choose from a List, Scale, Grid, Date, and Time.) Each question type can serve a unique purpose to helping shape the type of data you're collecting and how it can be used. Let's go over some of the advanced features you can enable for certain question types:
There are several add-ons you can use in Google Forms to make them more dynamic and useful. Here are some of my favorites and what they do:
CheckItOut- Allows you to modify several question types to create a dynamic system of check-in and check-out items. I have personally used it to create a Chromebook check-out for students in my high school. Choice Eliminator- This add-on lets you pick or create a question with a set of answers that can be removed from the list as they are picked. Great for sending out a sign-up for snacks for a class party or time slots for a conference. You can even set the number of times an answer can be selected before being eliminated. Form Notifications- Quick and easy way to have emails sent to one or multiple people when a certain number of responses have be collected with your Form. Respondents can also receive emails with custom messages after they complete the Form. formLimiter- Lets you set a number of responses or set a specific date and time of when your Form is no longer accepting responses. Very useful if you are using a Form as some type of sign-up and need to ensure you only allow a specific number of participants. formRanger- allows you to populate multiple choice, list, checkbox, and grid options from columns in any Sheet or Doctopus roster. When you've already done the work once use formRanger to ensure consistency and not retype the same information you have. So if you haven't jumped into all the amazing uses of Google Forms, go a little deeper and see how you can utilize this amazing tool for the betterment of your teaching and your students learning!  If you're like me then you always come up with a bright idea right when it's needed most and wish you had the foresight to put something in place ahead of time. If you haven't checked out IFTTT.com yet then you are doing your productivity a disservice. If This Then That is a web tool that allows you create "Recipes" for a multitude of processes including web services, apps, android and iOS notifications, and email. I was introduced to this tool from James Sanders when he was presenting a GAFE session on how to create problem-based learning for students.
Countless numbers of recipes can be created when you sign-up for an account with IFTTT.com and then let the fun begin. On the site they are divided into DO and IF recipes. DO recipes let you create a process you control like quickly adding events into your calendar. IF recipes let you create processes that run in the background like automatically saving Instagram posts into a dropbox folder. The site provides an easy search function as well as galleries and channels containing hundreds of suggested recipes you could spend all day browsing. Once you get the hang of the process you can even start to create your own recipes that are tailored specifically to your exact needs. One recipe that I use all the time is creating an email alert when iOS or Android educational apps go on sale or become free. One thing I think all educators are looking for is great, FREE tools to help them and their students. It's so convenient to have a daily digest sent right to my inbox and then be able to vet the app and share it out with other educators. Recipes can be made to retrieve photos or information on NASA activities, you can collect and read current event headlines from NPR, even keep track of the U.S House and Senate voting record. This list goes on and on and they are adding new ones all the time. Do yourself a favor, create an IFTTT account and start finding amazing recipes to make your personal and professional life more automated, organized, and productive. |
About EvanDirector of Technology for Traverse City Area Public Schools. Level 2 Google Certified Educator. Former Tech Integration Specialist and 4th grade teacher at Aspen School District and Spartan for life! Go Green! 
Categories
All
Archives
February 2019
|


 RSS Feed