|
Many people have been talking about flipping the classroom, but I feel like it has hit a wall when it comes to implementation. Some of the road blocks are obvious: lack of access, lack of training/PD, and unclear learning targets, but what are other reasons are there for people to take advantage of this strategy? I think the unknown is one of the biggest hang-ups people have in looking to implement this in their own teaching and I've put together a presentation with some resources to help get you started.
Some of the highlights from the presentation that I find particularly useful are:
I made sure to mention the ISTE standards and SAMR and TPACK models at the beginning of the presentation to get people thinking about the "why" when it comes to using any of the tools to try and flip content. I think when we have purposeful use of these tools to deliver content to our students in effective and innovative ways we can really see the benefits of flipping the classroom and how it can impact the work we accomplish with our students. My biggest piece of advice is to start small and focus on one area you really see potential in and branch out from there. If you have any great examples or experiences flipping your own classroom feel free to comment below. Feel free to refer and use the presentation for your own teaching and have fun flipping out!
0 Comments
There have been some significant and simple changes since my last post about Google Forms and I thought it was time to get the word out for all you avid Forms users out there.
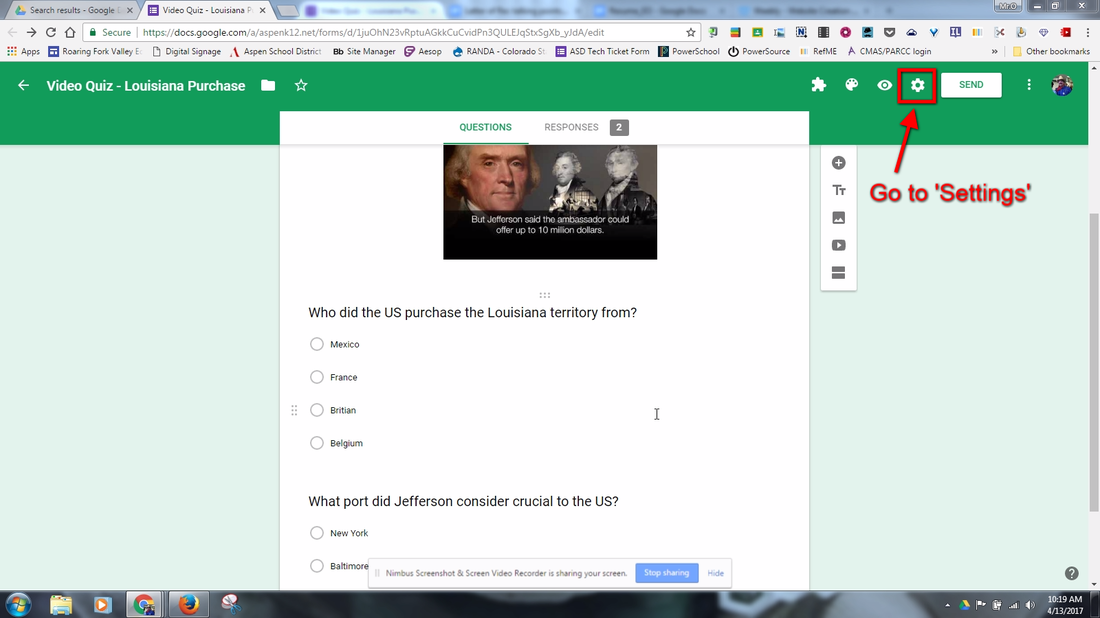 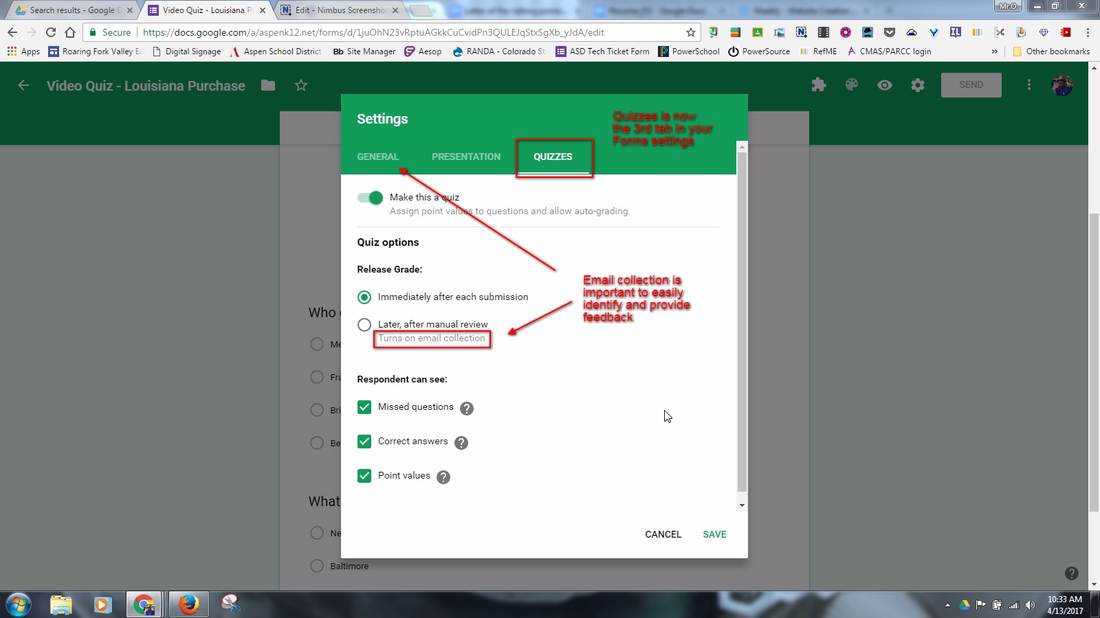 Set your options for the quiz including immediate or manual feedback, whether point values should be added, and what feedback students can see. 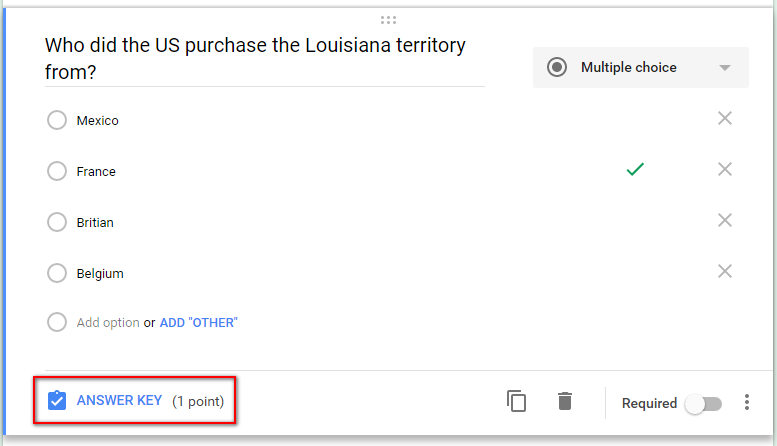 Click on 'Answer Key' to allow you to set point values, correct and incorrect answers, and provide custom feedback. 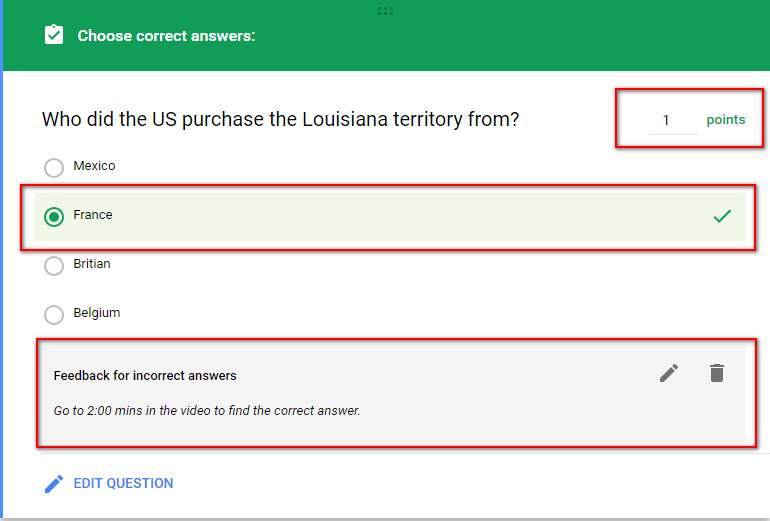 Set point values, mark the correct answer and add custom feedback. 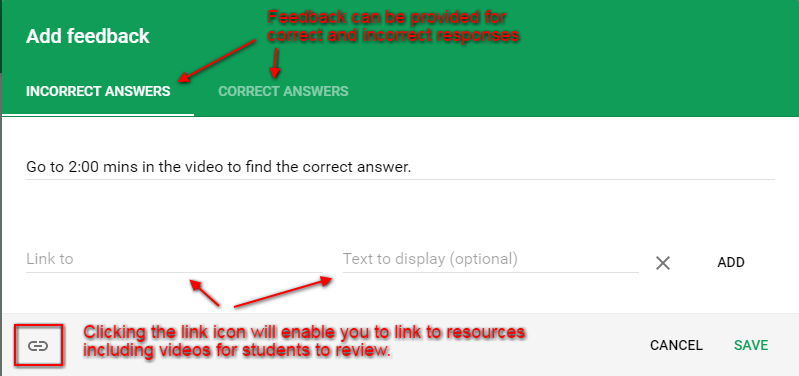
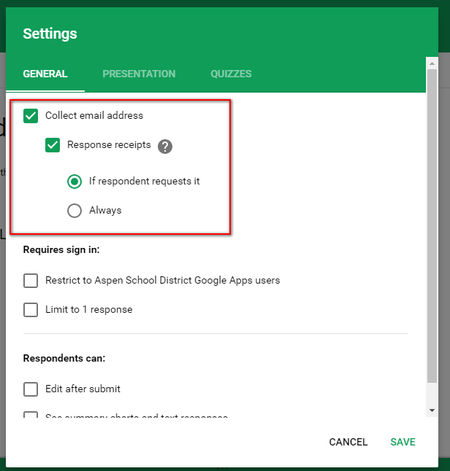 Select 'Collect email address' to insert a short answer question on your form asking your respondents to submit their email. You can then opt in for Response receipts. 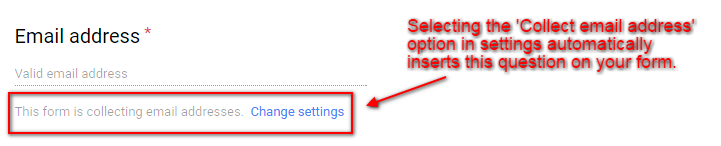
So there you have some new and some not so new features as well as a few tips on how to maximize your Google Forms experience. If you have had any experience or other ways to utilize these please share in the comments below.
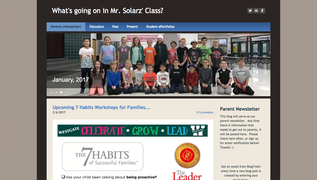
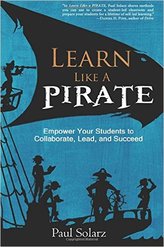
 There's a lot of learning happening in today's classroom and in turn lots of discussion of how we can best showcase that learning for the students' and teachers' reflection on their practices. The buzz word has become digital portfolios! There are many reasons a digital portfolio is a useful way to showcase what is happening in the classroom and no one reason is the best. You have many teachers wanting to focus less on grades and more on conceptional learning and what better way to still have evidence of how your students' are accomplishing this then by having each individual create a collection of their best work to showcase to parents, teachers, students, and the public alike! Project-based learning is another great concept in education that has been gaining momentum and by using a digital portfolio you can easily collect and display all the great work that was happening throughout the project as well as the end result. A great example of what project-based and more specifically, student-led, classrooms and digital portfolios can look like lives in Paul Solarz' classroom and website. Check out his book Learn like a Pirate to learn more about his awesome strategies and all the great work he is doing with his students.
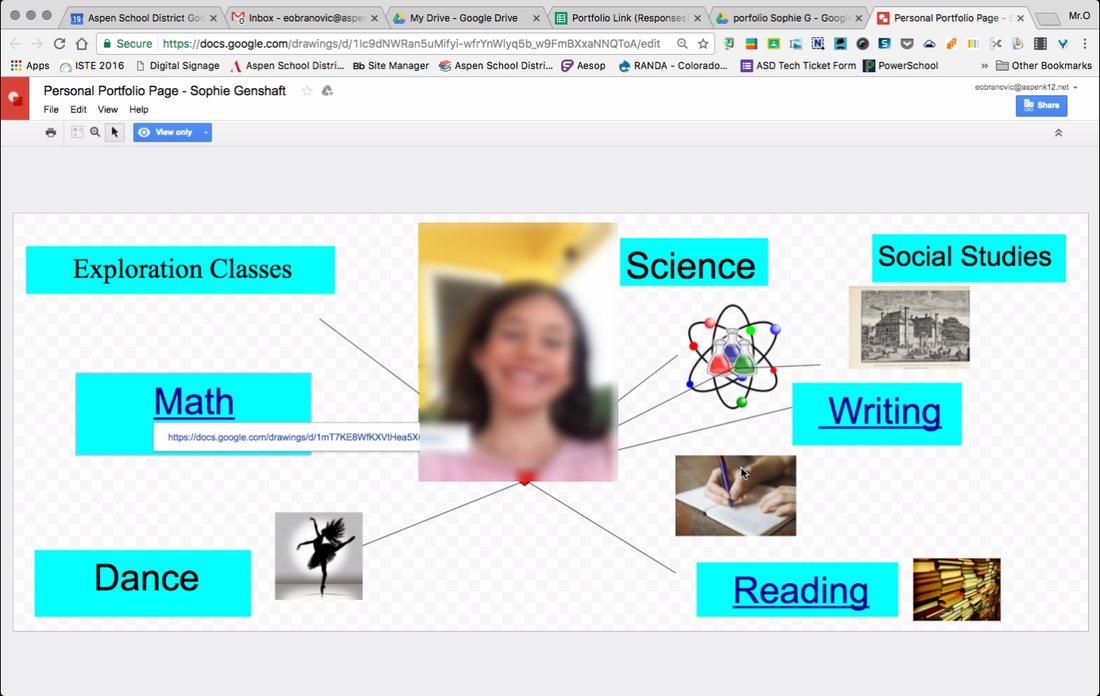
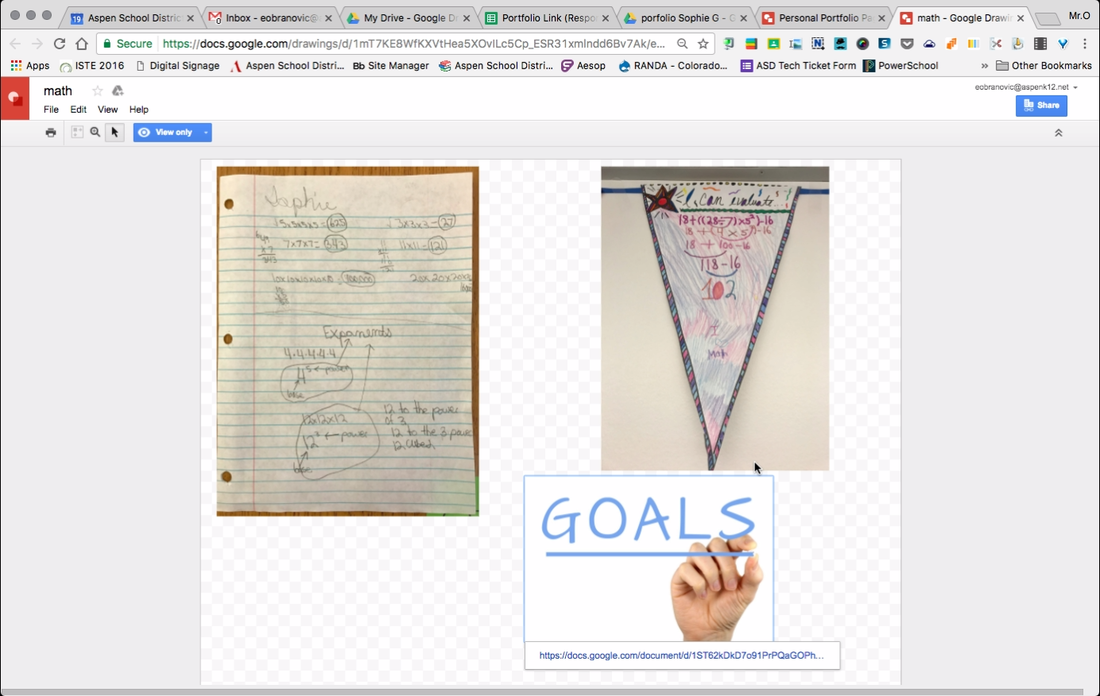
Post-secondary education prep has become so crucial in our education system whether that is college or another trade. Using digital portfolios to help students create effective resumes for college or other institutions. These and many other reasons are great justification for the use and practice of digital portfolios. The question then becomes which tool or medium is the best way to create digital portfolios for students. These suggestions below are not a fully comprehensive list, but should give you some ideas on how you could get started or modify your own version: Thinglink- This website allows for easy creation of interactive pages that students can link various resources or digital media to in order to create of collection of work that can be easily shared with others. Google Drawing- If you are using Gsuite then you can mimic a tool like 'Thinglink' with Google Drawing. Students can place text or images on a Google drawing page that can then be linked to other student work. An awesome AMS 6th grade teacher, Mark M., has instituted this method with his own class with great results.
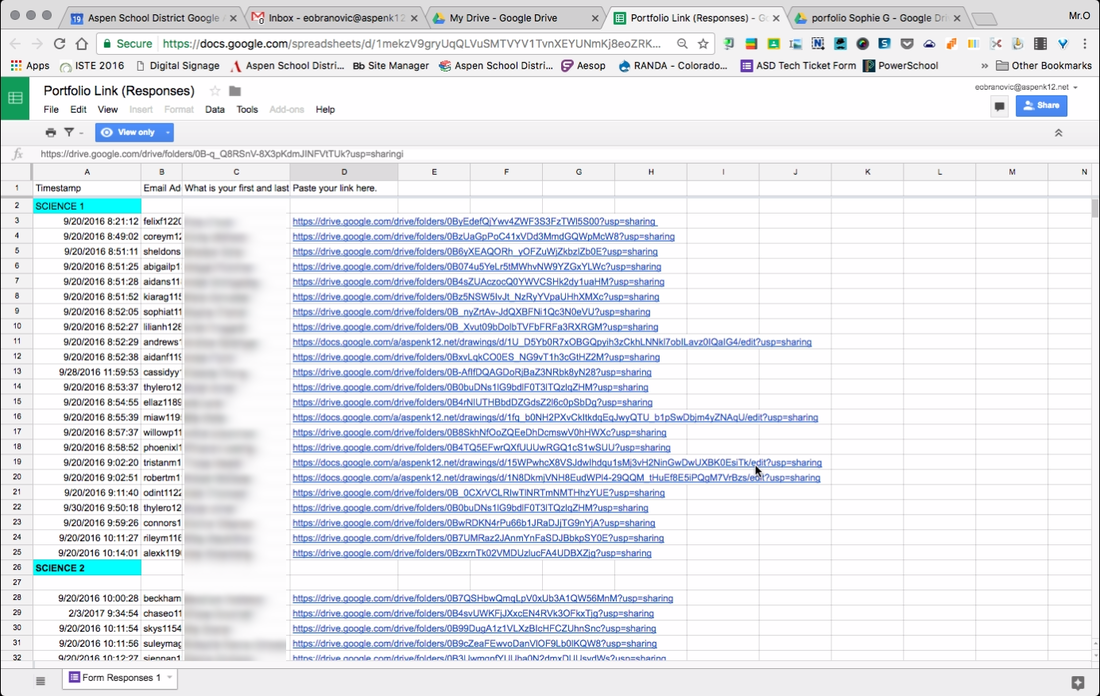
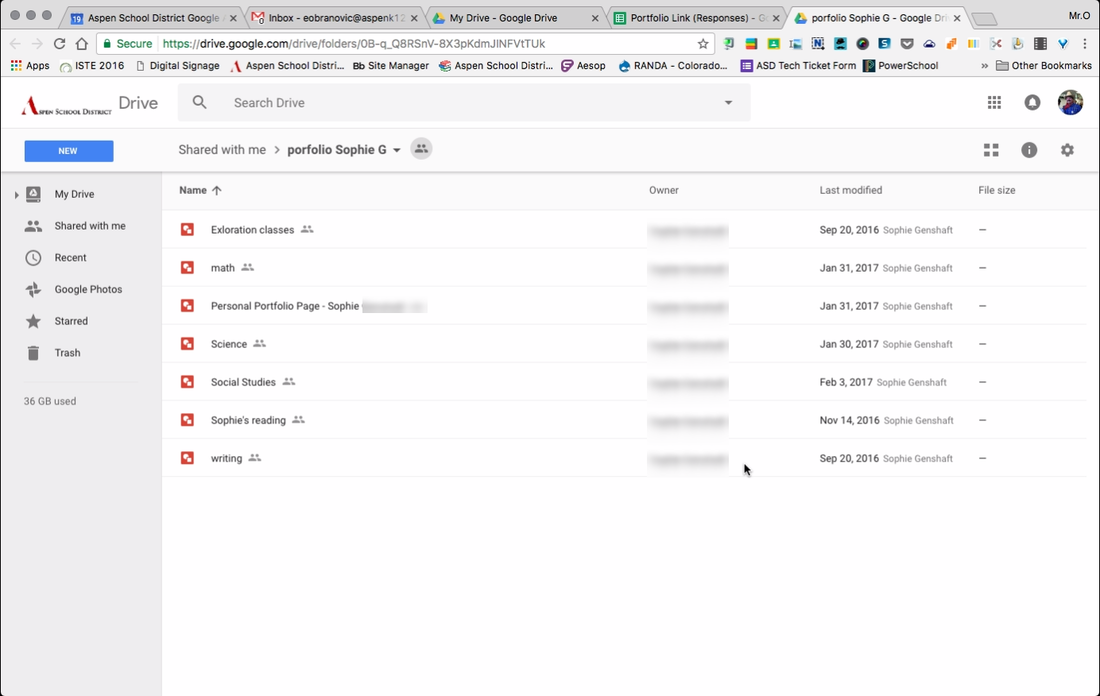
Google Drive- Another simple way to collect student work. Create a folder in a student's Google drive that can have sub folders for various subjects. Students can then simply drop in work they would like to be part of the portfolio and keep a collection going throughout their time in school. Though the collection is easy some downfalls are effective ways to display the information once collected, ability for students to reflect, and the easy of saving items that aren't savable file types, like a link to a web resource. Google Sites- Gsuite users should definitely take advantage of the easy and beautiful new Google Sites as an option to create great looking digital portfolios. Websites are great ways to collect a body of work, provide reflection, and showcase it to the public and in the case of Google sites, the sharing permissions can be locked down for younger students who aren't quite ready to be fully out into the internet. Weebly/Wix- Much like Google sites, Weebly and Wix offer easy to use platforms to create beautiful looking websites that can be used as digital portfolios. They both have very simple interfaces that allow for quick editing that doesn't require a lot of website building experience. Students can collect all types of work and post on the website One of the AHS Business teachers, Sheri S., has her students create websites to help build their 'brand' and use as a piece of an application or resume. 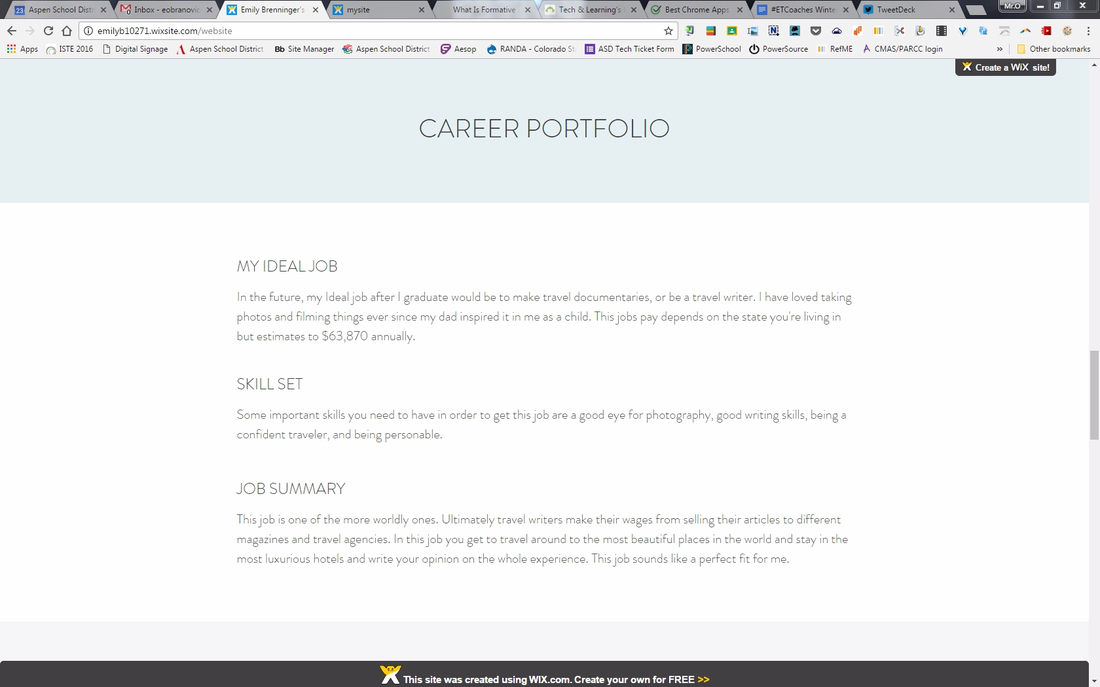 This student's Wix page contains a career portfolio and work showcase. Click on image to view her portfolio in full. 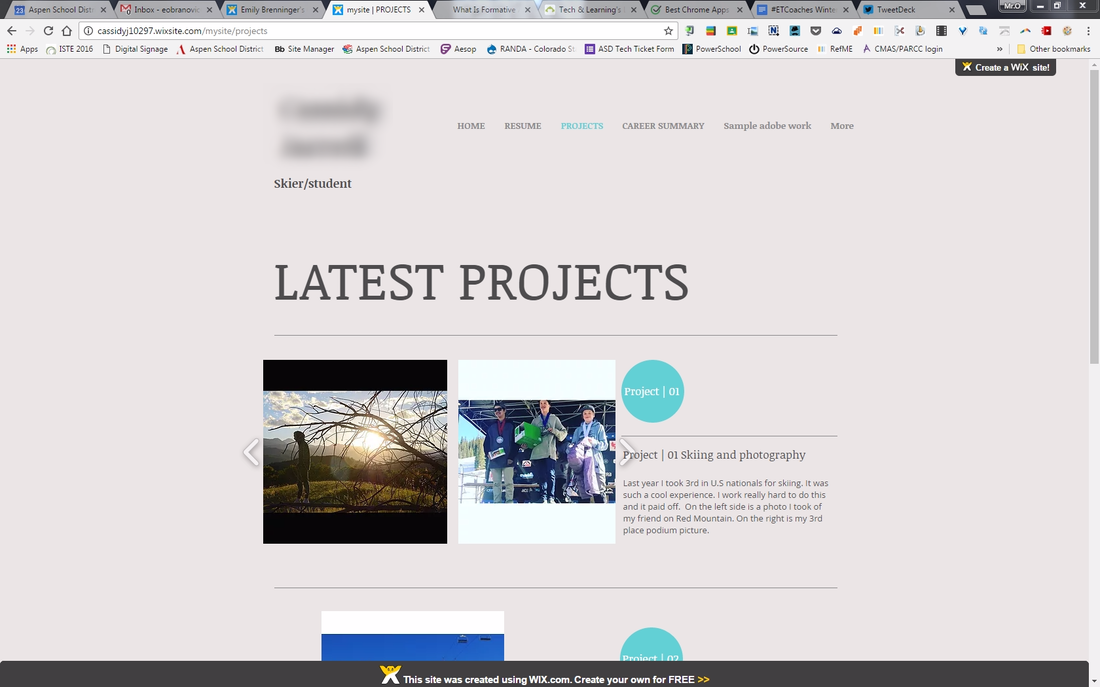 Another one of Sheri's students hopes to take his skiing to the next level so he designed his webpage to focus on his skiing accomplishments. Adobe Express- This is a great suite to make a lot of different web-based projects and the ability to make a digital portfolio is definitely one of those options. Accounts are free to create and gives you the ability to make videos, pages, and posts. Be sure to check it out for portfolio options or just a great tool to create digital media. Blogs- There are so many tools out there that can help you blog. Google sites, Wix, Weebly (which you are currently reading), and many others all have options to add a blog section and there are specific tools that pare down a full website to a simple blog interface like Blogger or Wordpress (also a robust website creator). A blog works well for a digital portfolio because it allows a place to collect work, provide reflection, receive feedback, and share with the world. As I mentioned earlier this is a short list and in no way the full quiver of tools and programs you could utilize to create a digital portfolio, but they are a great place to start! Please comment below any tools not mentioned that you have had experience with creating digital portfolios or just your thoughts on digital portfolios and their benefit in education.
When making a push to integrate technology into our classrooms the ASD tech team wanted to find a way to reach our educators in a deeper way then simply showing them "cool" tools that can make their teaching easier and their students more engaged (though those are good things too!). We found ourselves looking at our own philosophy on how we view technology in education and had hoped that the teachers would find our department's foundational pieces as enlightening and helpful as we did.
It came down to two models for viewing technology and its integration in to the classroom. SAMR (Substitution, Augmentation, Modification, and Redefinition) and TPACK (Technology, Pedagogy, and Content Knowledge) are fairly well known and are used by many teachers and schools to evaluate or reflection on how they are using technology, but I feel they are often set aside when a teacher keeps coming back to using various technology to support their teaching and a student's learning. Our tech team felt that if we could provide a interactive refresher for staff to look at these two models and define them in their own terms, then maybe we could spark the idea of how to effectively integrate technology in their classrooms and use us as a resource to do it. SAMR - There are lots of resources out there to look at what exactly SAMR means and how it applies to educational technology. I really like the video explanation by Common Sense Media found here. Created by Dr. Ruben Puentedura, this model frames how technology can be used in education and what the evolution looks like as more tools and increased skill levels are applied. I like the analogy that this model is like a pool: depending on what you are trying to accomplish a simple substitution or augmentation might be as far as you need to take it, but getting into the deep end of modification and redefinition is where the most authentic learning will take place and really transform what you are doing. 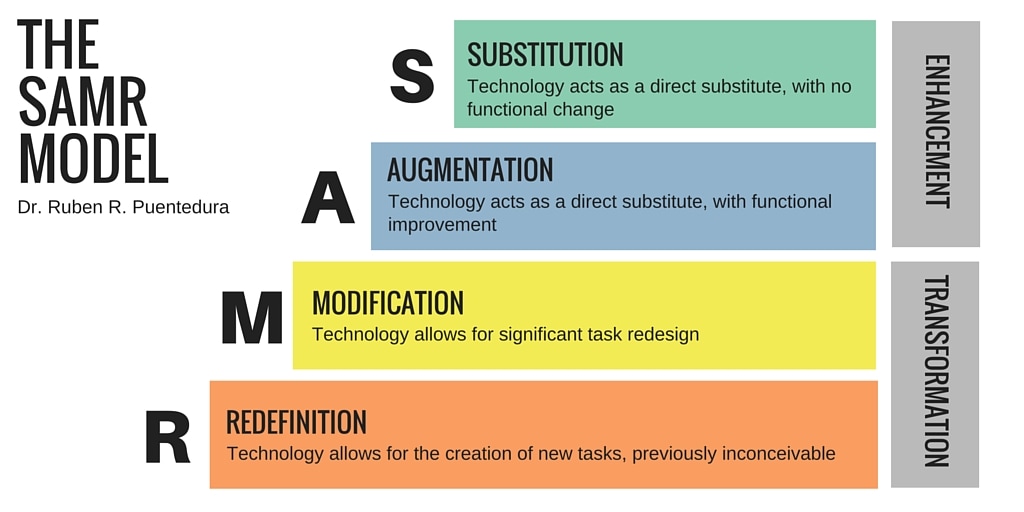
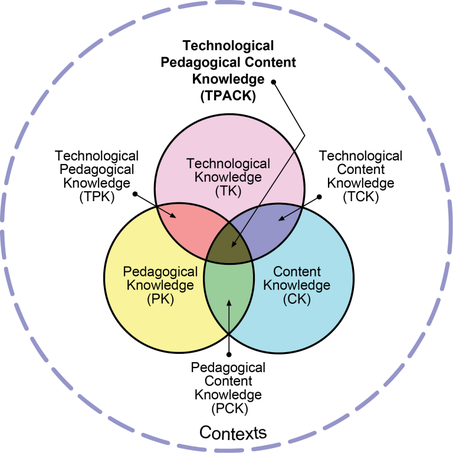
TPACK - I have a special place in my heart for the TPACK model as I am a graduate of the MAET program at Michigan State (Go Green!). Again, I really like the video introduction and explanation done by Common Sense Media found here. Created by Punya Mishra and Matthew J. Koehler at Michigan State University the TPACK model looks at three major areas in education and teaching: It looks at Content Knowledge, Pedagogical Knowledge, and Technological Knowledge and frames it in a Venn diagram to help visualize the intersection of these important areas and how they work together and can build on one another to create excellent teaching practice and in turn, student learning
http://tpack.org
So in order to expose our staff to these two models and how they applied to technology integration we created the slideshow below and had teachers spend time in small groups learning and jigsawing ideas of what these concepts mean to them and how they can apply it to their own teaching. We did the presentation three separate times in each of our buildings and were amazed at how engaged and thoughtful the staff was at working through this process. Shortly after each presentation my fellow integrator (Anita Moose) and I were constantly approached to help teachers with ideas or next steps for using these concepts to better integrate technology into their lessons. Feel free to make copies, modify, and use with your own staff to teach these crucial concepts of technology integration. Comment below on any experiences you have had with these two models and any success or struggles with implementing them.
Computer Science is one of the hottest topics in education, but why? Why is everyone pushing so hard to make CS an integral part of every student's education? As a "tech guy" I am clearly on board with the need to have more Computer Science in our schools both as specific classes and integrated into other subjects, but technology is such a small piece of all the skill set that go into CS. As many other advocates will tell you the benefits of CS for students goes far beyond the obvious of preparing students for a new and emerging work place, complex problem solving, math skills, design thinking, project-based learning, creativity, and team work just to name a few.
Looking to find ways CS can be instituted and integrated into our own school, my fellow integrator and I attended a Colorado-based Computer Science Task force that brought together many great minds from across the state in various fields in and out of education. Though we learned a lot and made many great connections with people who are doing great things, one thing that became abundtly clear was that there is no one road map to getting computer science accessible by our students.
Many districts are doing some great things, like St. Vrain, which has established an amazing Innovation Center that allows for students across the district to really have a meaningful experience with STEM education by partnering with industry to help get students working on real-world projects to solve real problems. Cherry Creek also has a great STEM program that helps produce students who, as explained by one Google employee, have several of the necessary skill sets, including algorithims and structures, that Google looks for in their own engineering interns. These are just among a few schools in Colorado that are making great strides in CS, but how can we create consistency and follow-through in all our districts to give each and every CO student a chance to experience computer science?
This will take work locally, statewide, and nationally to get CS the recognition it needs and deserves to push decision-makers and constituents to help prioritize computer science in our education system. One way to help get the word out is to support the CS Education Coalition which partners with Code.org to try and secure federal funds to support CS Education in our schools. At the state level creating or joining a CS taskforce is a great way to get a room full of people together who are all motivated to make CS a priority for schools and your department of education. Locally can be the most effective and not very complicated. Getting students exposed to CS with a Code.org, Scratch, Code Academy, Tynker, or Apple's Swift Playgrounds account can get the ball rolling and help make students' particpation in CS week and the Hour of Code fun and easy.
This year my fellow integrator and I made a big push to get district-wide participation in CS week. We put together a plan (2016 CS week schedule/agenda) that included lunch activities, intro classroom lessons, and classroom resources for teachers to use whenever convenient.
Our goal was to have unplugged and computer-based activities to give students a chance to experience the basics behind CS and enjoy the bells and whistles of fun online learning activities on sites like Code.org to spark their interest in CS. We started by meeting with all the building principals and giving them an overview of our planned activities as well as resources and videos classroom teachers could use independently throughout the week. Then we gave brief overviews to the staff at their weekly building meetings. Having the administration and staff on board was so important to starting a trickle down effect to get students excited and engaged. Our French and Coding teacher (quite the combo!) at the middle school, Diane Godfrey, set-up two web calls with engineers from Google and Intel which we ran through Youtube live to enable other students and teachers a chance to watch the discussion anytime. AMS coding students facilitated and asked questions of the engineers for about an hour. This was such a cool experience that allowed the students to see some real world application of what computer science is today and what it might look like in the future!
The week was hectic, but the we were able to expose so many students in all three schools to basic elements and concepts of CS in fun and engaging ways. In addition to getting people involved during lunch, several teachers tapped Anita or me to help them run CS/coding mini-lessons. Our AES and AMS Librarians (Lisa May Howard and Teresa Cavaleri) helped kids get on Code.org and Scratch. HS math teacher, Kiffor Berg, taught his students about binary numbers and their relation to CS and how to program their graphing calculators. The goal is to continue to carry this momentum throughout the school year and into the planning process for courses to be offered in the coming years. If the demand is high enough then specific CS or coding courses can be offered in all our buildings and hopefully classroom teachers will continue to use CS to help teach other subjects.
The journey to getting computer science in our schools is only just beginning. The excitement is building and I think most educators realize we are doing our students a disservice if we don't help them learn the skills that will set them up for the newly emerging jobs and careers that haven't even been created yet. So what's the big deal with computer science? The big deal is that we are not doing enough to help our students and if we don't adapt our schools and curriculum to match the times we are living in then we are hurting them just as much as if we decided not to teach math, science, english, or social studies. If you have had any experience with promoting CS in your own district or on a state or national level, please leave any comments below.
Being an avid GAFE (Google Apps for Education) user it only makes sense that I utilize Gmail as my email service of choice. With my district being a Microsoft user before starting the transition to GAFE the move to Gmail as an email option was not easy. Systems we have in place to connect our voicemail to email (Unified Messaging), and our Active Directory to manage and create user accounts made a jump to Gmail difficult. With some convincing (and obvious needs in a GAFE world) our IT department enabled dual delivery to Microsoft Exchange and Gmail and has started to put systems in place to sync the accounts so Gmail use could be more wide-spread. If we are going to be all in on Google then we needed to be able to use the communication tool that works best with the rest of the suite! Below are some of the settings, add-ons, and other Google tools that I've found useful in making Gmail work for me: Inboxes- You have the option to sort your mail into multiple Inboxes or change the format of your inbox entirely to help keep you organized. You can have 5 inboxes working at once (Primary, Social, Promotions, Updates, and Forums) I found using that many to be a bit overwhelming and even more difficult to keep track of all my messages. I ended up settling with just using two (Primary and Social) to keep some of my messages sorted, but not beyond retrival. You can also change the type of inbox you use to change how messages are displayed and if you'd like to give more priority to messages you've marked important, haven't read yet, starred, or a combination of all your sorting options. If you haven't already, definitely go play around with all your Inbox options to find the right combination that supports your work flow and organization. 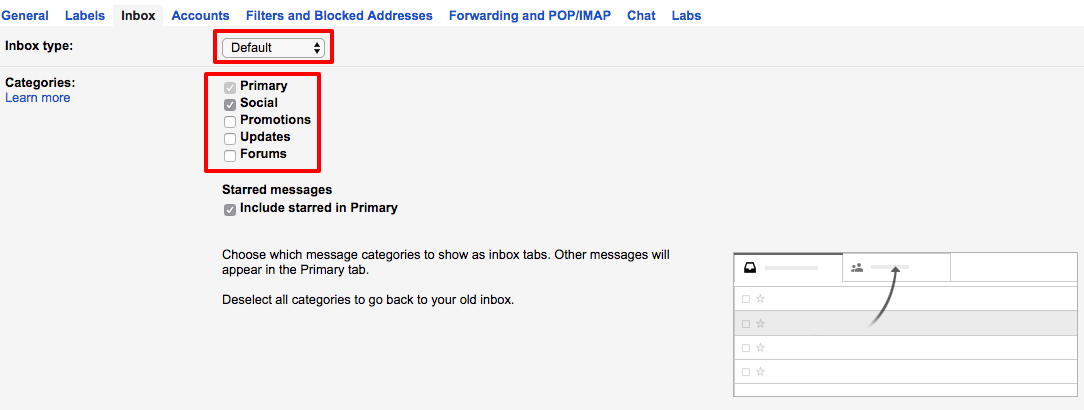 Labs- Gmail offers many experimental features called "Labs" that you can enable to enhance your Gmail experience. I have found a few favorites that I think make my Gmail experience more enjoyable: "Preview Pane" is a great lab that creates a preview screen of your messages and simulates many other mail clients view. I like the ability to see an entire message every time I click on a message so this lab is a must for me. It also helped many of our Microsoft Outlook users ease into the transition from Outlook to Gmail. The "Unread message icon" is a very simple lab that provides a quick visual in your Gmail tab of how many unread messages you have in your inbox. If you're like me and have multiple tabs open all the time the ability to quickly view if you have any messages is a great time-saver. If you're using Gmail then you are probably using Google Calendar to keep track of your schedule. The "Google Calendar Gadget" is another useful lab that brings your schedule easily into view in your Gmail tab. No need to switch tabs to check your calendar, simply check the bottom left corner of your Gmail tab to see your availability. Labs are constantly being updated and changed, so try not to get too attached as they may change or be removed at anytime. Don't let that stop you from finding and using great additives to your Gmail experience. Labs that do really well often end up becoming permanent features.  Go to the settings screen in Gmail and choose 'Labs' to see what's available.   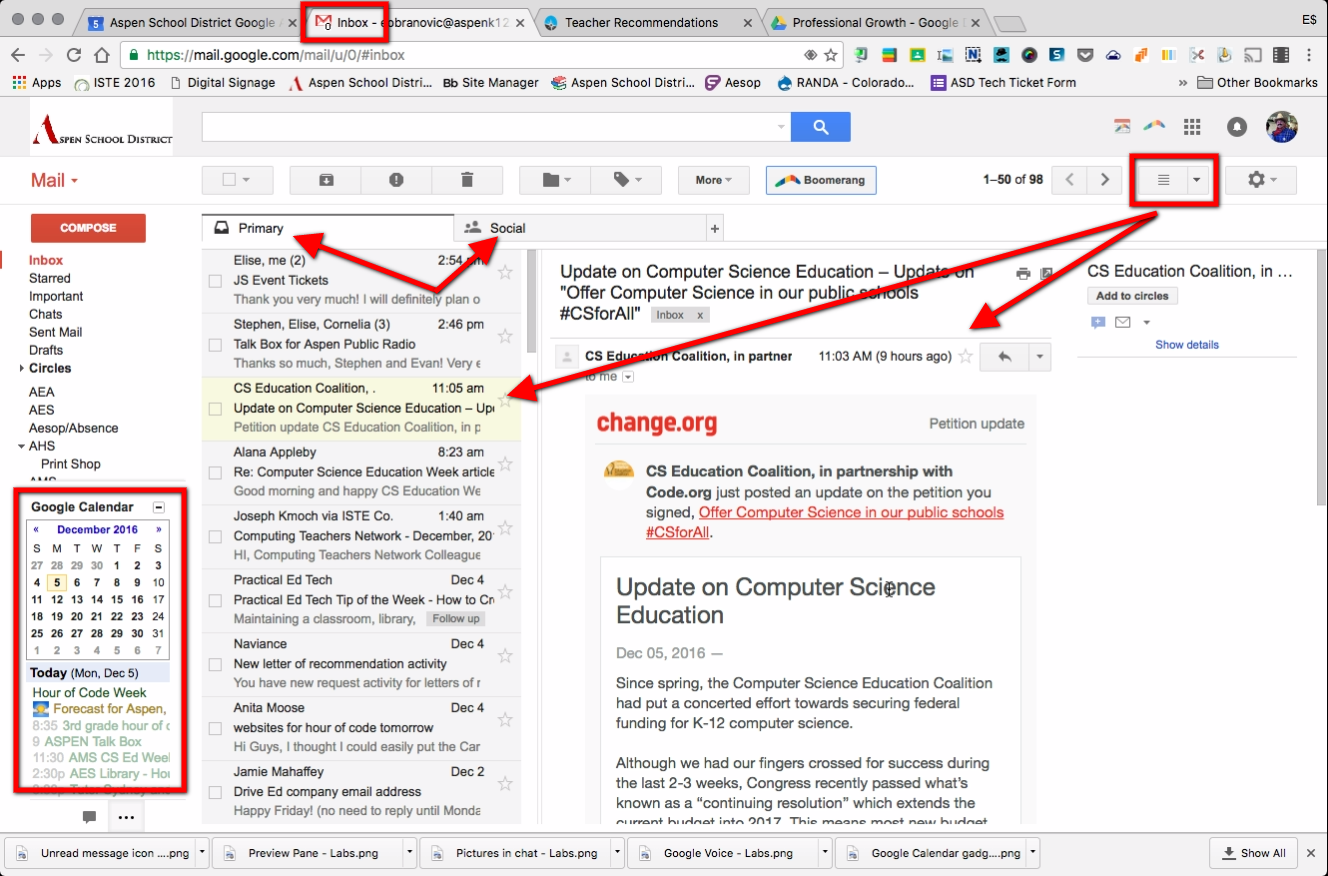 Boomerang- I love this app/add-on for Gmail! Boomerang allows you to easily send messages at a later date, "Boomerang" messages back to your inbox in a designated time frame, if none of your receipts have opened or clicked the message, or if no one has responded to the message. It's a great way to get a bunch of emails done on the weekend or evening, but schedule their delivery to a high traffic time when you know they'll be seen. The other piece that proves really useful is the Boomerang Calendar element. If you are in a position like an Edtech Coach, and are constantly scheduling appointments via email then you will really appreciate the clarity this option brings. Now with the click of a button in your email you can insert your schedule over the next couple of days or week and even give the recipient options to pick an appointment slot that will then register on both your and their calendars. Events already scheduled simply show up as "Busy" to keep information confidential. *Pro Tip- Make sure when you have all day events scheduled in your calendars you designate whether your are 'available' or 'busy' as that will affect how they show up in your email via Boomerang. If you have an all day event scheduled as 'busy' then you will see a block covering the entirety of that day as opposed to marking it 'available' if it's simply a reminder of something happening that day and you have other items on your agenda. There is both free and pay for versions of Boomerang you can opt to use and depending on your needs as an individual or organization you may find the extra features and functionality necessary  Once Boomerang is installed this toolbar will appear on all your new emails. 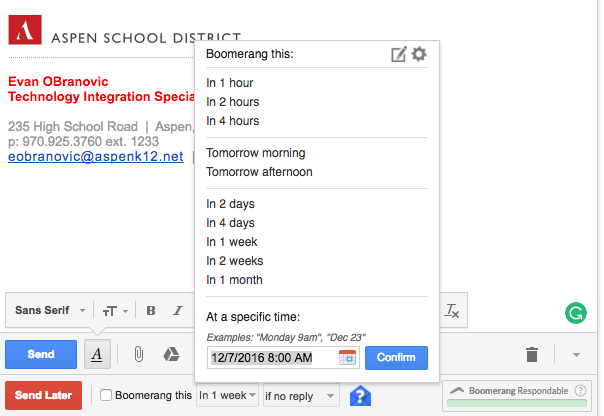 Messages can be scheduled to send out hours, days, weeks or even months later. You can also ask the message is sent back to you if you don't get a reply so you can remind your recipient.  Use Boomerang Calendar to send appointment options that recipients can click on to confirm and add to your and their calendars.  Insert your availability from the next few days directly from your Google Calendar into an email as an image.  Insert your availability for the next week into an email directly from Google Calendar. Google Calendar- If you are using Gmail then you shouldn't stop there! Take advantage of the compatibility with Google Calendar to keep your schedule organized and easily accessible. Sending and accepting event invitations is quick and seamless when using both Gmail and Google Calendar. Tools like Boomerang and labs like Google Calendar gadget (mentioned above) are great add-ons that really take advantage of the two tools together and can up your productivity. View your calendar in day, week, month, 5 day, and agenda views depending on your preference. Multiple calendars can be created and shared with others to help sync up schedules. When your calendar is too overwhelming you can temporarily turn off specific calendars to help you focus on important events. One of my favorite options is the 'Tasks' feature which lets you create a list of tasks that will display on the right side of your calendar and if you put a due date on a specific task it will also be inserted on that day in your calendar. Google Calendar has enough meat to it to warrant its own post, but just know that using it in conjunction with Gmail can really boost your productivity and keep you organized. 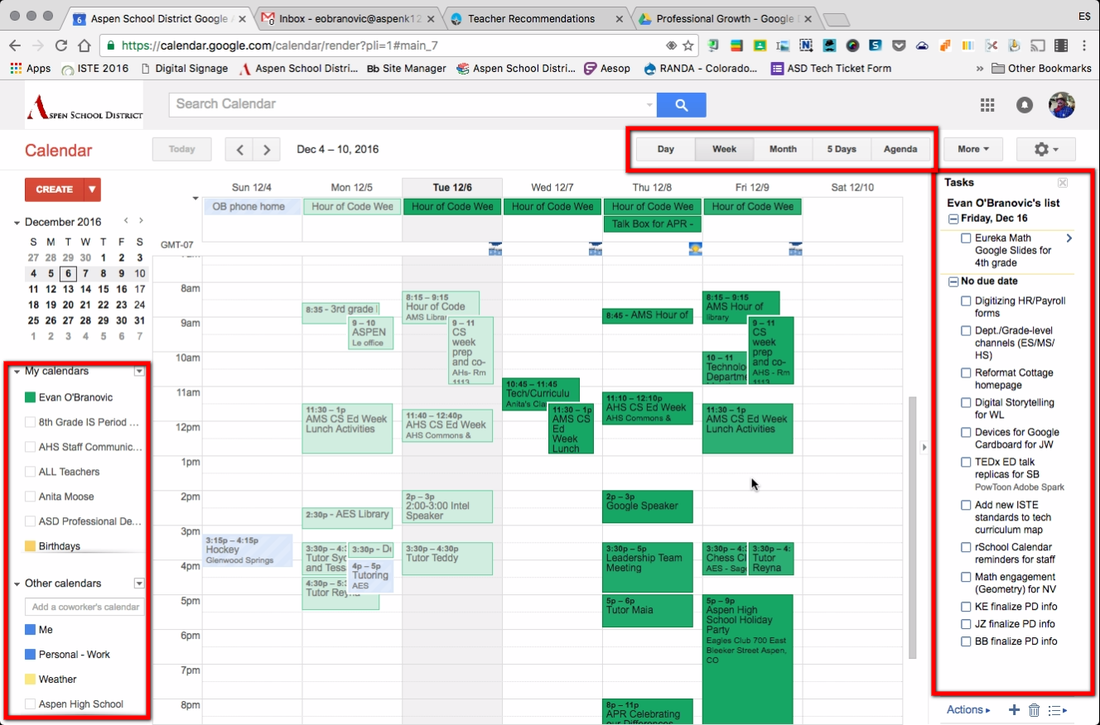 Add multiple calendars from co-workers, Google Classroom, your organization, and outside sources to keep all your information in one place. Change your preferred view from day, week, month, 5 days, and agenda to fit your needs. Take advantage of 'Tasks' to keep an organized to do list. So there you have the reasons I'm all in with Gmail. As I said earlier, you can't fully take advantage of everything GAFE has to offer unless you use it all. If you are an avid Gmail user and have any additional advice or great tools to enhance your use please leave them in the comments below.
The more you work with Google Apps for Education, the more quick hacks and tricks you find to make them work best for you. As much as we all love GAFE, no tool can do it all, and you need to be adaptable in order get things done that help you and your students succeed. If you're like me, you been shown, and discovered, some quick tips and tricks for many of the GAFE components. I thought I'd start a list (that will inevitably grow) of some of the ones I've found most useful: 1. Force copy - Unless you are handing something out through Google Classroom you've probably run into the trouble of making sure other people are making a copy of your work and not editing your original or have trouble with the process of copying. Use force copy to shorten the process and ensure the recipient has a editable copy of your document all to themselves. All you need to do is replace the end of the link from your edit screen with the word 'copy' and copy that link to anywhere easily accessible to your desired audience.
I have used the force copy link to share out templates with students and to allow professional development participants easy access to documents they can customize or take notes on. You can use the force copy trick for just about every GAFE tool (Docs, Sheets, Forms, and Drawings) So stop worrying about outsiders ruining your documents and start spreading the love! 2. Tables in Google Docs - You are probably familiar with the ability to insert tables in a Google Doc, but have you redesigned the purpose of this ability? When first implementing Google Docs many teachers jumped at the chance to create digital worksheets, but quickly had issues with where the content created by students should go to make the activities easy to view and provide feedback for. By creating a simple 1x1 table underneath a question you require a written response for, you now have a text box that will grow with any amount of content and keep answers organized on the page.  No need to stop at a 1x1 table. Inserting a mute-cell table enables you have students respond to more complex questions and help continue developing critical thinking questions and answers. 3. Page size in Google Slides - Adjusting the page size in Google Slides is a quick and easy way to adapt the standard presentation format into something different and engaging for the students. A simple change to 8.5in x 11in will create a great magazine template that can be easily shared and worked on by an entire class.  One of our AHS English teachers used this formatting trick to create a wonderful literary magazine (Nepsamerg 2016) that her students were able to quickly and easily edit and publish. The formatting made basic graphic design easy for all students and enabled each one to put a personal touch on the final product. 4. Google Slides backgrounds in Google Drawings - If you have really taken on the use of Google Slides as a presentation and student-work tool in your classroom then you need to take advantage of your ability to customize the backgrounds using Google Drawings. Change the page size to match your slide and create a slide background that cannot be manipulated or erased by another user (unless they change the background as a whole...). This is a great way to make assignments using Google Slides that can be shared out via Google Classroom.
Make sure once you have created an image you want to use as a Slides background that you download it as an image file type (preferably a .jpg or .png) or Slides won't recognize it as a viable option. 5. Pre-filled Google Forms - Are you using Google Forms to collect all types of information from staff and students? In the case when you want to collect some individual information, but also have pieces that will be the same for anyone submitting you can utilize pre-filled forms to get what you need and keep a consistency for certain questions. Our district has found this extremely useful when creating registrations for in-district courses for staff. The pre-filled Google form creates a great roster that can then be shared with HR.  This is used in my district to have staff create registrations for in-district course offerings that require rosters for HR. Course Instructors can then easily collect information from interested staff members while keeping some of the important information for HR consistent. 6. Photo editing in Google Drawing - Photo editing can be complicated, but if you're in need of basic and simple changes insert you picture into Google Drawings for a quick way to resize, crop, fade, brighten, contrast, or recolor.  This skill set is very similar to creation of Google Slides backgrounds mentioned in trick #4. One thing to remember is to make sure to download the file as a photo (.jpg, .png, or .svg) in order to have it be recognized by other programs as an image. 7. Limiting Sharing Options - When you want to share a document with your colleagues or the world you may be hesitant to put it out there for anyone to take share with others or create their own copies and use your work without giving you credit. Recently added are two options to limit others abilities to share you documents. When you go to 'advanced options' options you can now select to "Prevent editors from changing access and adding new people" and "Disable options to download, print, and copy for commenters and viewers".  These options are great for sharing sensitive information that you would only like a specific group to see or safely sharing others work with a larger audience without the worry of work being taken without permission. There you have a few ways to get the most out of your GAFE tools. The more we use GAFE the more ways we find to make sure they work best for our needs. I have no doubt that I'll be updating this post with more tips and tricks as time goes on, but if you have any that work for you, feel free to leave them in the comments below.
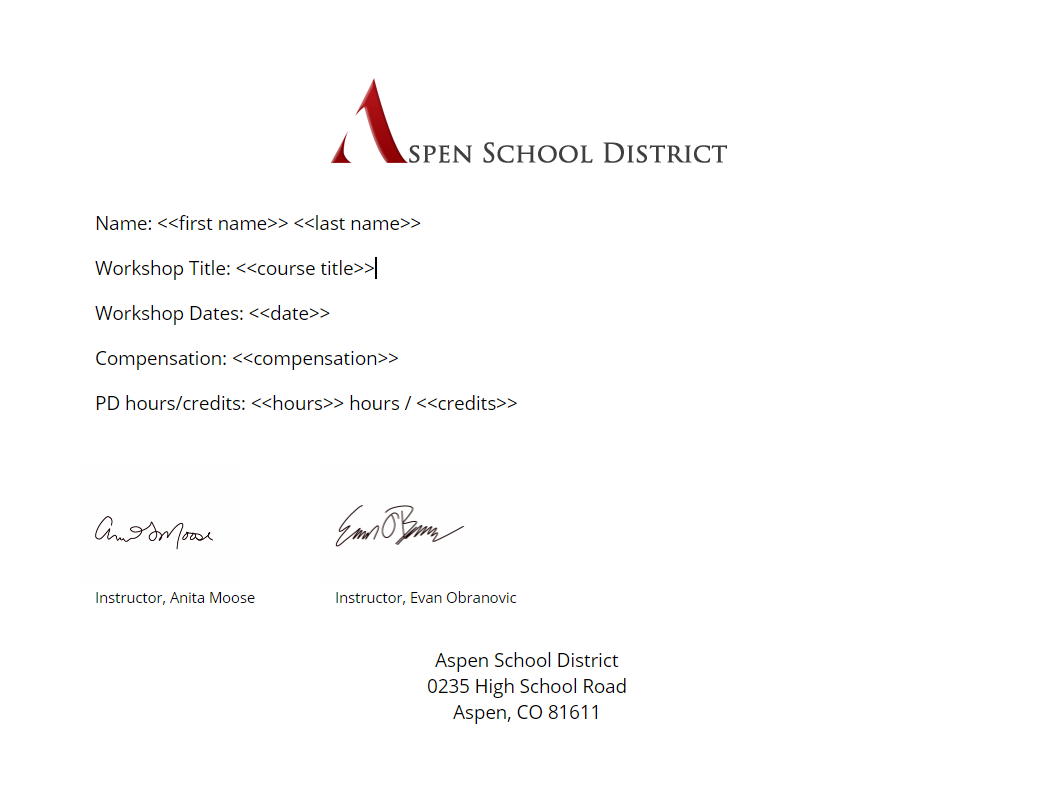
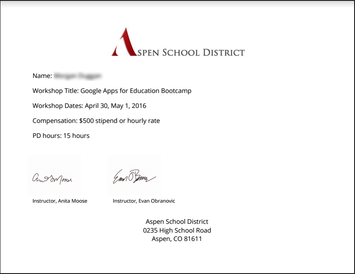
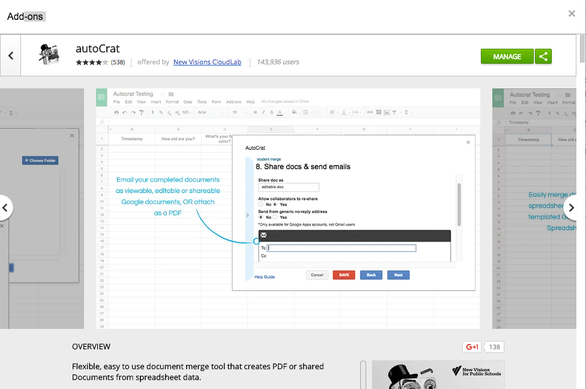 Find the autoCrat add-on in the Chrome web store or the add-on market directly in a Google Sheet. I have written about the autoCrat add-on before in my "What Google Sheets and add-ons can do for you..." post, but I really wanted to spend some time diving into the great ways myself and my district are using this versatile add-on to help automate, streamline, and uniform how we format and share information from our Google Apps for Education (GAFE) with our staff. The process of autoCrat is really just a version of a mail-merge tool, but with the added power of GAFE, (specifically Forms, Sheets, and Classroom) you are really able to create and maintain a workflow that better helps the transfer of information between everyone. I have used it many times with my co-integrator, Anita Moose (@amooseIT), in order to create and share certificates of completion for our technology-based professional development with our staff. This process has allowed us to use an existing roster of participants collected from a Google Form registration and create custom certificates that serve as record of participation, completion, and in-district credit. We also then have a spreadsheet containing all the relevant data and links to the certificates to share with HR in order to qualify staff for salary advancement and keep their records digital and searchable. 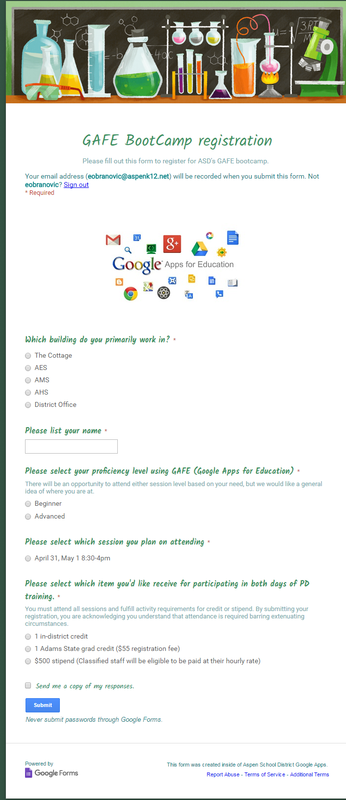 Collecting information via a Google Form is a great way to get all the important details in a spreadsheet that you can run autoCrat on to send form letters or certificates. 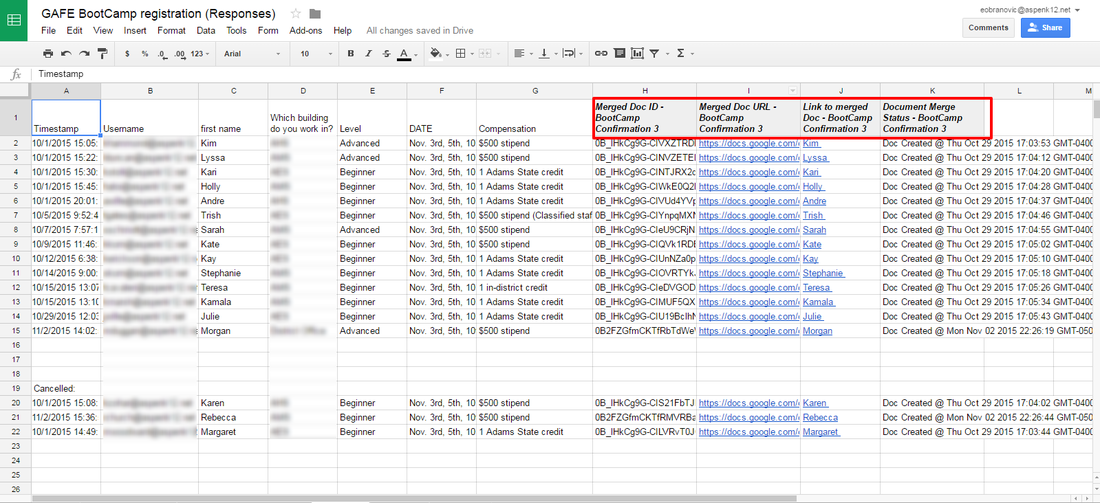 Using the response sheet from a Google Form, you can run autoCrat to pull the specific information you want and insert it on a Google doc template.
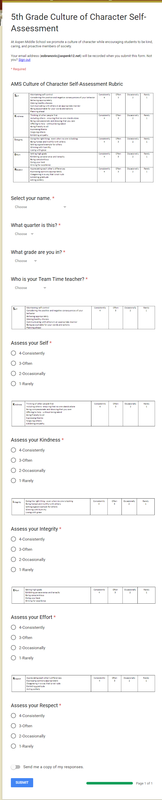
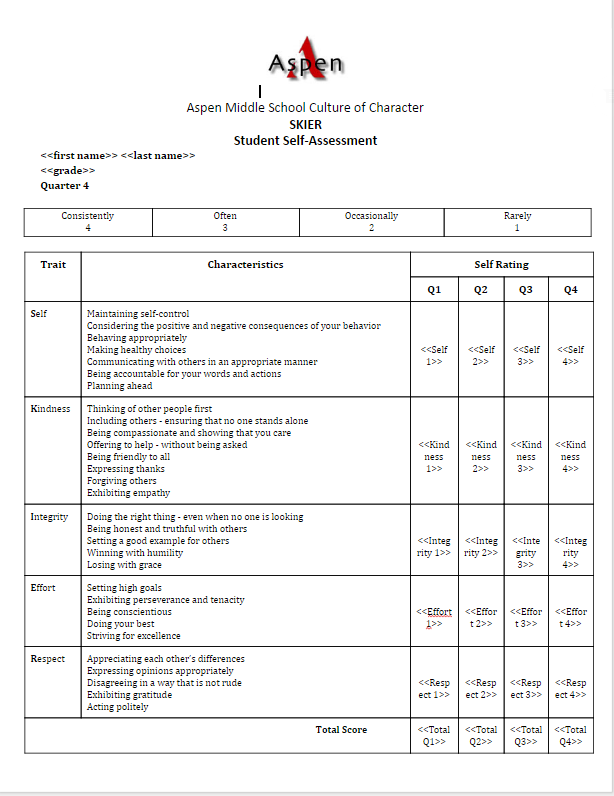
Anita has used autoCrat to create progress reports for middle school students as they self-evaluate on a rubric designed to evaluate character using Google forms. Grades 5th-8th are enrolled in a Google Classroom per grade-level and expected to complete the self-evaluation each quarter The results are then pushed to a running progress report that is printed and included in report card envelopes sent home at the end of each quarter to help students see their progression throughout the year.
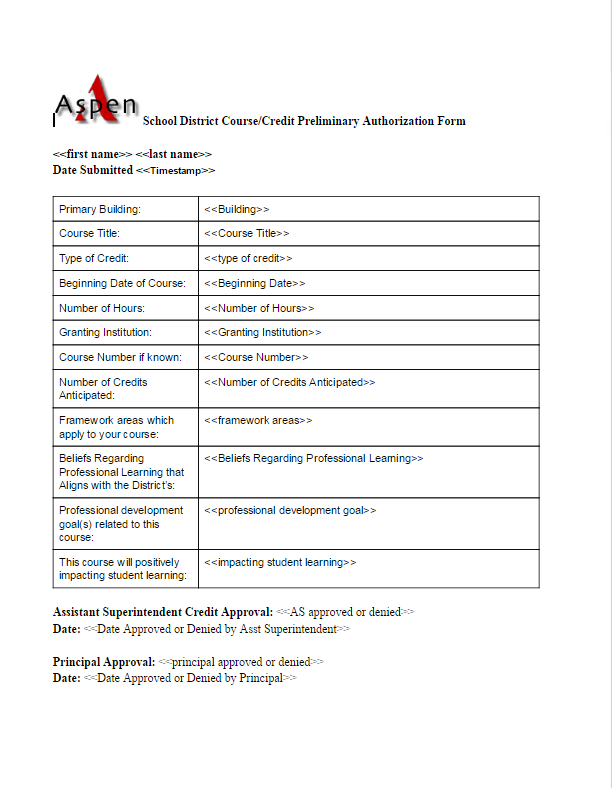
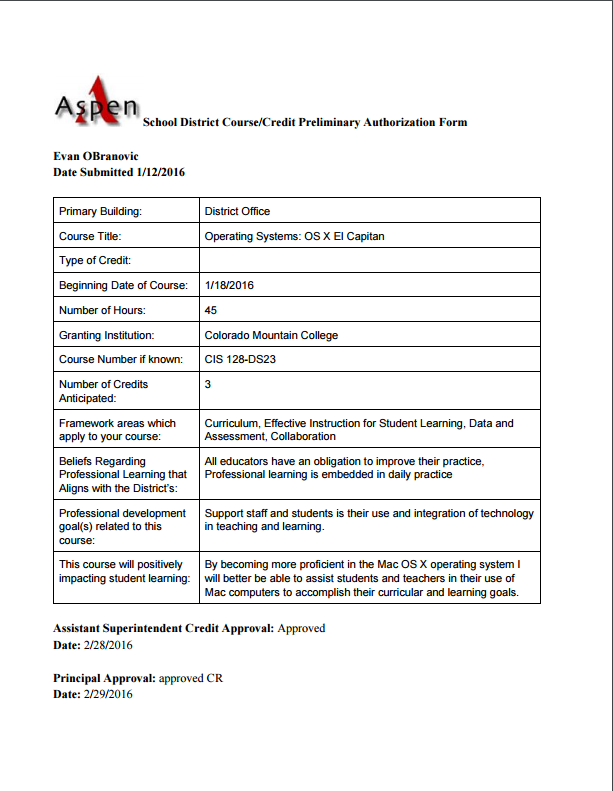
Our district has started to move several of their processes to a digital/GAFE format and we again found great use for autoCrat. With the large amount of professional development opportunities our staff take advantage of during the school year and summer, we wanted to streamline the process of approving relevant PD and keeping track of completion. All approvals are now done through Google forms as well as completion certificate submissions. This makes record keeping for our District office much easier and a quicker turn-around for teachers and staff to have the information they need.
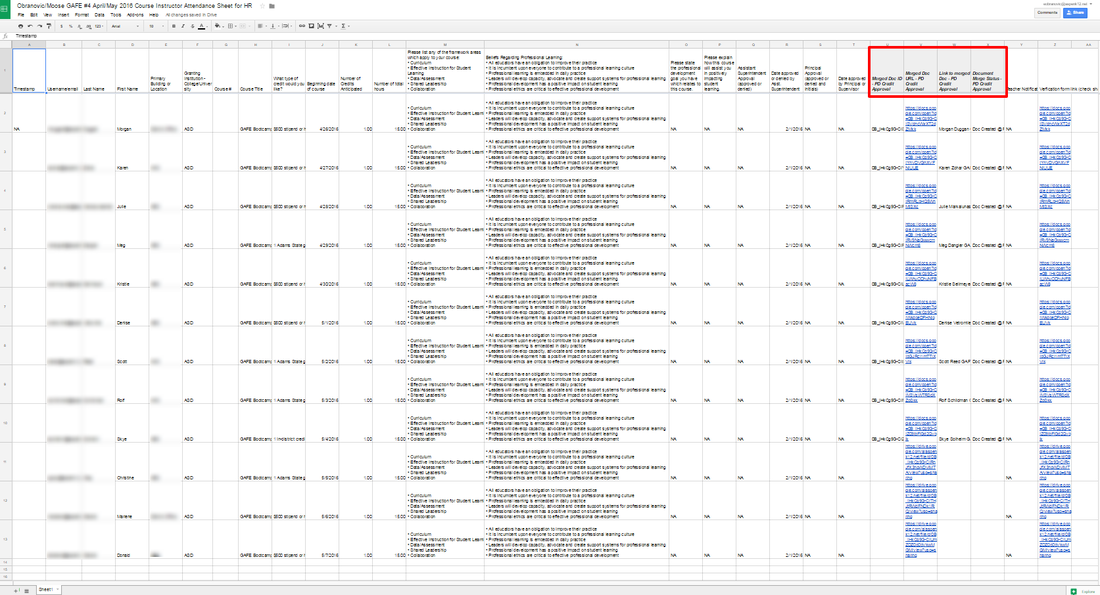 When a staff member runs an in-district PD, they are given a copy of this sheet to customize for their own attendance and record keeping. They can then run autoCrat to personalize completion certificates and turn in a copy of the Sheet to HR for district records. So now you can see how much autoCrat can improve your workflow. If you are a Google school you need to start taking advantage of this FREE add-on and become far more efficient with how you can collect, format, and share information. There are lots of great tutorials out there, but below you will find one that walks through the latest version of autoCrat by Brent Coley that is well done. Please don't hesitate to contact me for help getting started with autoCrat and feel free to comment below on great ways you have found to use this amazing tool! Dear Voxer, I just wanted to thank you for taking my smart phone back in time to the days of Nextel (chirp, chirp!). A simpler time, when with the quick push of a button I could send a walkie-talkie type voice message to my friends to find out what was happening on campus. The push-to-talk phase was great, and oh how it's back with a vengeance! Now with the Voxer app I can take all the best features of push-to-talk with the added functionality of having a computer in my pocket. You enable me to send quick voice messages that can either be played in real-time when the app is open or the messages will be queued up and ready to play over and over again if needed. The saved message feature is great for multi-tasker like myself. When I am trying to listen to which Chromebooks my colleague took from my office and simultaneously help a teacher set-up their Google Classroom ("Wait, where did those Chromebooks go?"). I love that messages can be between individuals or set up in group conversations to enable your whole team an easy avenue to communicate with each other and refer back to information relevant to the whole group. Working in a tech department that is always on the go and handling multiple issues I need that ability to juggle multiple conversations at once and you do not disappoint. And if doing push to talk wasn't enough, you include all the great features of normal texting apps including pictures, text, and even GIFs! So in closing, thank you Voxer. I never knew how much I missed the ability to turn my phone into a walkie-talkie until you came along, and the best part is how much more productive you have made me and my team! I think we have a long and prosperous future ahead! Love, Evan P.S. You are just as useful and even more fun with my friends. What better way to amp up a group text then by creating a group vox to talk trash about fantasy sports or our favorite TV show! What were those directions again, just replay the message. How did I communicate before you were around?!? 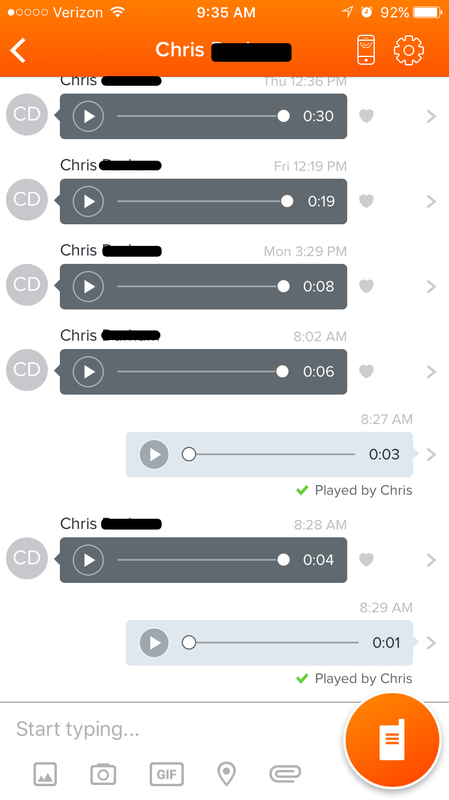 Voxer keeps a queue of the messages you have sent and received for easy replaying. 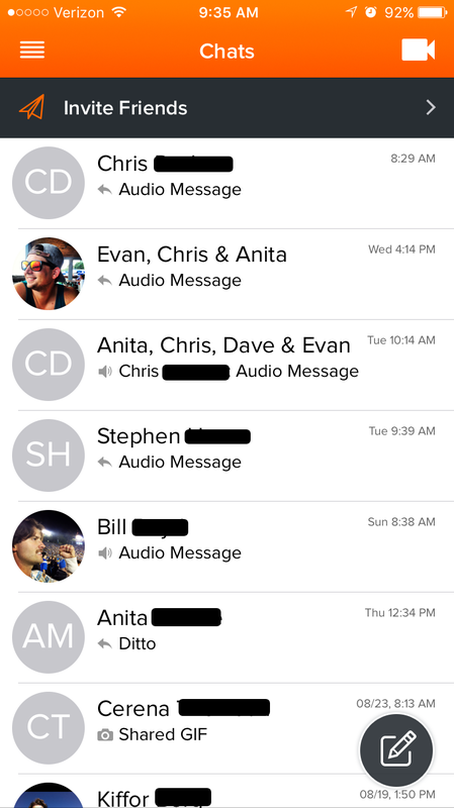 Your messaging is organized by individuals and/or groups and in chronological order. 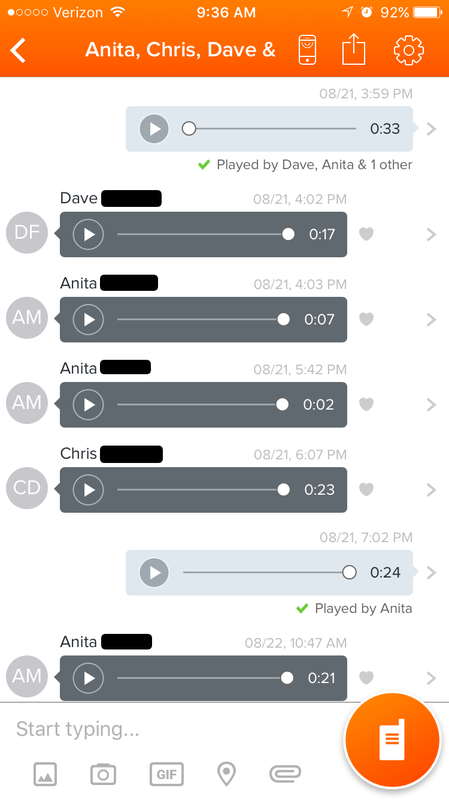 Group messaging is a great way to get a whole department involved in on the conversation.
12 educators from all three of our buildings at Aspen School District (ASD) travelled to Denver at the end of June to attend the annual ISTE conference (International Society for Technology in Education). What is the ISTE conference? It's a massive gathering of educators, administrators, and edtech companies coming together for the purpose of learning from one another how educational technology can be used to help teachers, students, administrators and schools be successful in accomplishing meaningful student learning. Held at the Colorado Convention Center, it is truly a sight to behold. This year’s conference had over 14,000 attendees! Walking through the convention center halls with so many inspired and motivated professionals was truly amazing!
So what does does an ISTE conference look like? It fills the halls of the CCC with teachers, specialists, administrators, etc… buzzing from room to room and booth to booth, trying to find the right presentation for their needs and interests in educational technology. Presentations are held in many different formats: traditional lectures, interactive playgrounds, quick poster presentations, research paper presentations, interactive discussions, panel discussions, workshops, and a massive expo hall space in which companies from around the country and world showcase their latest and best in education. The vast variety of content makes finding what’s interesting and right for you and your school only a few steps away. Topics this year included coding, robotics, blended and distance learning, virtual reality, effective assessment, BYOD (Bring your Own Device), Personalized Professional Development, ISTE standards for teachers, admins, and students, and much much more! Being my second time attending an ISTE conference I could really appreciate everything that was going on and how beneficial bringing educators to a conference like this can be. You are instantly put in a place to network with like-minded educators and grow your PLN (Professional Learning Network) so that long after the conference you are still developing great ideas and new concepts. Being in a new role as a Technology Integration Specialist I was amazed to see how prevalent my new position has become across the country and excited to connect and learn from other’s in my field doing so many great things for their staff and students. Having the ASD teachers who attended come up and express their excitement and motivation during and after the conference was also inspiring. They were able to see how many in their same position could leverage all the tools available to create successful and exciting learning environments. We all left the conference with a renewed, positive outlook on our involvement in education and how we can take our profession and students to the next level. Events like this are so important for teachers, administrators, specialists, and all educators to attend to recharge their outlook on the profession and continue to develop their skills to match an evolving field. It feels good to be part of a school district that values educational technology and encourages teachers to learn and grow in this incredible field. 
Click on the image above to check out my full list of resources from ISTE 2016 in my Digital Tote.
My biggest take-aways:
1. Student devices are here to stay! - With so many newly evolving technology practices within education, students having an easily accessible device is crucial to taking advantage of the new methods capable in a digital world. So many teachers are utilizing the various cloud-based platforms and LMS (Google Classroom, Microsoft Classroom, ClassFlow, Canvas, Blackboard, etc...) systems to make classrooms paperless and more accessible. Many factors play into what device is ideal for your student population and though my district has moved forward with Chromebooks, I can see the advantages of tablet devices and feel like a mix of the two helps address all the needs. BYOD (Bring your own device) policies and programs still haven't found the sweet spot. But just like different learning styles, cause us to change our teaching methods, if a student can succeed with one device over another and has the ability to bring it and take ownership of it, why not let them choose? It seems the most important item is access to some type of device to enable the teacher and student to work together in this new medium of education.
2. Edtech Coaches/Tech Coaches/Tech Integrators/etc... are a growing part of most schools and districts. - It was so refreshing to see such a large group of educators in my same field, working towards the same goals. We have many different names, but it became clear to me that the position of Edtech Coach/Integrator is here to stay. Now that we are here to stay, we can start to connect and share our hurdles and successes. Having the ISTE standards for Coaches is a great reference that can help put us all on the same page working to help our teachers, students, and administrators achieve the same goals. I can't wait to continue to grow in this field and work with other amazing educators passionate about how technology can change education for the better!
4. Technology does not replace great teachers and good teaching! - With everything that continues to help make teaching better, one very simple fact seems to stand the test of time: great teachers are what make students successful! The various tools and strategies can only amplify what is already there. The potential for great teachers to become even better and reach more students with the developments in edtech is staggering. The technology available is finally starting to reach a point that allows educators to think well beyond what was once possible and prepare students for a world and job market that is always on the cutting edge. So all the bells and whistles are great, but it's still the teacher behind the technology that makes it go!
Comment below any of your highlights or insights from ISTE 2016! |
About EvanDirector of Technology for Traverse City Area Public Schools. Level 2 Google Certified Educator. Former Tech Integration Specialist and 4th grade teacher at Aspen School District and Spartan for life! Go Green! 
Categories
All
Archives
February 2019
|

 RSS Feed