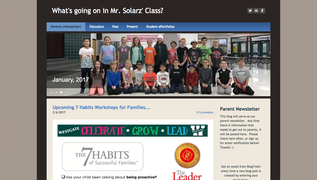
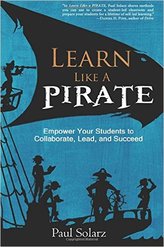
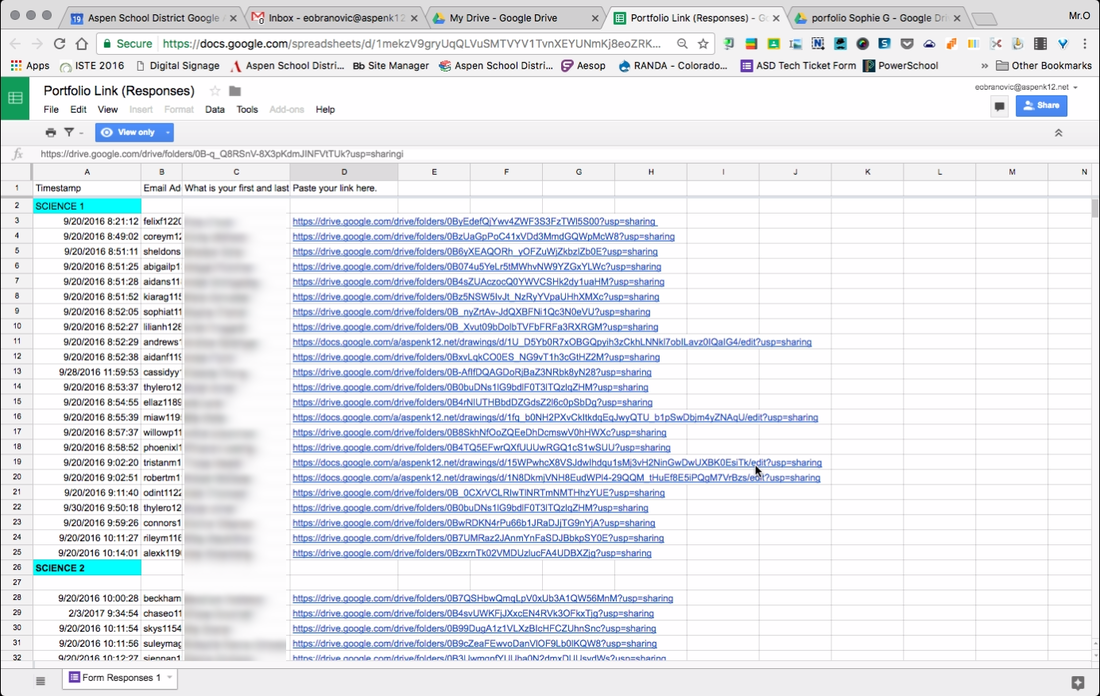
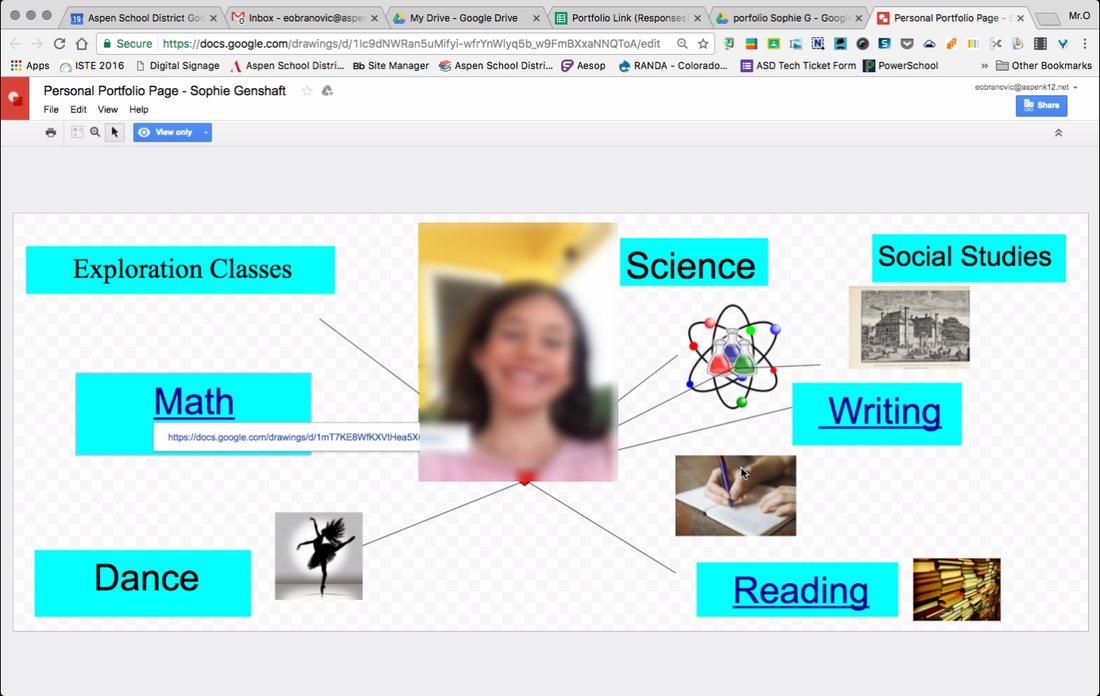
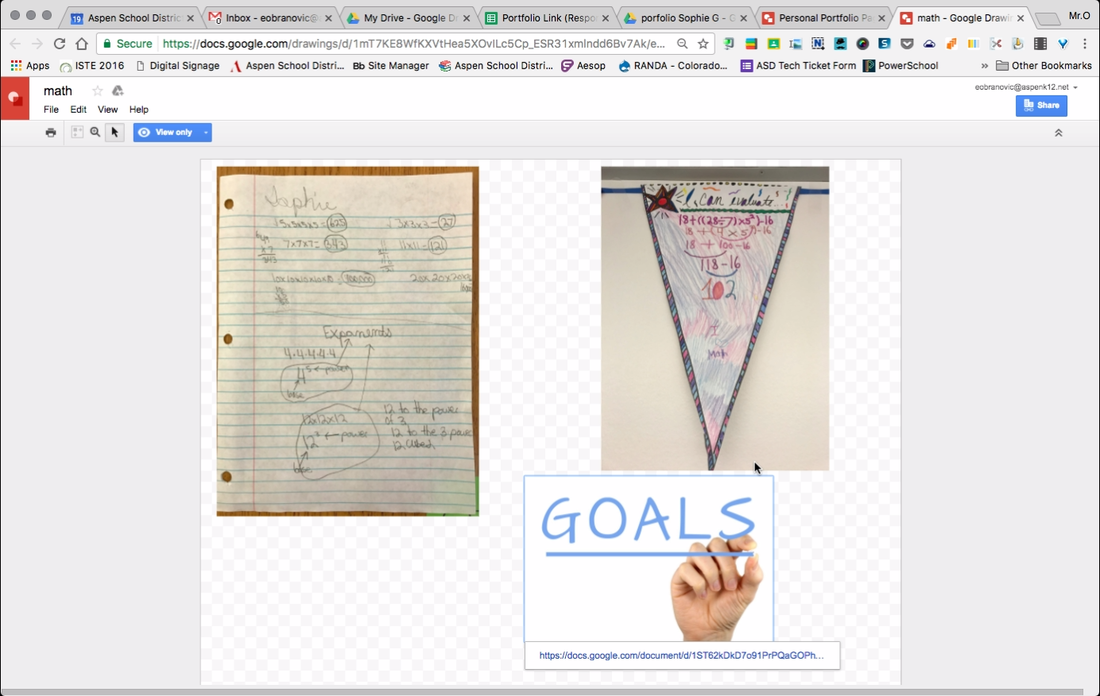
 There's a lot of learning happening in today's classroom and in turn lots of discussion of how we can best showcase that learning for the students' and teachers' reflection on their practices. The buzz word has become digital portfolios! There are many reasons a digital portfolio is a useful way to showcase what is happening in the classroom and no one reason is the best. You have many teachers wanting to focus less on grades and more on conceptional learning and what better way to still have evidence of how your students' are accomplishing this then by having each individual create a collection of their best work to showcase to parents, teachers, students, and the public alike! Project-based learning is another great concept in education that has been gaining momentum and by using a digital portfolio you can easily collect and display all the great work that was happening throughout the project as well as the end result. A great example of what project-based and more specifically, student-led, classrooms and digital portfolios can look like lives in Paul Solarz' classroom and website. Check out his book Learn like a Pirate to learn more about his awesome strategies and all the great work he is doing with his students. Post-secondary education prep has become so crucial in our education system whether that is college or another trade. Using digital portfolios to help students create effective resumes for college or other institutions. These and many other reasons are great justification for the use and practice of digital portfolios. The question then becomes which tool or medium is the best way to create digital portfolios for students. These suggestions below are not a fully comprehensive list, but should give you some ideas on how you could get started or modify your own version: Thinglink- This website allows for easy creation of interactive pages that students can link various resources or digital media to in order to create of collection of work that can be easily shared with others. Google Drawing- If you are using Gsuite then you can mimic a tool like 'Thinglink' with Google Drawing. Students can place text or images on a Google drawing page that can then be linked to other student work. An awesome AMS 6th grade teacher, Mark M., has instituted this method with his own class with great results.
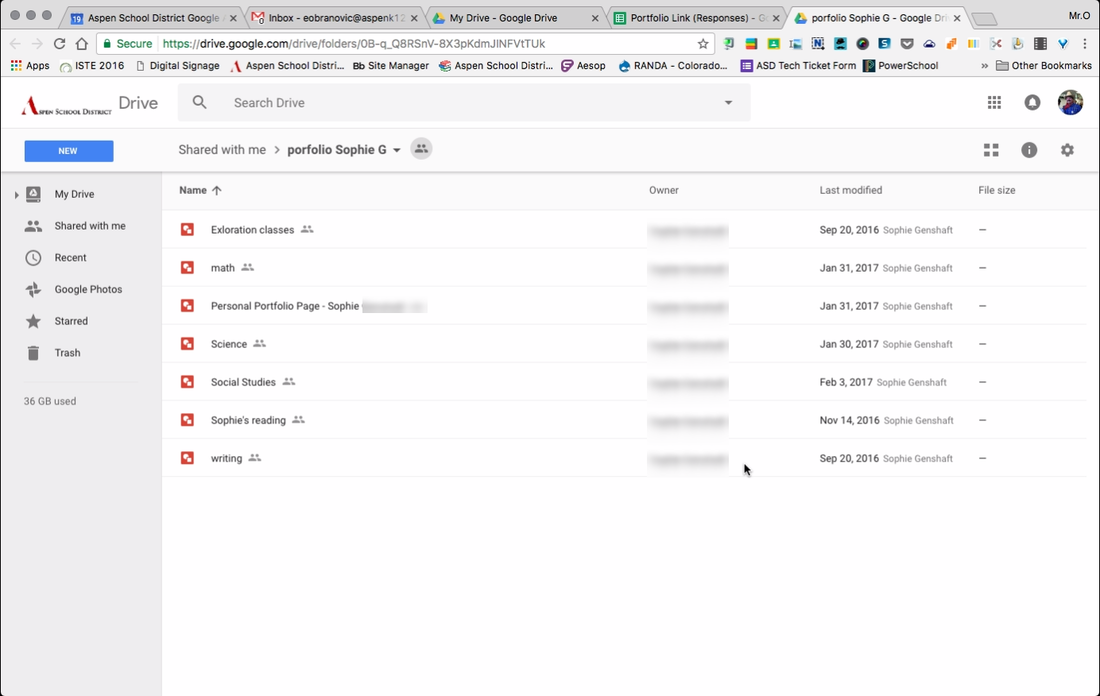
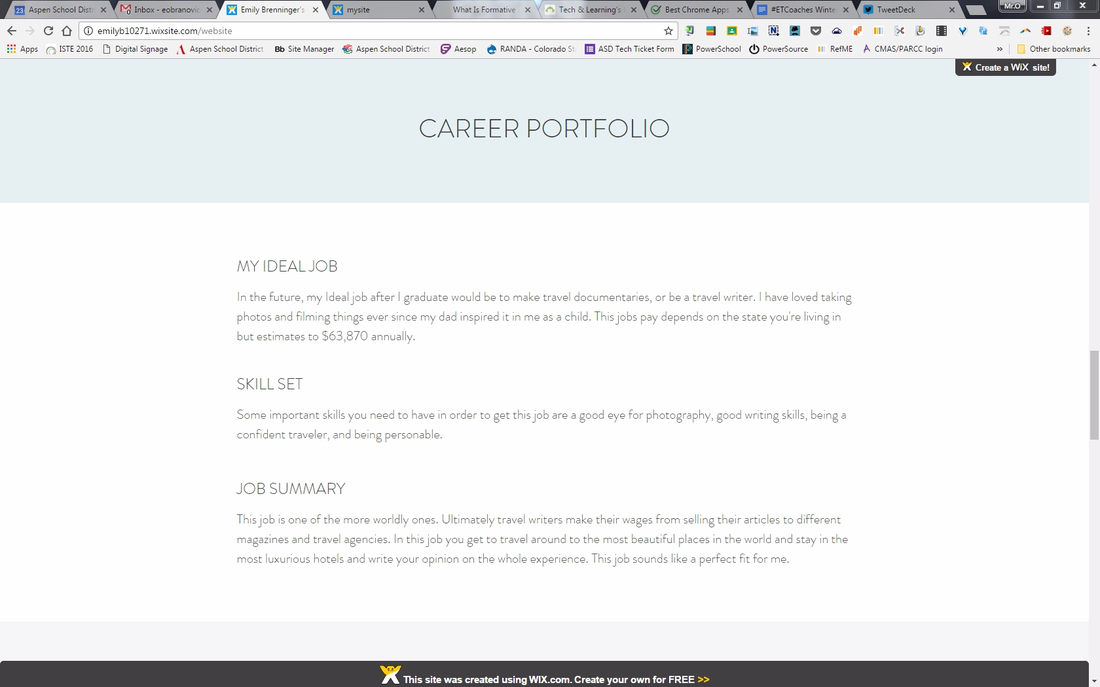
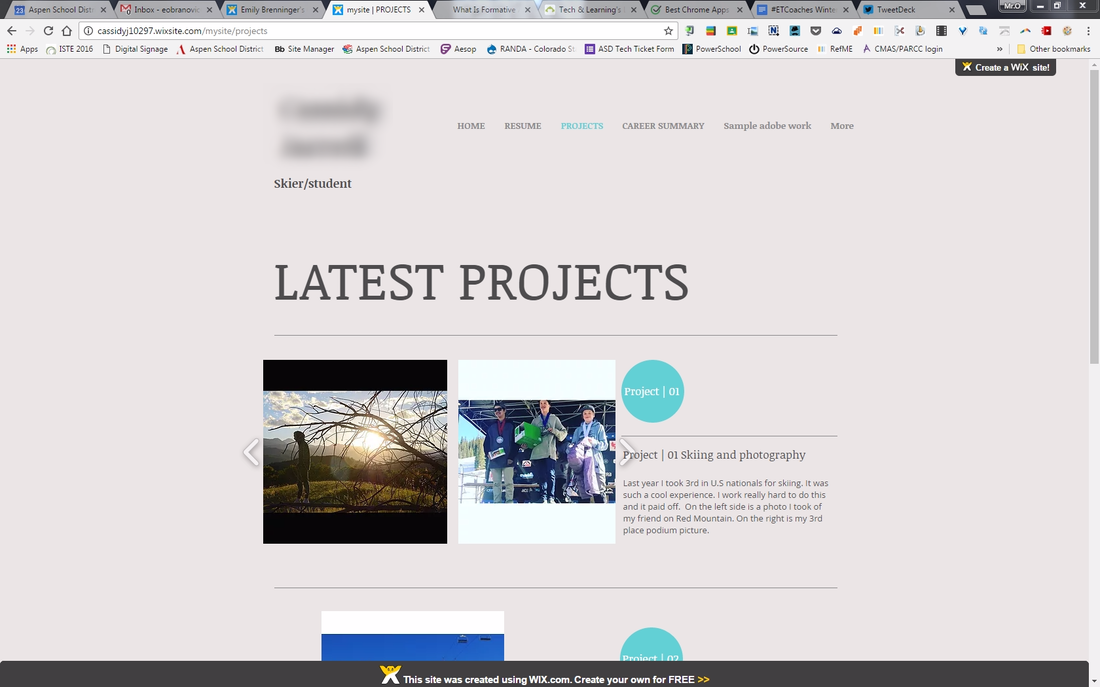
Google Drive- Another simple way to collect student work. Create a folder in a student's Google drive that can have sub folders for various subjects. Students can then simply drop in work they would like to be part of the portfolio and keep a collection going throughout their time in school. Though the collection is easy some downfalls are effective ways to display the information once collected, ability for students to reflect, and the easy of saving items that aren't savable file types, like a link to a web resource. Google Sites- Gsuite users should definitely take advantage of the easy and beautiful new Google Sites as an option to create great looking digital portfolios. Websites are great ways to collect a body of work, provide reflection, and showcase it to the public and in the case of Google sites, the sharing permissions can be locked down for younger students who aren't quite ready to be fully out into the internet. Weebly/Wix- Much like Google sites, Weebly and Wix offer easy to use platforms to create beautiful looking websites that can be used as digital portfolios. They both have very simple interfaces that allow for quick editing that doesn't require a lot of website building experience. Students can collect all types of work and post on the website One of the AHS Business teachers, Sheri S., has her students create websites to help build their 'brand' and use as a piece of an application or resume. Adobe Express- This is a great suite to make a lot of different web-based projects and the ability to make a digital portfolio is definitely one of those options. Accounts are free to create and gives you the ability to make videos, pages, and posts. Be sure to check it out for portfolio options or just a great tool to create digital media. Blogs- There are so many tools out there that can help you blog. Google sites, Wix, Weebly (which you are currently reading), and many others all have options to add a blog section and there are specific tools that pare down a full website to a simple blog interface like Blogger or Wordpress (also a robust website creator). A blog works well for a digital portfolio because it allows a place to collect work, provide reflection, receive feedback, and share with the world. As I mentioned earlier this is a short list and in no way the full quiver of tools and programs you could utilize to create a digital portfolio, but they are a great place to start! Please comment below any tools not mentioned that you have had experience with creating digital portfolios or just your thoughts on digital portfolios and their benefit in education.
1 Comment
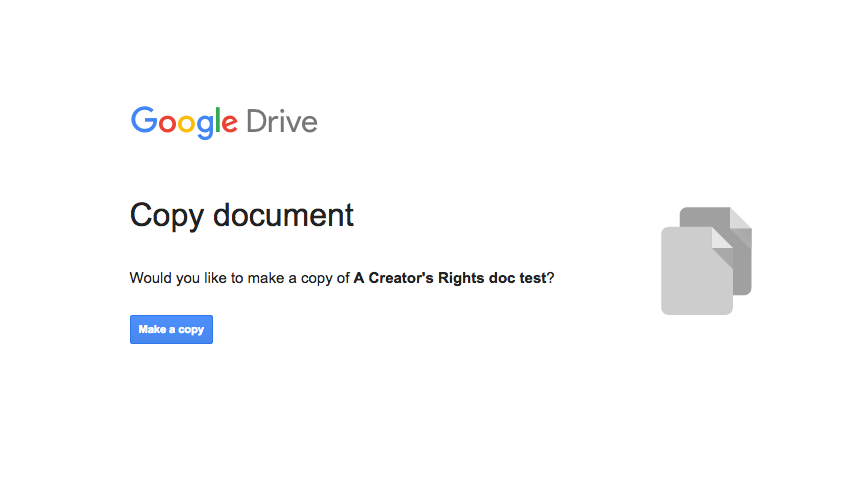
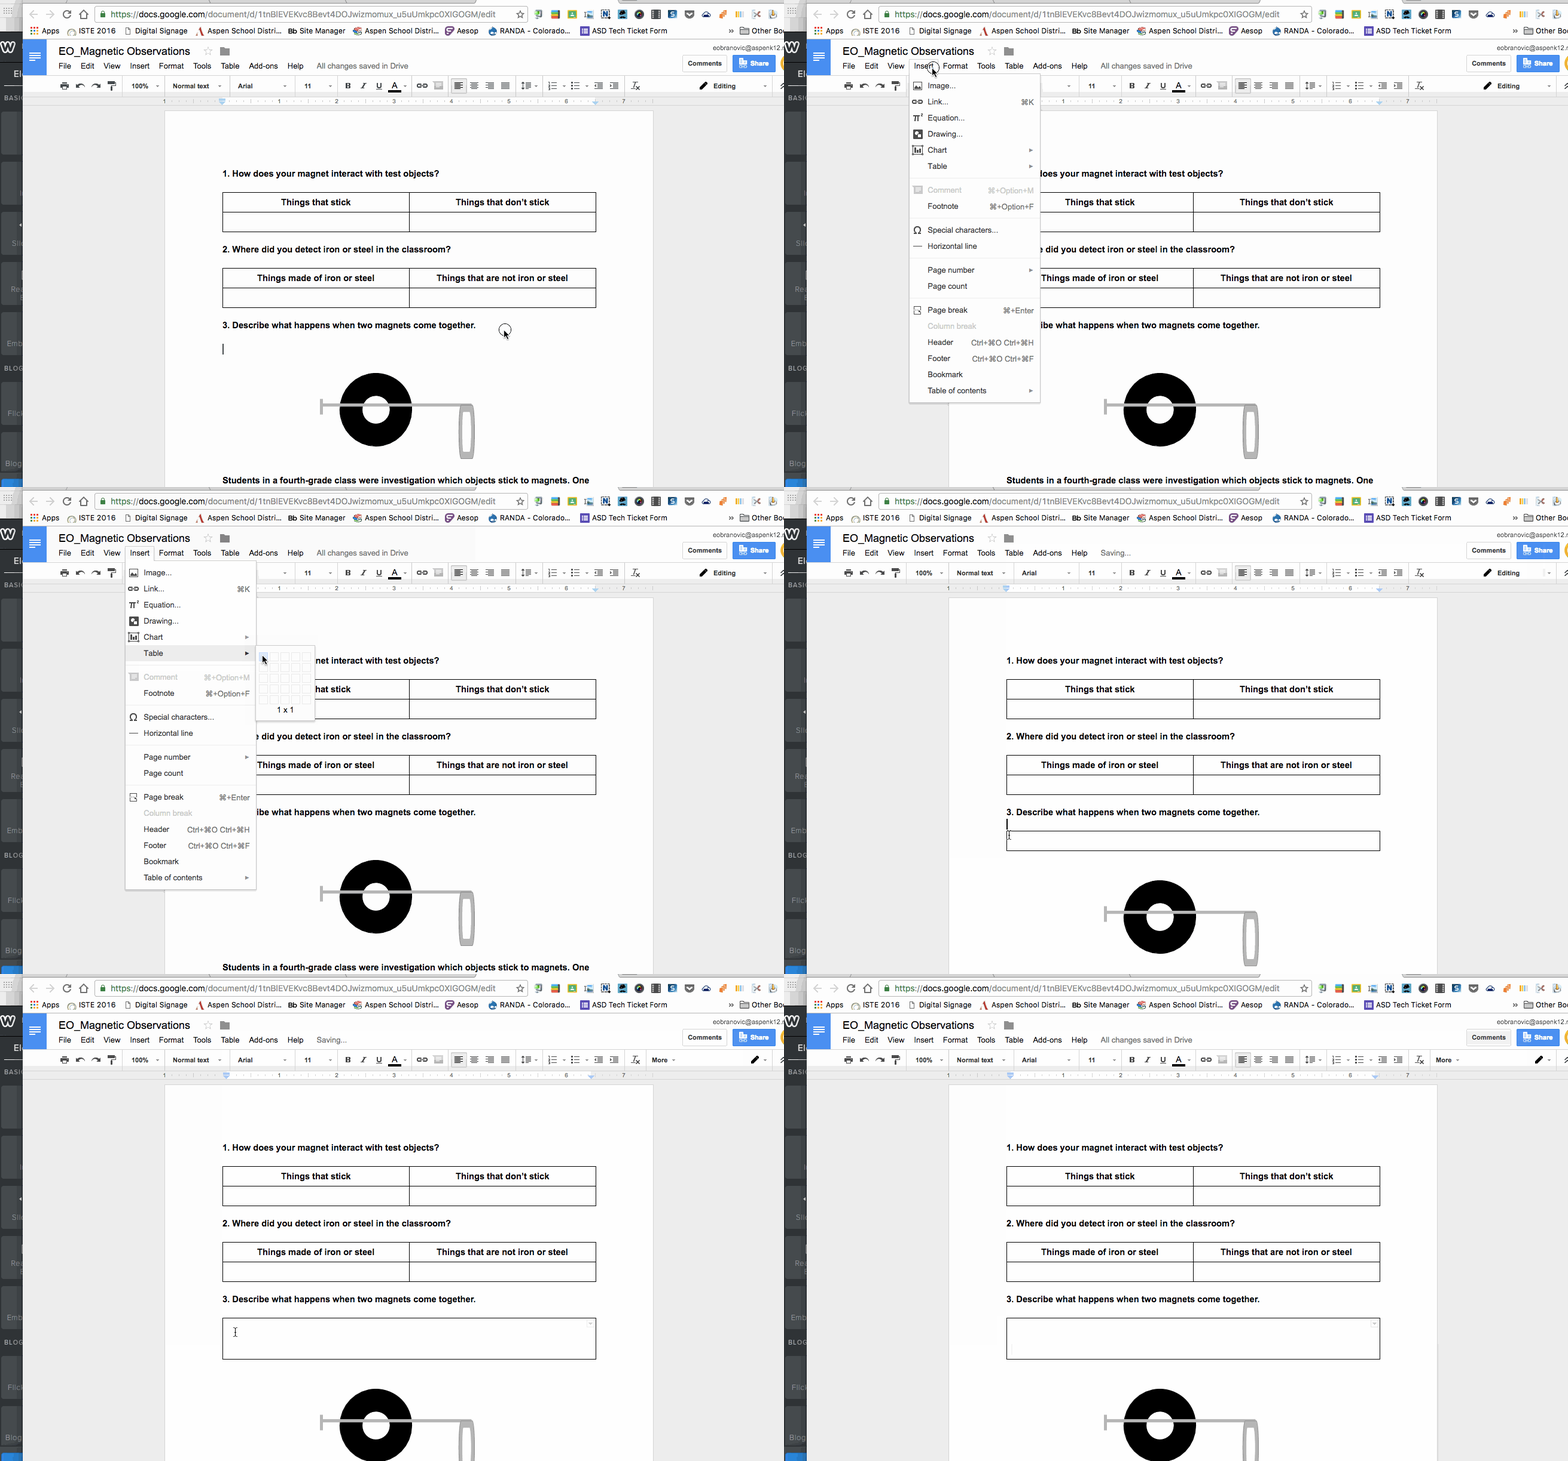
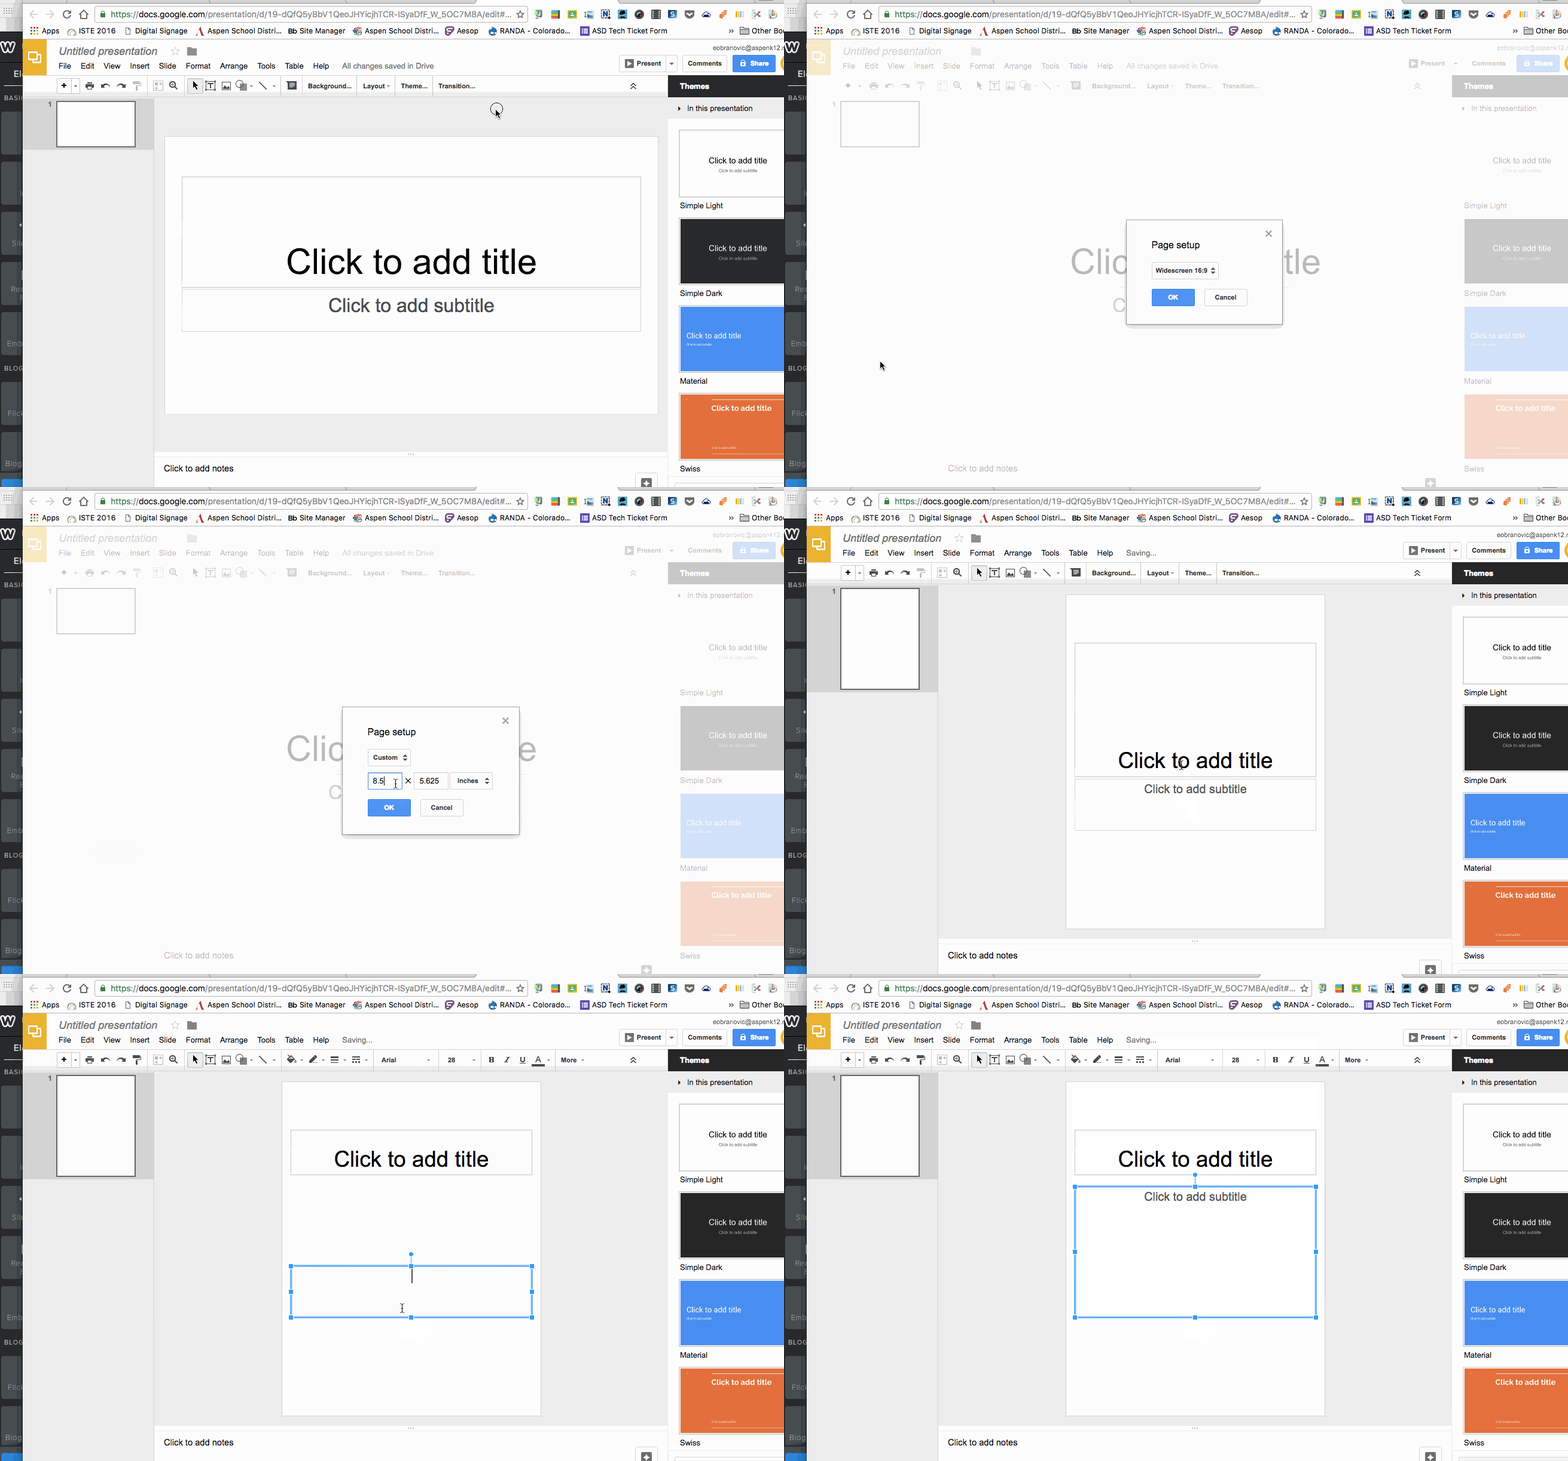
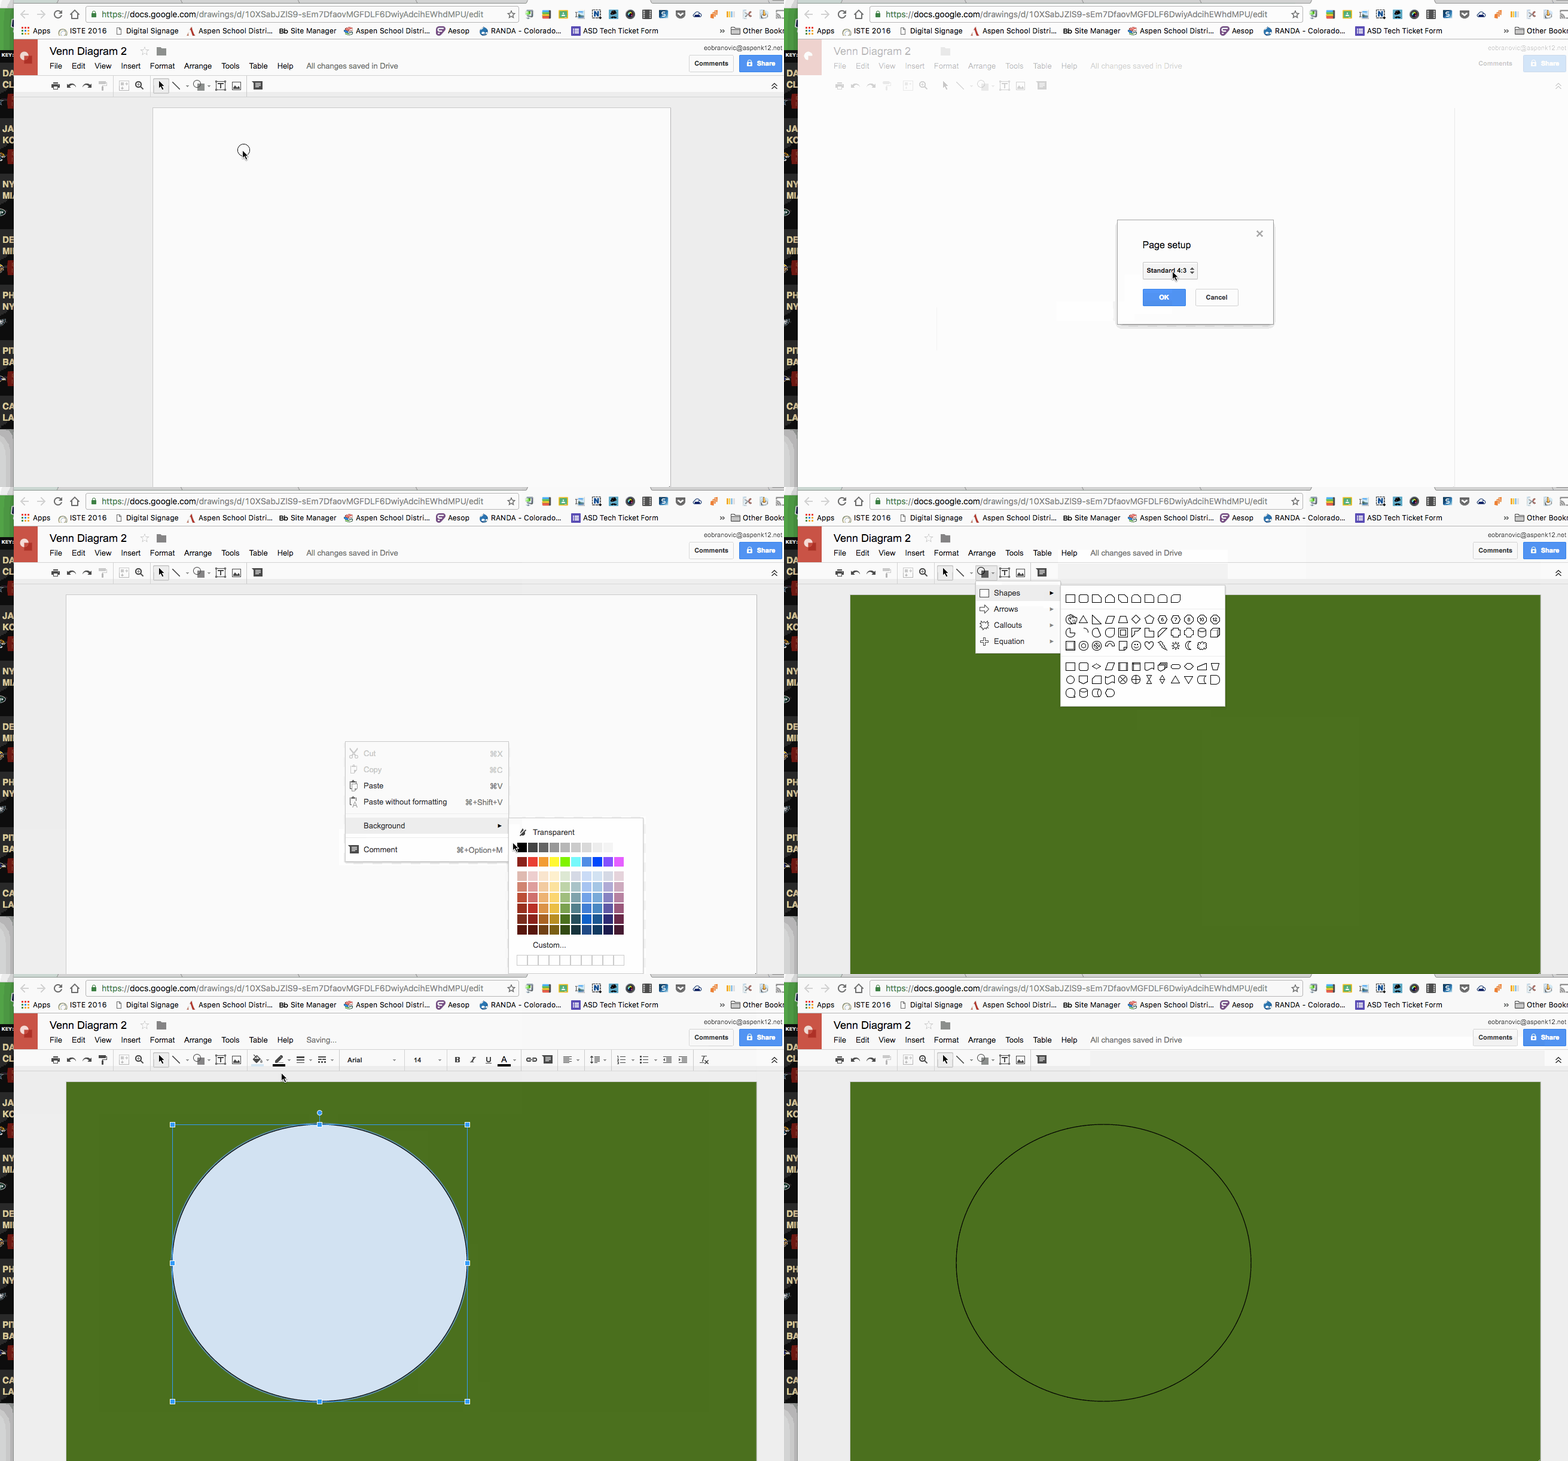
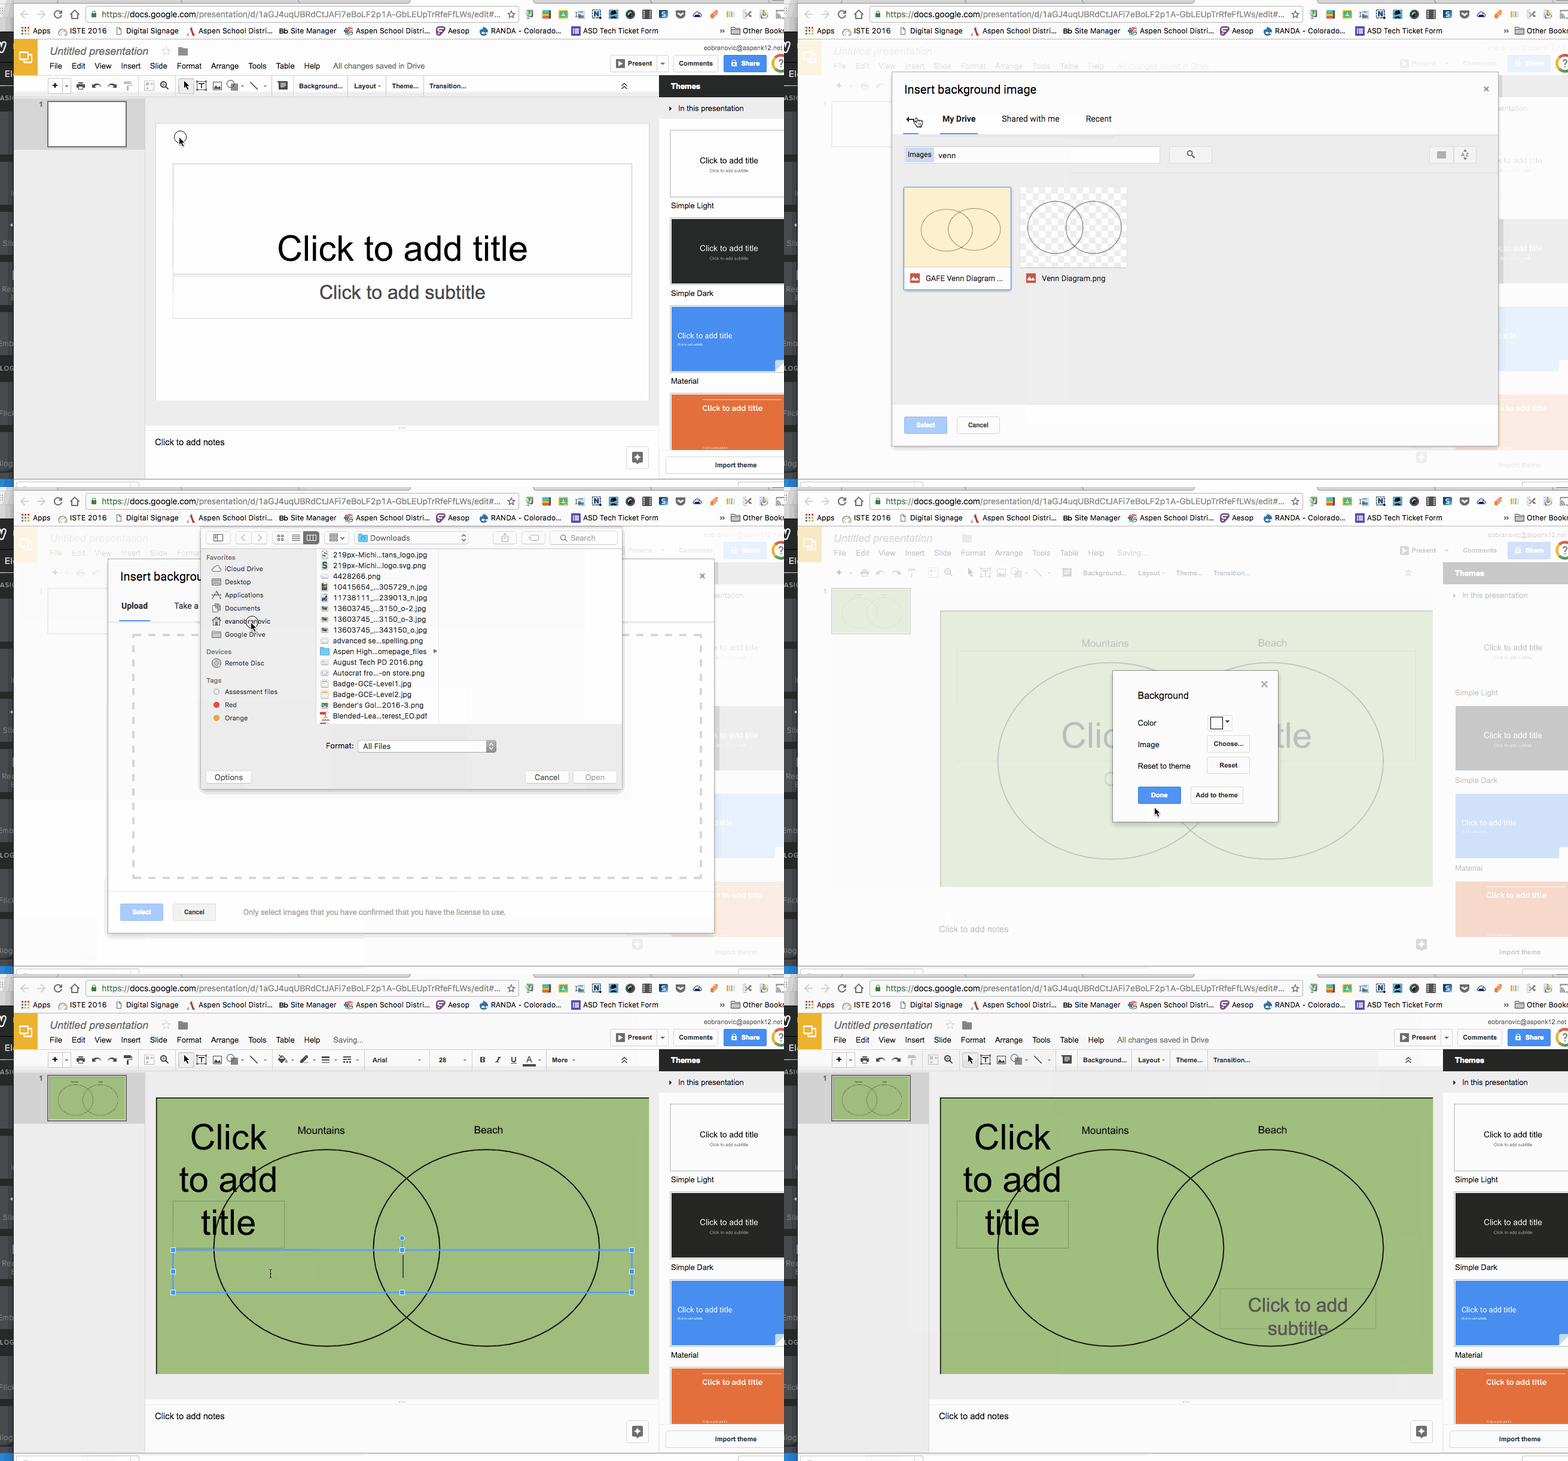
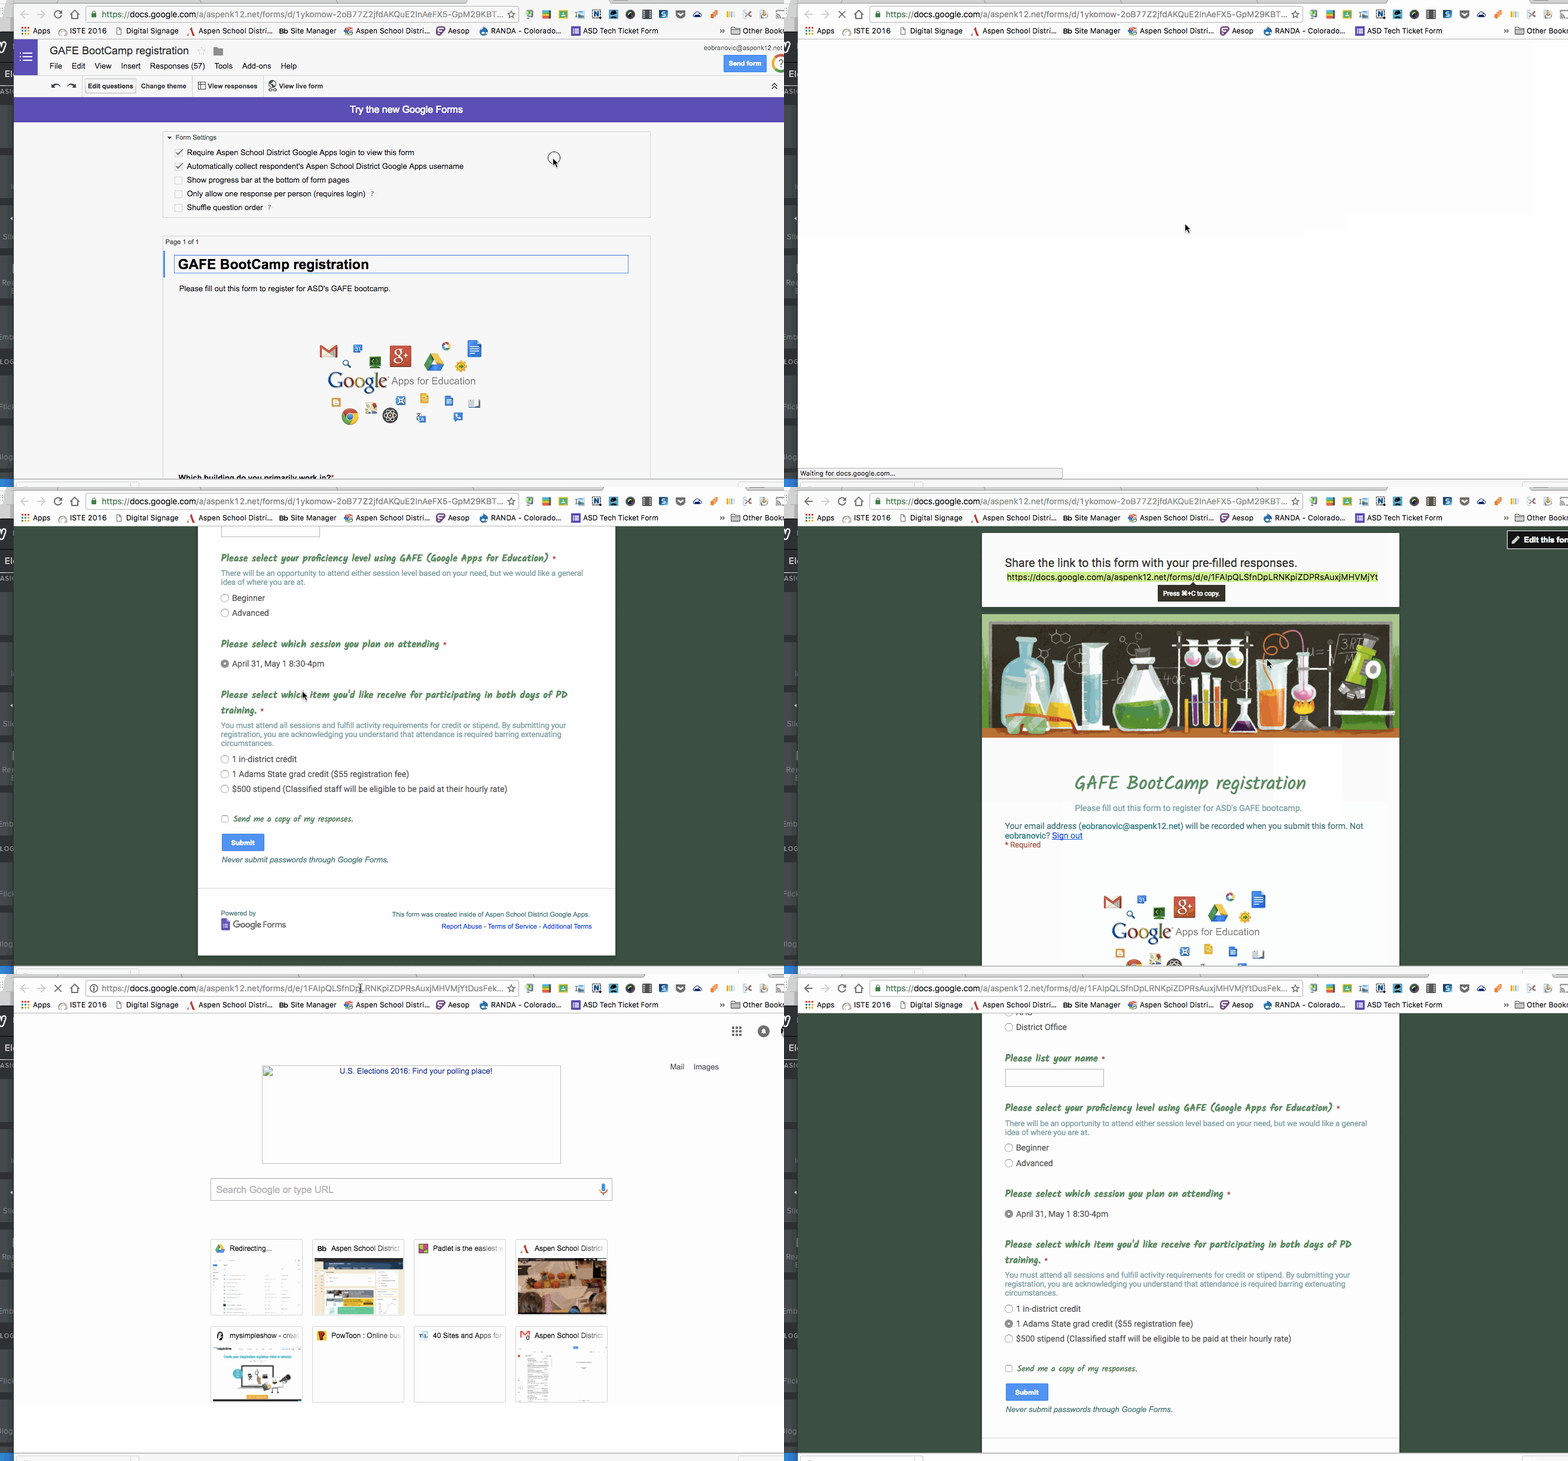
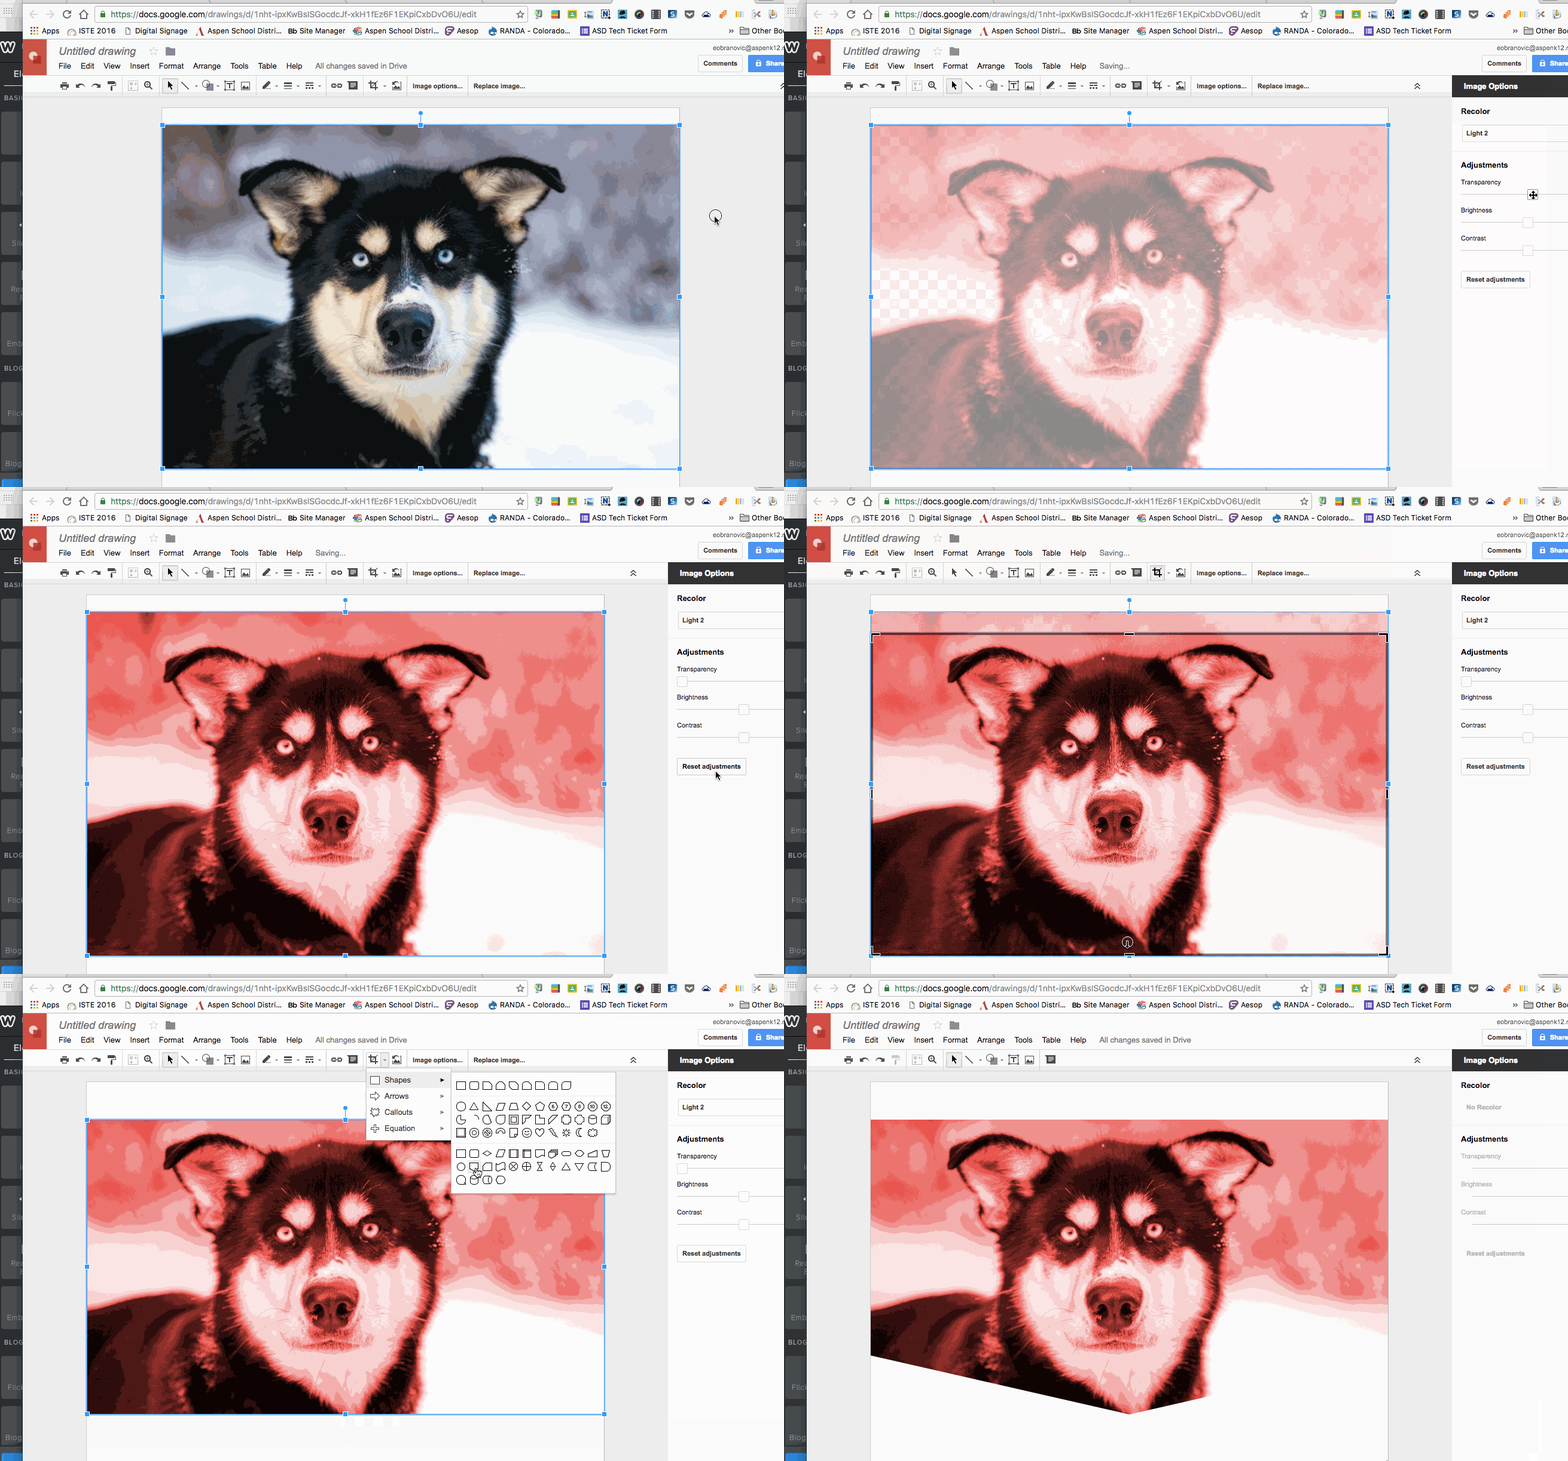
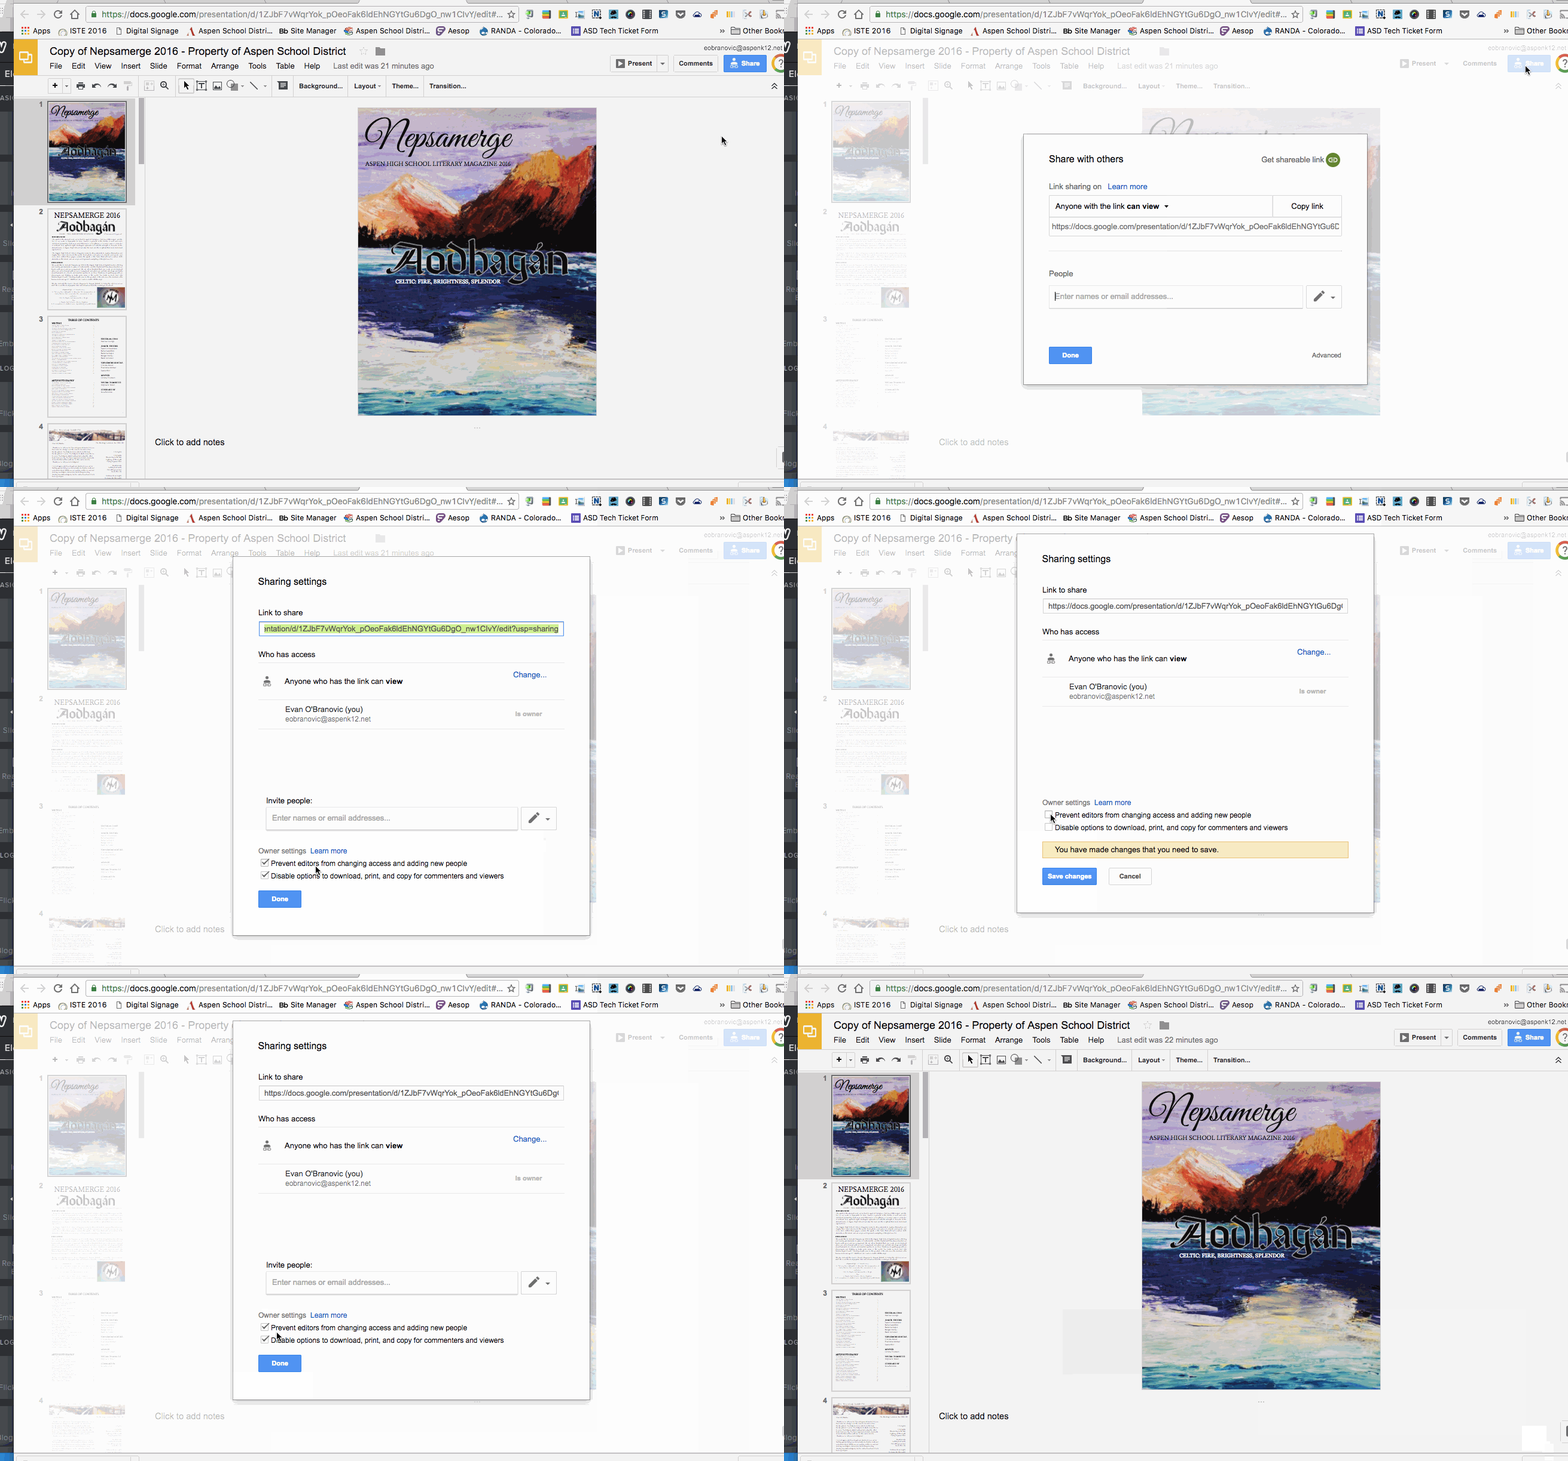
The more you work with Google Apps for Education, the more quick hacks and tricks you find to make them work best for you. As much as we all love GAFE, no tool can do it all, and you need to be adaptable in order get things done that help you and your students succeed. If you're like me, you been shown, and discovered, some quick tips and tricks for many of the GAFE components. I thought I'd start a list (that will inevitably grow) of some of the ones I've found most useful: 1. Force copy - Unless you are handing something out through Google Classroom you've probably run into the trouble of making sure other people are making a copy of your work and not editing your original or have trouble with the process of copying. Use force copy to shorten the process and ensure the recipient has a editable copy of your document all to themselves. All you need to do is replace the end of the link from your edit screen with the word 'copy' and copy that link to anywhere easily accessible to your desired audience. I have used the force copy link to share out templates with students and to allow professional development participants easy access to documents they can customize or take notes on. You can use the force copy trick for just about every GAFE tool (Docs, Sheets, Forms, and Drawings) So stop worrying about outsiders ruining your documents and start spreading the love! 2. Tables in Google Docs - You are probably familiar with the ability to insert tables in a Google Doc, but have you redesigned the purpose of this ability? When first implementing Google Docs many teachers jumped at the chance to create digital worksheets, but quickly had issues with where the content created by students should go to make the activities easy to view and provide feedback for. By creating a simple 1x1 table underneath a question you require a written response for, you now have a text box that will grow with any amount of content and keep answers organized on the page. No need to stop at a 1x1 table. Inserting a mute-cell table enables you have students respond to more complex questions and help continue developing critical thinking questions and answers. 3. Page size in Google Slides - Adjusting the page size in Google Slides is a quick and easy way to adapt the standard presentation format into something different and engaging for the students. A simple change to 8.5in x 11in will create a great magazine template that can be easily shared and worked on by an entire class. One of our AHS English teachers used this formatting trick to create a wonderful literary magazine (Nepsamerg 2016) that her students were able to quickly and easily edit and publish. The formatting made basic graphic design easy for all students and enabled each one to put a personal touch on the final product. 4. Google Slides backgrounds in Google Drawings - If you have really taken on the use of Google Slides as a presentation and student-work tool in your classroom then you need to take advantage of your ability to customize the backgrounds using Google Drawings. Change the page size to match your slide and create a slide background that cannot be manipulated or erased by another user (unless they change the background as a whole...). This is a great way to make assignments using Google Slides that can be shared out via Google Classroom. Make sure once you have created an image you want to use as a Slides background that you download it as an image file type (preferably a .jpg or .png) or Slides won't recognize it as a viable option. 5. Pre-filled Google Forms - Are you using Google Forms to collect all types of information from staff and students? In the case when you want to collect some individual information, but also have pieces that will be the same for anyone submitting you can utilize pre-filled forms to get what you need and keep a consistency for certain questions. Our district has found this extremely useful when creating registrations for in-district courses for staff. The pre-filled Google form creates a great roster that can then be shared with HR. This is used in my district to have staff create registrations for in-district course offerings that require rosters for HR. Course Instructors can then easily collect information from interested staff members while keeping some of the important information for HR consistent. 6. Photo editing in Google Drawing - Photo editing can be complicated, but if you're in need of basic and simple changes insert you picture into Google Drawings for a quick way to resize, crop, fade, brighten, contrast, or recolor. This skill set is very similar to creation of Google Slides backgrounds mentioned in trick #4. One thing to remember is to make sure to download the file as a photo (.jpg, .png, or .svg) in order to have it be recognized by other programs as an image. 7. Limiting Sharing Options - When you want to share a document with your colleagues or the world you may be hesitant to put it out there for anyone to take share with others or create their own copies and use your work without giving you credit. Recently added are two options to limit others abilities to share you documents. When you go to 'advanced options' options you can now select to "Prevent editors from changing access and adding new people" and "Disable options to download, print, and copy for commenters and viewers". These options are great for sharing sensitive information that you would only like a specific group to see or safely sharing others work with a larger audience without the worry of work being taken without permission. There you have a few ways to get the most out of your GAFE tools. The more we use GAFE the more ways we find to make sure they work best for our needs. I have no doubt that I'll be updating this post with more tips and tricks as time goes on, but if you have any that work for you, feel free to leave them in the comments below.
This is the second GAFE summit I've been able to attend and I'm always amazed at the innovate and new ways educators can use Google Apps for Education (GAFE) to accomplish so many things in the classroom and promote student learning. Below you will find my thoughts and take-aways from the sessions I attended including a quick reference guide Google Presentation.
Fueling Future-Ready Students with 20time The opening keynote was an eye opening look at utilizing 20time in the classroom. Kevin Brookhouser spoke to his own experience in the classroom giving his students 20% of their time to work on a project that means something to them. He found he was able to create powerful learning that was engaging to the students. I loved his emphasis on completion of student projects rather than perfection and that students need to feel comfortable sharing and exploring "bad" ideas in order to develop good ones. Paperless Projects: Google Slides as Project templates This was an eye-opening look at how Google Slides can be used to provide templates for student projects and easily handed out and collected with Google Classroom. The speaker notes section for each slide can be used to record instructions for the project. Slides can also be graded with a custom rubric using Doctopus and Goobric. If you want a background template on a slide for students to base their work on you can easily change the background of a slide (individually or for all slides) using any image or a Google Drawing. Slides provides for a great way to provide guidance for various types of student projects that can be fun and dynamic. Check out Nate Paul's presentation for a more detailed overview on how you can utlilize Slides in a multitude of ways. Dynamic Google Drawings Google Drawings is an often underused GAFE tool that has many applications for teachers and students. The drawings you or students create can become interactive posters by adding links to videos, websites, images, sound clips, and other Google apps. It's also a quick and easy device for basic photo editing or modification. Creating backgrounds and templates for Google Slides was my biggest take-away for the uses of Drawing. It allows you to customize any type of graphic organizer (chart, graph, venn diagram, etc...) that your students can work off of without fear of accidentally altering or deleting crucial pieces. Preparing a Staff for Major Change There are lots of changes happening in education and in order for one to be successful all the stakeholders have to involved. Rushton Hurley did a great job talking through changes he has helped educational organizations make, focusing on adopting and utilizing educational technology. The one concept that really stuck with me was his feeling that all parties involved in some type of change need to truly be able to explain, justify, and understand both sides of the proposed change in order to effectively move forward in any type of decision. I think this often gets lost in making a decision that stakeholders are firmly on only one side of the fence which results in a change that isn't fully supported and facing an uphill battle. Check out Rushton's website, http://www.nextvista.org/ for great free resources, videos, and contests that you can do with your students. Google Sites 1.0 Google sites has not been my favorite platform for building websites, but it has begun to grow on me as I have seen what others are able to accomplish with it. Michael Wacker showed me how to set the custom footer on your Google Site in order to create links and information that are specific to the visitors coming to your site. Another nifty trick is using Google Drawing to create your very own Favicon for your website (that mini icon on the browser tab). Google Drawing can also be used to create a custom header for your website, which if you have ever tried inserting a photo into a header section of any website without formatting its size you can understand the frustration of trying to move and resize a photo within a header. The integration of other GAFE tools with Google Sites has slowly started to bring me around to the idea of utilizing Sites as a web-building tool. Demo Slam Demo slams are one of my favorite events at the GAFE summit because of their instant gratification in learning and using new, cool tools. Four demos really stood out to me this year: 1. The ability to insert Google Slides into Google Maps to make a really engaging and unique presentation. 2. The add-on "SaveAsDoc" which allows you to take information in a spreadsheet (typically collected in a Form) and quickly save it as a Google Doc which makes it much easier to read and process. 3. The Chrome extension "Black Menu" is an amazing all-in-one menu to access everything Google from your browser and even work within the extension so you don't lose your current tab. 4. The biggest take-away is an amazing extension and web teaching device called DocentEDU (you may need to load unsafe scripts if you're using Chrome). This fantastic tool allows you to adapt any website of your choosing into an interactive lesson for students. I had an opportunity to chat with one of the co-creators, Karin Hogan, after the summit and was incredibly impressed with this device and how useful it is in the education. Assessment in the Digital Age Assessment is always something educators are looking to improve upon and the GAFE tools are making constant improvements to how we can assess all the time. Using Google Forms is a great way to complete formative and summative assessments. It's now easier than ever to add elements like pictures and YouTube videos for students to reference as they complete the form. On the response end you can use conditional formatting to quickly check for right and wrong answers as students complete your quiz and if you haven't checked out the Autocrat add-on to send automated responses and feedback forms then your missing out on a great time-saver and feedback device. As useful as Google Forms are for creating assessments and gathering data there are several other options out there that make assessment fun and dynamic for students: Quizizz, Socrative, and Kahoot are all great game-based assessment tools you should also spend time looking into. How to Survive a Zombie Apocalypse w/ Google This was a unique way at looking how encouraging students to solve a large complex problem and use GAFE tools in order to put a plan for a solution together. James Sanders is always looking to make educational technology dynamic and innovative to encourage students to learn. The problem you have students solve doesn't have to revolve around surviving zombies, but there are many scenarios you could create that would engage your students and require them to use a variety of cross-curricular skills and tools in a fun and engaging way. Check out James' website, classroominthefuture.com, to learn more about all the great projects he's working on. 30+ Forgotten buckets of Googlicious Awesomeness There are so many tricks and tips for using Google and web that go un-utilized. Michael Wacker went through a laundry list of items that are both fun and useful. Many people don't know that by right-clicking on the Omnibox (a.k.a address bar) you can customize the search engines that are used when making a quick search. Most people are aware of Google translate, but enabling the microphone access can be a great way for students to practice their speech and self-assess if they are pronouncing words correctly. Peanut Gallery films and Google Story Builder are quick and effective ways to digitally express stories and ideas. Wacker is continously updating this list so be sure to check him out from time to time to find the next great Googlicious item. Build you own Android apps (and learn to code) The explosion of students learning coding has lead to a whole new way of learning to problem solve. Kevin Brookhouser demonstrated how anyone can use the free software on MIT App Inventor and create simple to very complex applications for an Android device. Check out that website as well as code.org to find tons of free resources to teach and learn coding. |
About EvanDirector of Technology for Traverse City Area Public Schools. Level 2 Google Certified Educator. Former Tech Integration Specialist and 4th grade teacher at Aspen School District and Spartan for life! Go Green! Categories
All
Archives
February 2019
|


 RSS Feed