 Providing meaningful feedback for students is one of the most powerful tools for educators to create meaningful connections and learning. It never seems like one method will check all the boxes in allowing students or teachers to get that feedback to other students so they can reflect on their own work. With the addition of technology in the mix, it has proven even more difficult to find effective ways to allow students to give and receive feedback on digital work. Working with a 2nd grade teacher we were struggling to find ways for her students to make comments on hand-written and digital writing in a way that could be collected and reviewed later by both the teacher and the students. Some of the obvious options came up: wanting to use Google Forms for students to easily type in comments and Google Classroom to collect and share digital writing. We had the outline to how we thought we could get it done and now we had to find how to best adjust the tools at hand to work in a way that was easy for the students and teachers and could be replicated over and over again. docAppender - If you haven't heard of docAppender it's a Google Forms add-on that will send responses to an specific Google Doc based on some of the parameters you set-up ahead of time. The initial set-up can take a bit of time (this is where Google Classroom comes in), but then you have a form that will send each response to a easily readable Google Doc that can be shared and used repeatedly to create a running record of feedback. Google Classroom - I'm only going to assume you haven't heard of Google Classroom because you have been living under a rock with no Wifi and refuse to join most of the world in utilizing GSuite (j/k, well kinda...). The ability to organize a workflow between students and teachers with Classroom is game changing. It has made working in a digital, "mostly" paperless environment user-friendly and effective. When it comes to creating assignments, handing out individual templates, and easily collecting student work of a variety of medias I don't have much negative to say. There are no perfect systems, but we won't get into those in this post. So now you know the tools, but the key is how you make them work together. The docAppender add-on doesn't need Google Classroom in order to function, but it makes it go much smoother. As mentioned above the docAppender add-on will allow you to sort and separate responses to a Google form onto specific Google docs which makes it a great way to get written feedback for specific people and then share that data with those people without sharing other feedback. Using Google Classroom lets you easily create a document and folder location to keep all the feedback documents together for easy sharing and use. Take a look at the screenshots below to get an idea how to get the process started.  Go to the add-ons and add the docAppender add-on to your Form. This will now be available for all future forms you create. 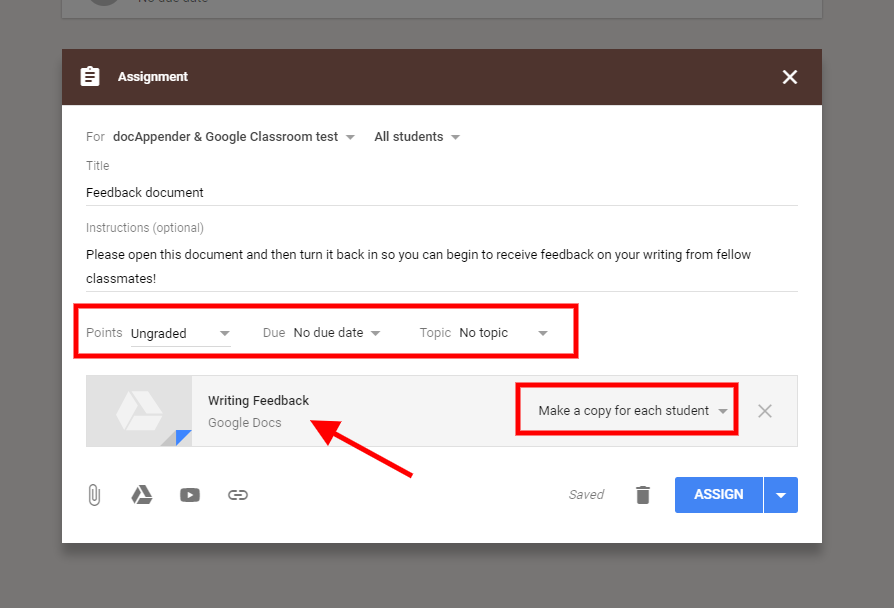 Create an assignment in Google Classroom that will hand out a blank template to your students. Make sure you choose "Make a copy for each student" and have the students turn the document back in so you have full edit access to them. 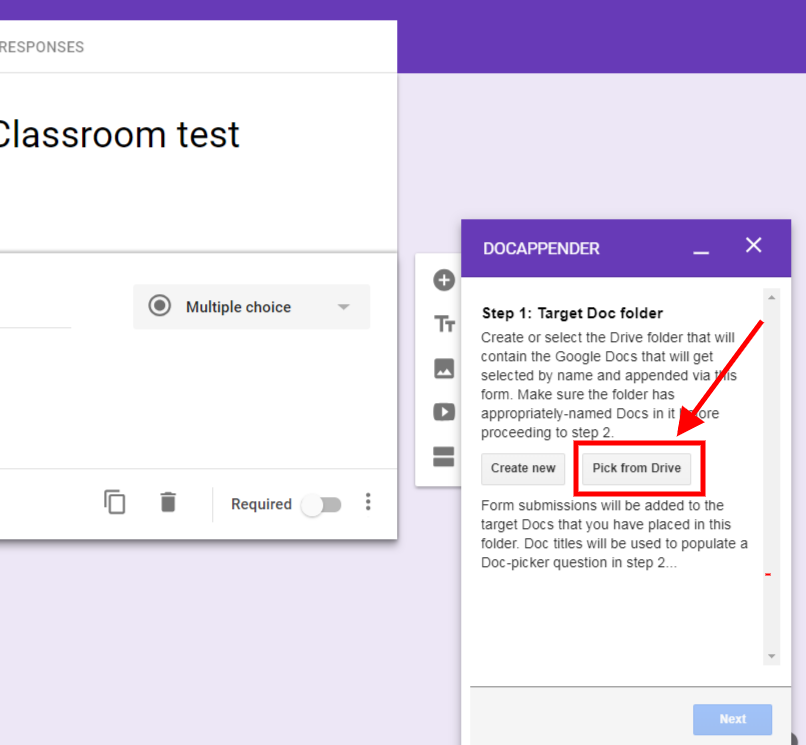 Open up the docAppender add-on and walk thru the process of setting up your connection from the Form to your student feedback documents.  Since the folder was already created via the Classroom, select "Pick from Drive" and find the assignment folder with the feedback documents. 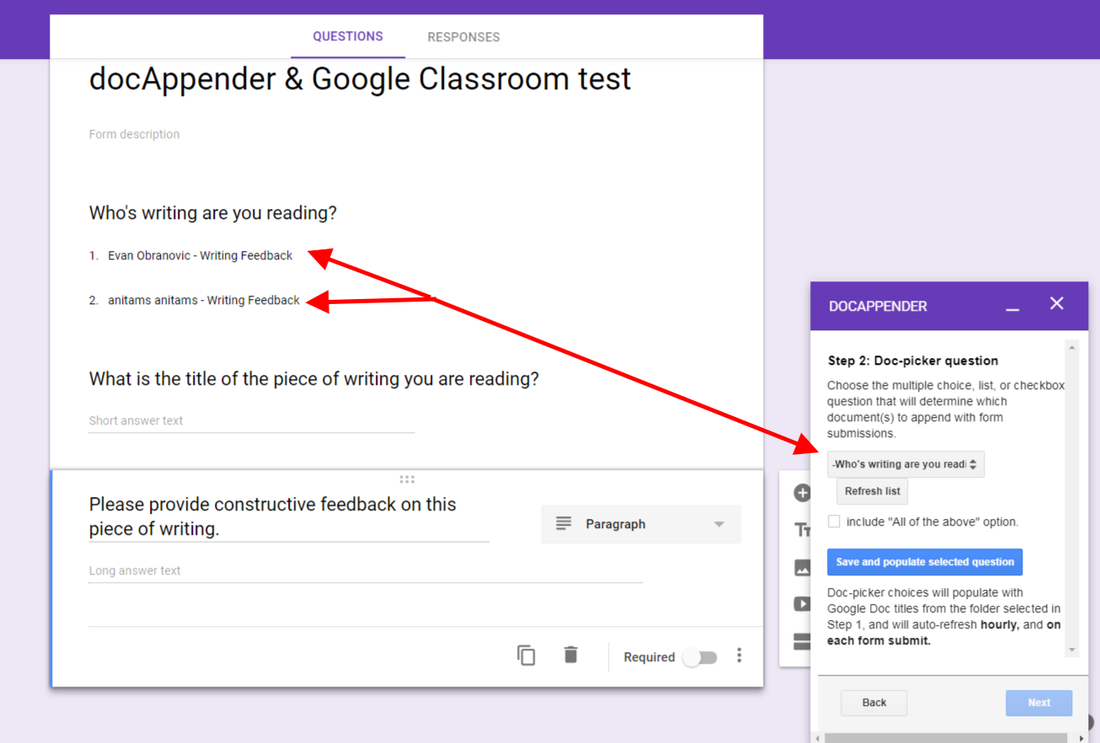 Create a question for students to choose their peer author who's writing they are giving feedback to and the names/answers will be automatically populated by the titles of the documents in the feedback folder.  Create questions to identify and provide feedback to the author that will be displayed on their feedback document.  Students can then fill out the Form as many times as needed to provide feedback to one or more peers on a variety of writing.  Students can then go back to the Classroom assignment to view any feedback they were given on a piece of writing. Students would have access via the Classroom or their Google Drives. So there you have a "daisy-chain" of two great tools to help facilitate peer feedback in your class. Many modifications can be made to suit your specific needs such as creating multiple documents for different types of writing, but if you include the right identification questions it may be just as easy to keep one big running record of feedback to not overwhelm a student with different documents to sort through in order to see their feedback. Making the connection through Classroom makes it really easy to create the documents and identify them by student name as well as give you as the teacher access to everyone's work and feedback. If you have any systems like this or good modifications/suggestions please leave them in the comments below.
2 Comments
I was very excited to have an opportunity to attend and present at the EdTechTeam Summit April 29th-30th in Breckenridge, CO. I always jump at the chance to take advantage of an event so close to Aspen that never disappoints and always provides me with great resources and ideas to take back to my staff. Below you will find some of the strategies and tools that stuck out to me during my two days at this awesome event:

Make Learning Visible! Creating Student Digital Portfolios with the new Google Sites - Everyone seems interested in utilizing digital portfolios as the most effective way to display student work, and most importantly, understanding. The biggest question has become how do we do it? There are plenty of avenues out there and if you are a Google school then I think the new Google Sites has to top your list. The site revamp has really made sites a useful tool and with many of the same sharing and privacy functionality as a Google Doc it becomes very easy for students to use and limit visibility until the time is right. Some updates to the functionality of the teacher-student workflow would be nice (Hey Site Maestro!) but I think the pros far out weigh the cons. Check out the amazing resources and presentation by Pamela Lewis for more great info on getting started.
Map What? Map That! - Google Maps and My Maps are two amazingly powerful tools that can be taken advantage of in many ways in the classroom. Mapping data from a Google Forms survey can give incredible visual context to what is being collected. By coming several of the GSuite tools a fun and interactive scavenger hunt can be created that has students traveling to various locations around the globe watching informational videos on YouTube, answering questions in Google Forms, and retrieving information from Google Slides and Google searches. Check out Leslie Davison's presentation for more details on what activities like this can look like. Zero to Ninja: Sheets and Forms- EdTechTeam's Michael Wacker walked us through the process of becoming Google Sheets and Forms Ninjas by completing a self-paced activity that earned you digital badges along the way based on your completion. So while learning a bit more about Google Sheets and Forms was nice, the real take-away I had was the process of becoming a "Ninja" and earning the digital badges that came with each level of accomplishment. The process was set up through Google Slides which provided the instructions for each activity and then a final submission of which levels you completed via Google Forms gave you the necessary codes to get your badges and keep them in a Google Sheets trophy case. The badging process was facilitated through a great add-on created by Daniel Sharpe that can easily be used for multiple applications. I see so many applications of this process both with students and teachers. Check out Wacker's site with the ability to become a Ninja in all the GSuite apps. There you have three of my big take-aways from yet another amazing two days of PD, learning, connection and excitement at the EdTechTeam Breckenridge summit. Below you will find another summary of my reflection on two things learned and how I hope to apply them in my own practice. Feel free to comment below on any experience you have had with any of these tools/ideas and what works for you and your students/staff.
Many people have been talking about flipping the classroom, but I feel like it has hit a wall when it comes to implementation. Some of the road blocks are obvious: lack of access, lack of training/PD, and unclear learning targets, but what are other reasons are there for people to take advantage of this strategy? I think the unknown is one of the biggest hang-ups people have in looking to implement this in their own teaching and I've put together a presentation with some resources to help get you started.
Some of the highlights from the presentation that I find particularly useful are:
I made sure to mention the ISTE standards and SAMR and TPACK models at the beginning of the presentation to get people thinking about the "why" when it comes to using any of the tools to try and flip content. I think when we have purposeful use of these tools to deliver content to our students in effective and innovative ways we can really see the benefits of flipping the classroom and how it can impact the work we accomplish with our students. My biggest piece of advice is to start small and focus on one area you really see potential in and branch out from there. If you have any great examples or experiences flipping your own classroom feel free to comment below. Feel free to refer and use the presentation for your own teaching and have fun flipping out! There have been some significant and simple changes since my last post about Google Forms and I thought it was time to get the word out for all you avid Forms users out there.
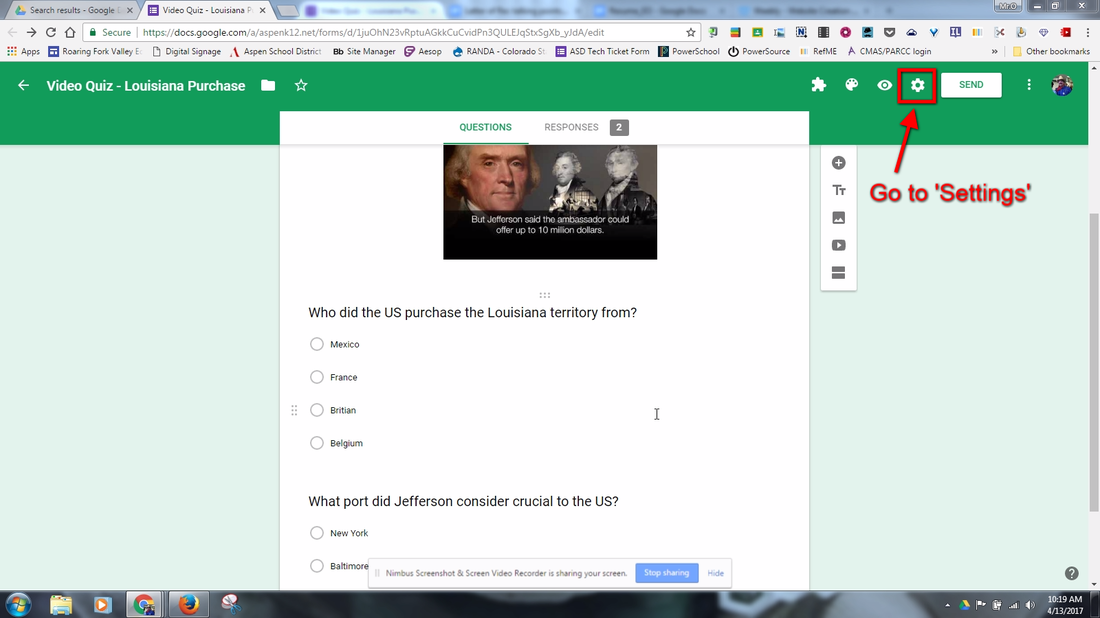 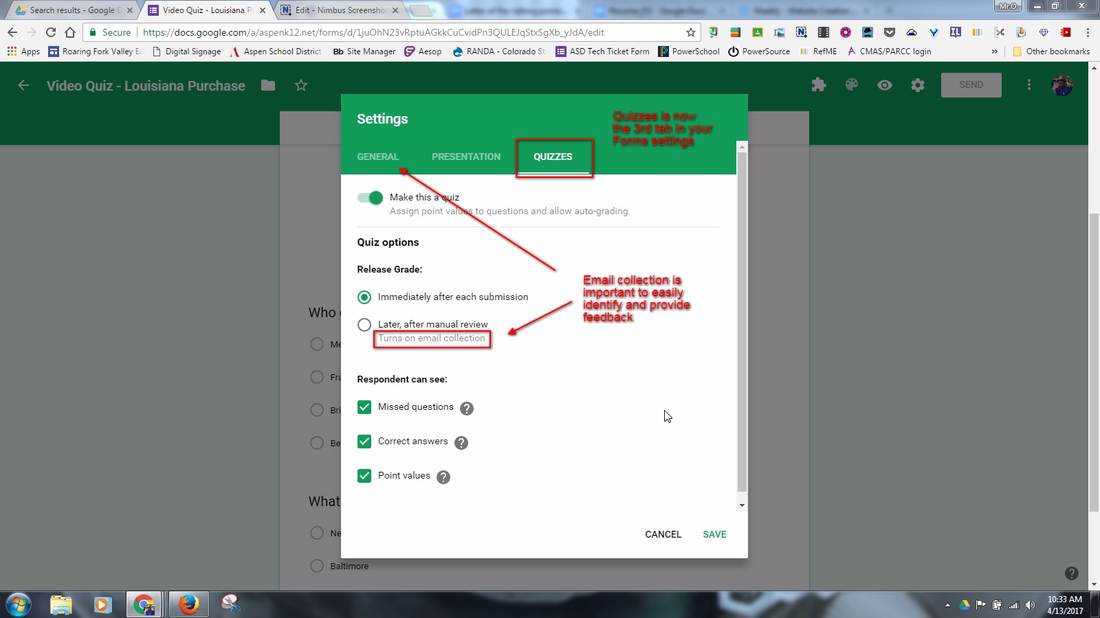 Set your options for the quiz including immediate or manual feedback, whether point values should be added, and what feedback students can see. 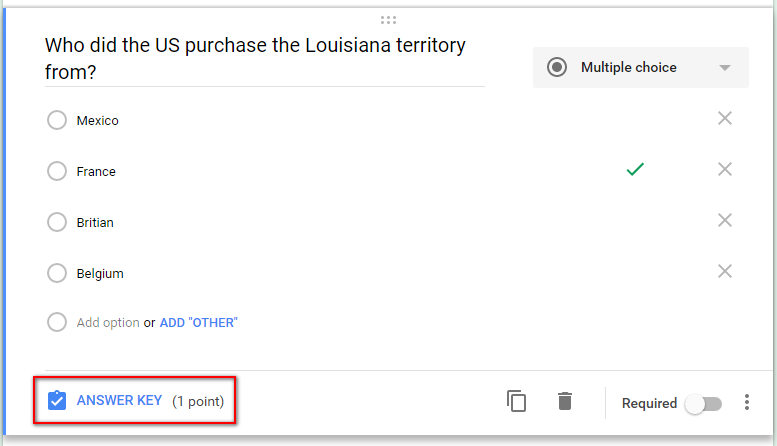 Click on 'Answer Key' to allow you to set point values, correct and incorrect answers, and provide custom feedback. 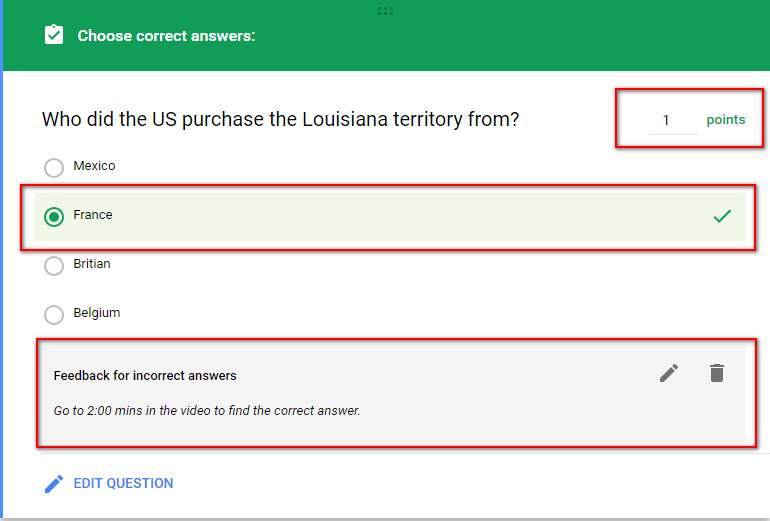 Set point values, mark the correct answer and add custom feedback. 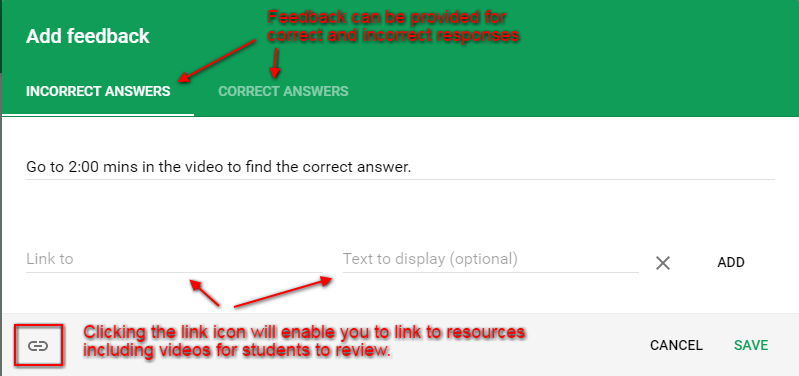
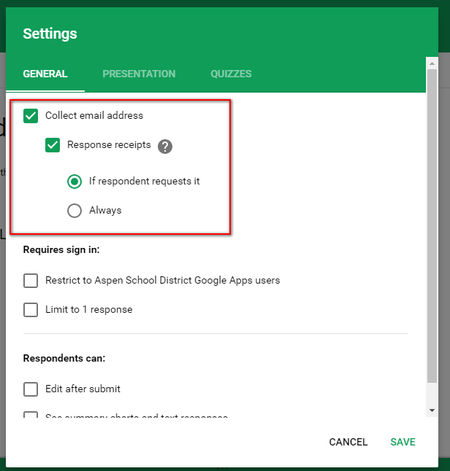 Select 'Collect email address' to insert a short answer question on your form asking your respondents to submit their email. You can then opt in for Response receipts. 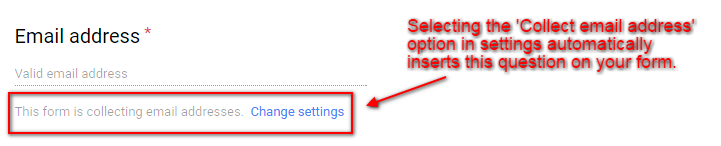
So there you have some new and some not so new features as well as a few tips on how to maximize your Google Forms experience. If you have had any experience or other ways to utilize these please share in the comments below.
The more you work with Google Apps for Education, the more quick hacks and tricks you find to make them work best for you. As much as we all love GAFE, no tool can do it all, and you need to be adaptable in order get things done that help you and your students succeed. If you're like me, you been shown, and discovered, some quick tips and tricks for many of the GAFE components. I thought I'd start a list (that will inevitably grow) of some of the ones I've found most useful: 1. Force copy - Unless you are handing something out through Google Classroom you've probably run into the trouble of making sure other people are making a copy of your work and not editing your original or have trouble with the process of copying. Use force copy to shorten the process and ensure the recipient has a editable copy of your document all to themselves. All you need to do is replace the end of the link from your edit screen with the word 'copy' and copy that link to anywhere easily accessible to your desired audience.
I have used the force copy link to share out templates with students and to allow professional development participants easy access to documents they can customize or take notes on. You can use the force copy trick for just about every GAFE tool (Docs, Sheets, Forms, and Drawings) So stop worrying about outsiders ruining your documents and start spreading the love! 2. Tables in Google Docs - You are probably familiar with the ability to insert tables in a Google Doc, but have you redesigned the purpose of this ability? When first implementing Google Docs many teachers jumped at the chance to create digital worksheets, but quickly had issues with where the content created by students should go to make the activities easy to view and provide feedback for. By creating a simple 1x1 table underneath a question you require a written response for, you now have a text box that will grow with any amount of content and keep answers organized on the page.  No need to stop at a 1x1 table. Inserting a mute-cell table enables you have students respond to more complex questions and help continue developing critical thinking questions and answers. 3. Page size in Google Slides - Adjusting the page size in Google Slides is a quick and easy way to adapt the standard presentation format into something different and engaging for the students. A simple change to 8.5in x 11in will create a great magazine template that can be easily shared and worked on by an entire class.  One of our AHS English teachers used this formatting trick to create a wonderful literary magazine (Nepsamerg 2016) that her students were able to quickly and easily edit and publish. The formatting made basic graphic design easy for all students and enabled each one to put a personal touch on the final product. 4. Google Slides backgrounds in Google Drawings - If you have really taken on the use of Google Slides as a presentation and student-work tool in your classroom then you need to take advantage of your ability to customize the backgrounds using Google Drawings. Change the page size to match your slide and create a slide background that cannot be manipulated or erased by another user (unless they change the background as a whole...). This is a great way to make assignments using Google Slides that can be shared out via Google Classroom.
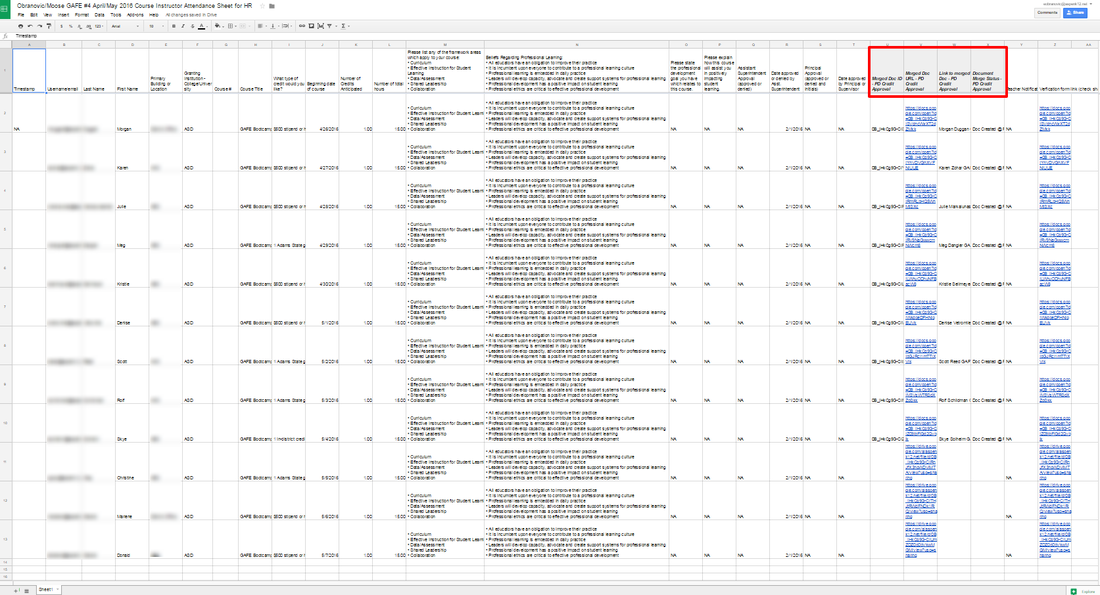
Make sure once you have created an image you want to use as a Slides background that you download it as an image file type (preferably a .jpg or .png) or Slides won't recognize it as a viable option. 5. Pre-filled Google Forms - Are you using Google Forms to collect all types of information from staff and students? In the case when you want to collect some individual information, but also have pieces that will be the same for anyone submitting you can utilize pre-filled forms to get what you need and keep a consistency for certain questions. Our district has found this extremely useful when creating registrations for in-district courses for staff. The pre-filled Google form creates a great roster that can then be shared with HR.  This is used in my district to have staff create registrations for in-district course offerings that require rosters for HR. Course Instructors can then easily collect information from interested staff members while keeping some of the important information for HR consistent. 6. Photo editing in Google Drawing - Photo editing can be complicated, but if you're in need of basic and simple changes insert you picture into Google Drawings for a quick way to resize, crop, fade, brighten, contrast, or recolor.  This skill set is very similar to creation of Google Slides backgrounds mentioned in trick #4. One thing to remember is to make sure to download the file as a photo (.jpg, .png, or .svg) in order to have it be recognized by other programs as an image. 7. Limiting Sharing Options - When you want to share a document with your colleagues or the world you may be hesitant to put it out there for anyone to take share with others or create their own copies and use your work without giving you credit. Recently added are two options to limit others abilities to share you documents. When you go to 'advanced options' options you can now select to "Prevent editors from changing access and adding new people" and "Disable options to download, print, and copy for commenters and viewers".  These options are great for sharing sensitive information that you would only like a specific group to see or safely sharing others work with a larger audience without the worry of work being taken without permission. There you have a few ways to get the most out of your GAFE tools. The more we use GAFE the more ways we find to make sure they work best for our needs. I have no doubt that I'll be updating this post with more tips and tricks as time goes on, but if you have any that work for you, feel free to leave them in the comments below.
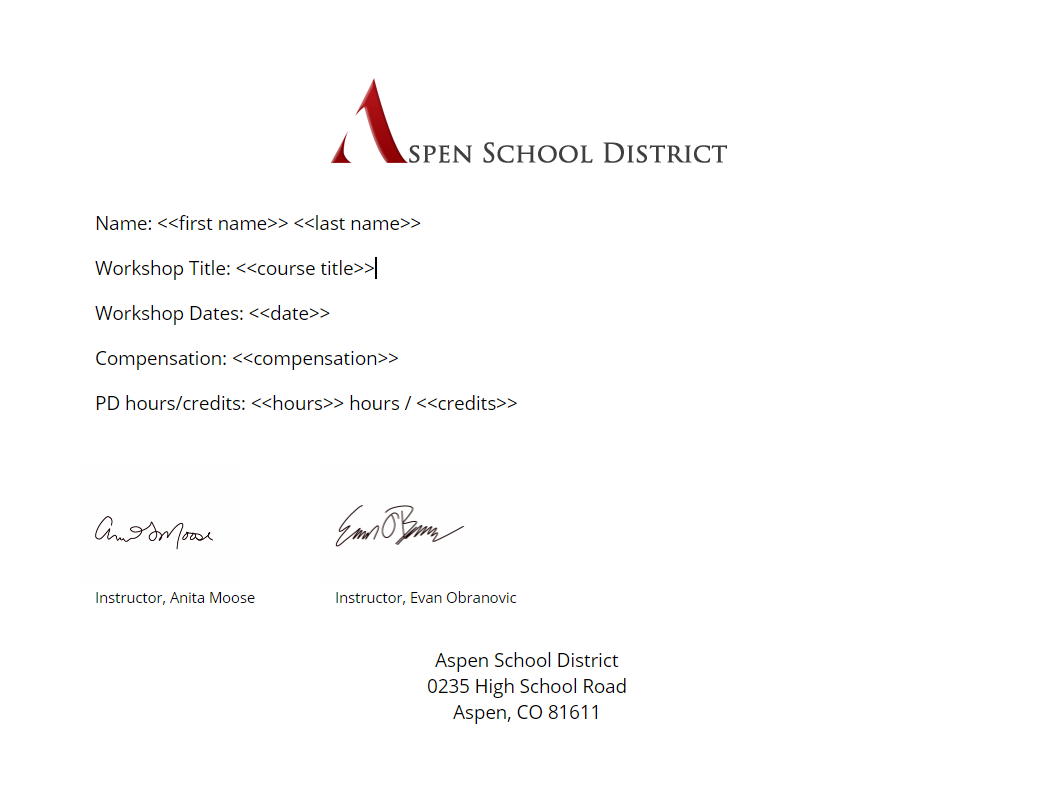
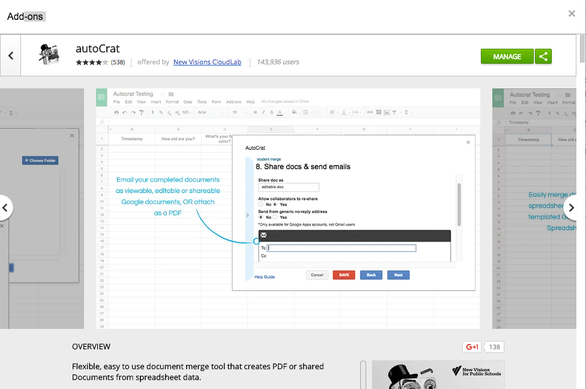 Find the autoCrat add-on in the Chrome web store or the add-on market directly in a Google Sheet. I have written about the autoCrat add-on before in my "What Google Sheets and add-ons can do for you..." post, but I really wanted to spend some time diving into the great ways myself and my district are using this versatile add-on to help automate, streamline, and uniform how we format and share information from our Google Apps for Education (GAFE) with our staff. The process of autoCrat is really just a version of a mail-merge tool, but with the added power of GAFE, (specifically Forms, Sheets, and Classroom) you are really able to create and maintain a workflow that better helps the transfer of information between everyone. I have used it many times with my co-integrator, Anita Moose (@amooseIT), in order to create and share certificates of completion for our technology-based professional development with our staff. This process has allowed us to use an existing roster of participants collected from a Google Form registration and create custom certificates that serve as record of participation, completion, and in-district credit. We also then have a spreadsheet containing all the relevant data and links to the certificates to share with HR in order to qualify staff for salary advancement and keep their records digital and searchable. 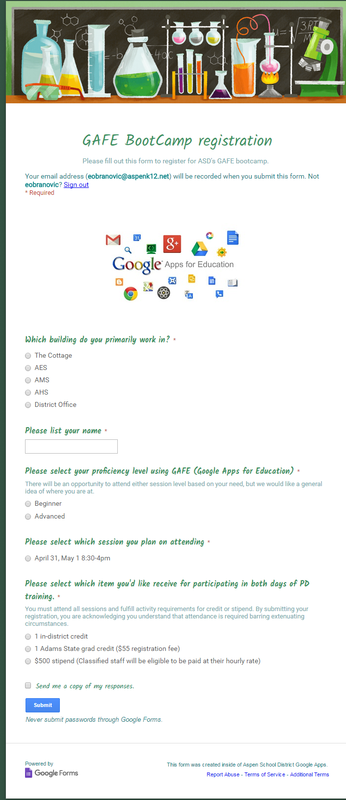 Collecting information via a Google Form is a great way to get all the important details in a spreadsheet that you can run autoCrat on to send form letters or certificates. 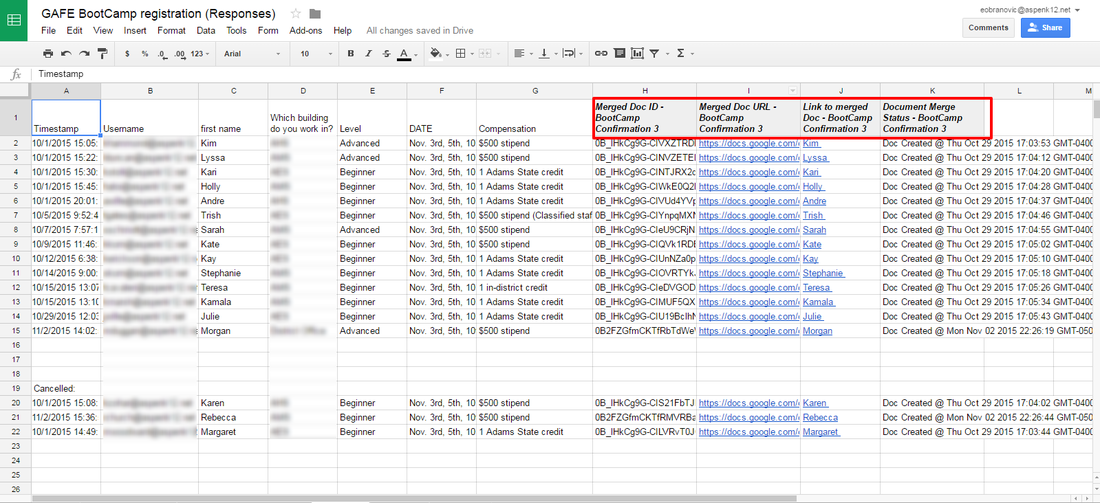 Using the response sheet from a Google Form, you can run autoCrat to pull the specific information you want and insert it on a Google doc template.
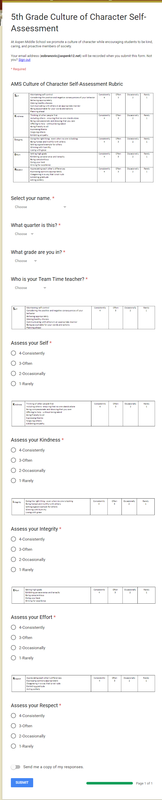
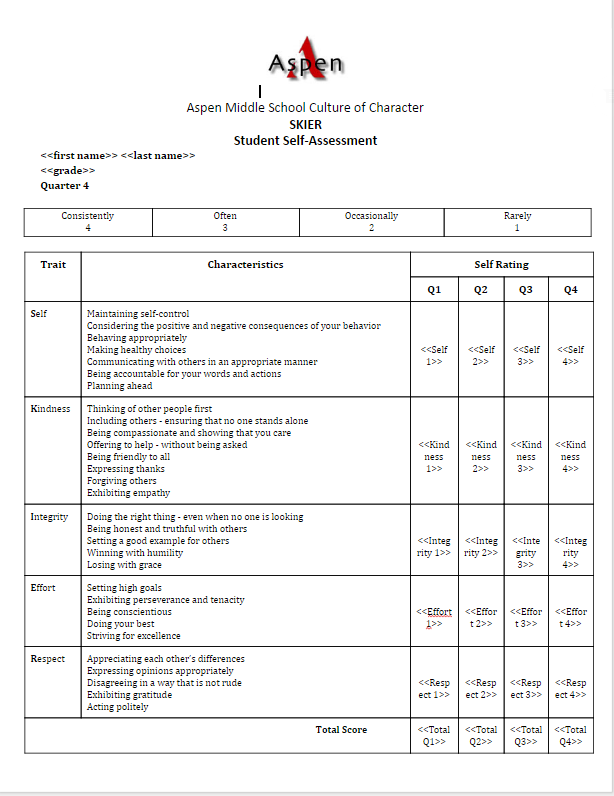
Anita has used autoCrat to create progress reports for middle school students as they self-evaluate on a rubric designed to evaluate character using Google forms. Grades 5th-8th are enrolled in a Google Classroom per grade-level and expected to complete the self-evaluation each quarter The results are then pushed to a running progress report that is printed and included in report card envelopes sent home at the end of each quarter to help students see their progression throughout the year.
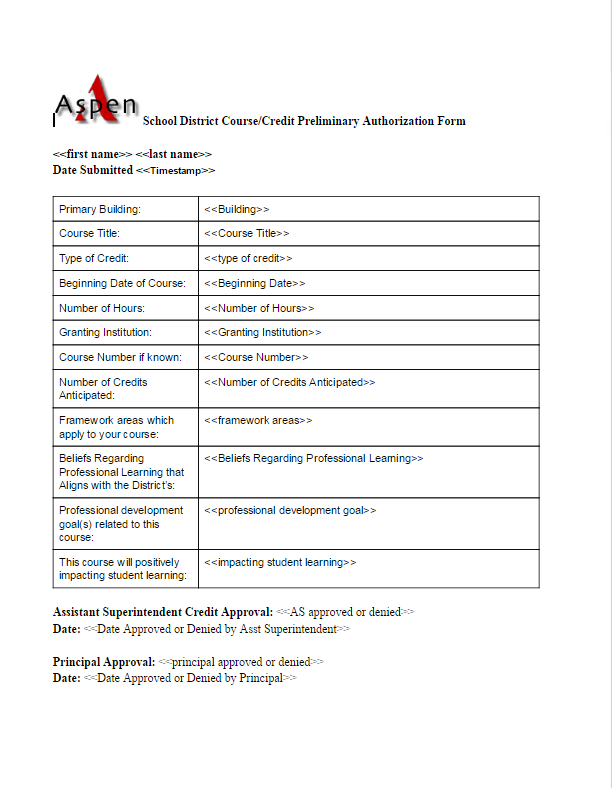
Our district has started to move several of their processes to a digital/GAFE format and we again found great use for autoCrat. With the large amount of professional development opportunities our staff take advantage of during the school year and summer, we wanted to streamline the process of approving relevant PD and keeping track of completion. All approvals are now done through Google forms as well as completion certificate submissions. This makes record keeping for our District office much easier and a quicker turn-around for teachers and staff to have the information they need.
 When a staff member runs an in-district PD, they are given a copy of this sheet to customize for their own attendance and record keeping. They can then run autoCrat to personalize completion certificates and turn in a copy of the Sheet to HR for district records. So now you can see how much autoCrat can improve your workflow. If you are a Google school you need to start taking advantage of this FREE add-on and become far more efficient with how you can collect, format, and share information. There are lots of great tutorials out there, but below you will find one that walks through the latest version of autoCrat by Brent Coley that is well done. Please don't hesitate to contact me for help getting started with autoCrat and feel free to comment below on great ways you have found to use this amazing tool!
I'm a big fan of the EdtechTeam and the great ed-tech PD they put on for educators across the country and even world-wide. In last month's post I showcased a local summit my colleagues and I put together, modeled after the EdtechTeam summits I have attended in the past and gained so much knowledge about effectively using technology to enhance student learning and teacher delivery of content using all the great edtech out there.
This year I decided to take the plunge and put in a proposal to present at the 2016 Breckenridge summit. I submitted two proposals because I hoped they could find one of them worth accepting and then I was surprised with an email letting me know that both had been accepted! It was exciting and nerve-wracking to be selected to speak to fellow educators about what great things you've learned and worked with that could help them. Just like teaching a group of students you want your presentation to be engaging, informative, differentiated, and useful, which we know are not always easy to put together in one neat package. My topics were customizing Google Chrome and Google Forms, two tools I had a lot of experience with and had already discussed with my own staff many times. I put together two presentations that I tried to overload with information to enable advanced folks to work ahead and beginners to continue to digest well after the summit.
The summit was fantastic and as always I walked away inspired by the people I met and learned from, and with a head full of new great ideas to bring back to my own district. When it came to presenting, I think the biggest take-away is to not be afraid to put yourself out there and engage with your peers. Fellow educators are always so appreciative and excited to learn from one another and there is a recognition that we are all in the same boat and just want great things to make our students more successful and our teaching more dynamic. That sense of community and desire to continue life-long learning is what makes summits like these so successful.
Below you will find my two presentations which you can feel free to copy for your own learning regarding Forms and Chrome. Take a look and don't hesitate to contact me with any questions.
Diving Deep into Google Forms looks at the customization that can be done in the old Google forms and what your options are in the new Google Forms. Take advantage of all the great advanced question features and add-ons to really make Forms an amazing tool!
Making Chrome Work for You is a quick guide to how you can customize the Chrome web browser to work for you and use the multitude of apps and extensions to work smarter, not harder.
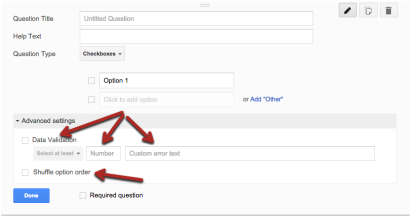
The information and data you can collect with Google Forms is astounding! They have become so versatile that the uses in education seem to keep growing. Now with Google Forms one thing that needs to be remembered is that your responses are often collected in a Google Sheet (look for a post about the great add-ons and uses for Sheets coming soon!). You can now opt to see the results directly in "Summary of Responses" from the "Responses" tab. 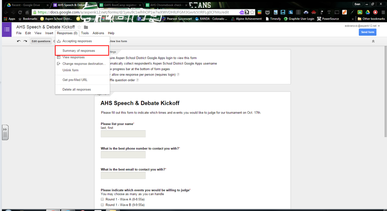
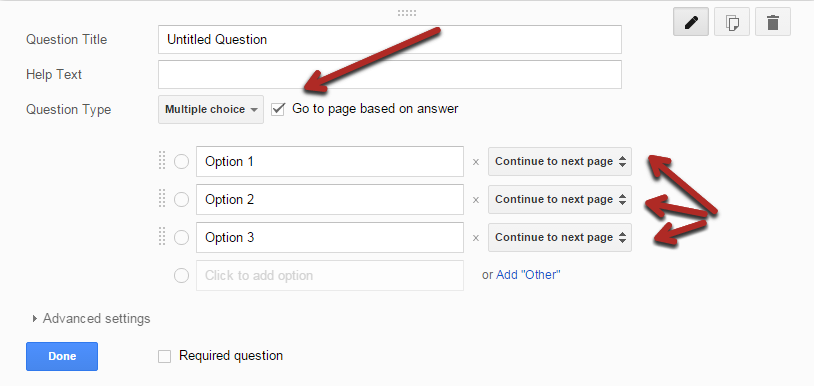
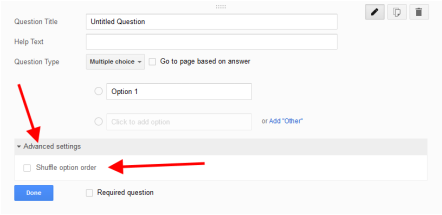
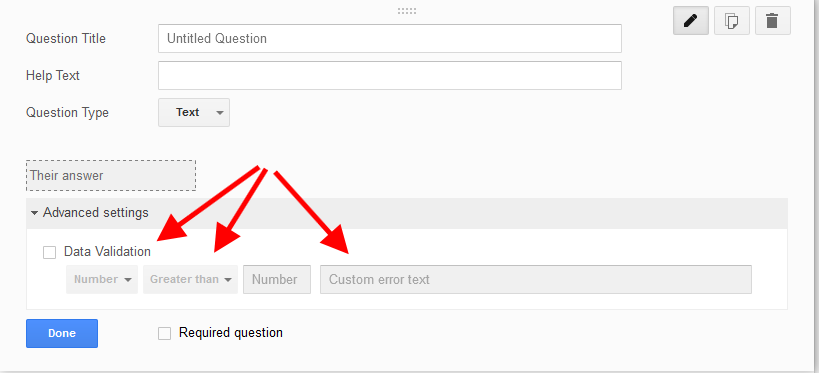
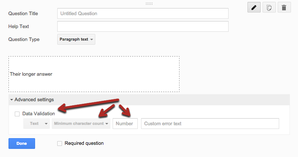
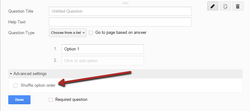
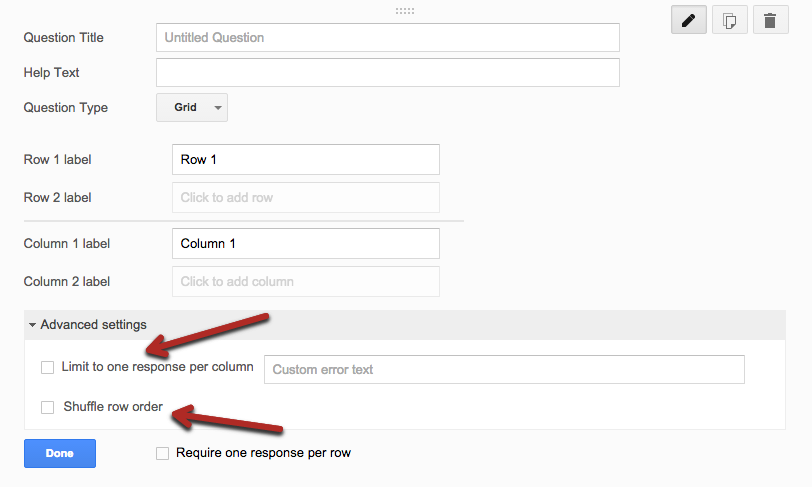
You hopefully are familiar with the various types of questions you can ask in a Form (Text, Paragraph Text, Multiple Choice, Checkboxes, Choose from a List, Scale, Grid, Date, and Time.) Each question type can serve a unique purpose to helping shape the type of data you're collecting and how it can be used. Let's go over some of the advanced features you can enable for certain question types:
There are several add-ons you can use in Google Forms to make them more dynamic and useful. Here are some of my favorites and what they do:
CheckItOut- Allows you to modify several question types to create a dynamic system of check-in and check-out items. I have personally used it to create a Chromebook check-out for students in my high school. Choice Eliminator- This add-on lets you pick or create a question with a set of answers that can be removed from the list as they are picked. Great for sending out a sign-up for snacks for a class party or time slots for a conference. You can even set the number of times an answer can be selected before being eliminated. Form Notifications- Quick and easy way to have emails sent to one or multiple people when a certain number of responses have be collected with your Form. Respondents can also receive emails with custom messages after they complete the Form. formLimiter- Lets you set a number of responses or set a specific date and time of when your Form is no longer accepting responses. Very useful if you are using a Form as some type of sign-up and need to ensure you only allow a specific number of participants. formRanger- allows you to populate multiple choice, list, checkbox, and grid options from columns in any Sheet or Doctopus roster. When you've already done the work once use formRanger to ensure consistency and not retype the same information you have. So if you haven't jumped into all the amazing uses of Google Forms, go a little deeper and see how you can utilize this amazing tool for the betterment of your teaching and your students learning! |
About EvanDirector of Technology for Traverse City Area Public Schools. Level 2 Google Certified Educator. Former Tech Integration Specialist and 4th grade teacher at Aspen School District and Spartan for life! Go Green! 
Categories
All
Archives
February 2019
|

 RSS Feed